Strengthening and strengthening the foundation of the house is necessary when cracks appear in the walls or foundation, as well as if an increase in load is planned: an attic will be built or it is planned to pour screed to replace wooden floors.
There are many amplification methods, but not all of them can be implemented with your own hands. There are some situations in which you simply cannot do without professionals. Sometimes the damage is so great that it is cheaper to build a new house than to repair the foundation. So both the method and the method of action depend on the degree of destruction and the reasons that caused it.
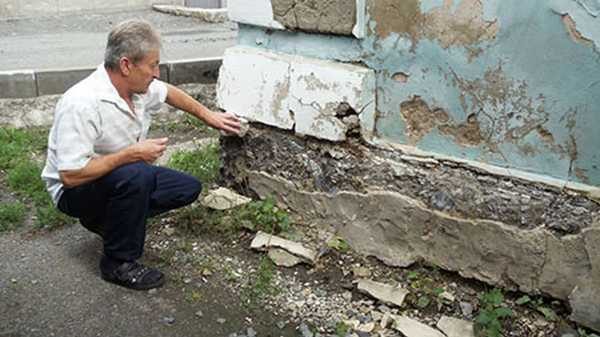
Foundation problems need to be resolved in a timely manner
Most often, problems arise with shallow strip foundations (this is if the foundation ends above the depth of soil freezing). They do not always create problems, but when conditions change (changes in groundwater levels, soil shifts, etc.) they can be squeezed out by heaving or eroded.
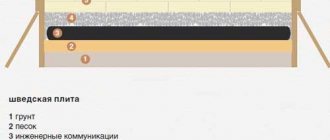
The fewest problems occur with a slab foundation. Strengthening it is a rare problem. If any measures are required, it is usually water drainage or, in extreme cases, cementing the underlying loose soils.
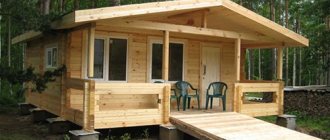
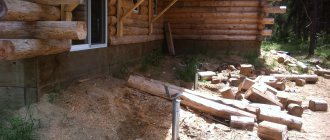
The easiest way to repair the foundation of a wooden house. Due to its fibrous structure, wood (log or timber, it doesn’t matter) can easily withstand all work, and compensates for distortions due to its flexibility. With brick, concrete, block houses the situation is different - here the slightest mistake can lead to the destruction of the wall. Therefore, it is necessary to make the intervention zones (strengthening work) very small - this way there is less chance of causing serious harm.
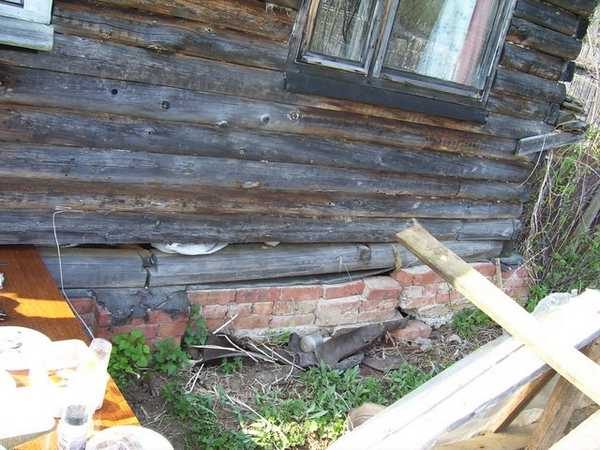
The easiest way to work with wooden houses
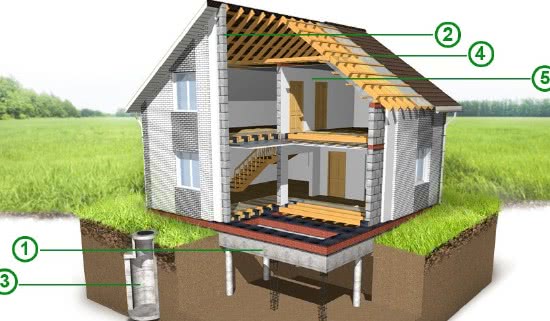
Foundation types and designs
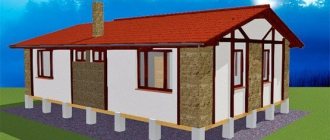
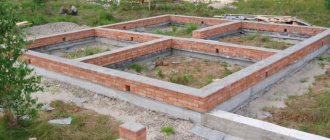
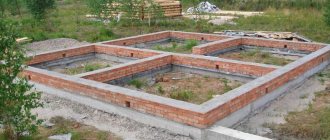
The choice of foundation type and design is determined by how many floors you plan to build. If we are talking about a stone house without a basement (ground) floor, you can use a recessed strip foundation.
This is due to the fact that the work will be carried out with heavy materials and, of course, the stone cottage will shrink over time. In order to prevent the erected walls from cracking, it is necessary to make a reinforced solid foundation. Since our foundation will be slightly different from the usual structure intended for a frame house, we will consider this issue in more detail.
Booth: all about natural stone
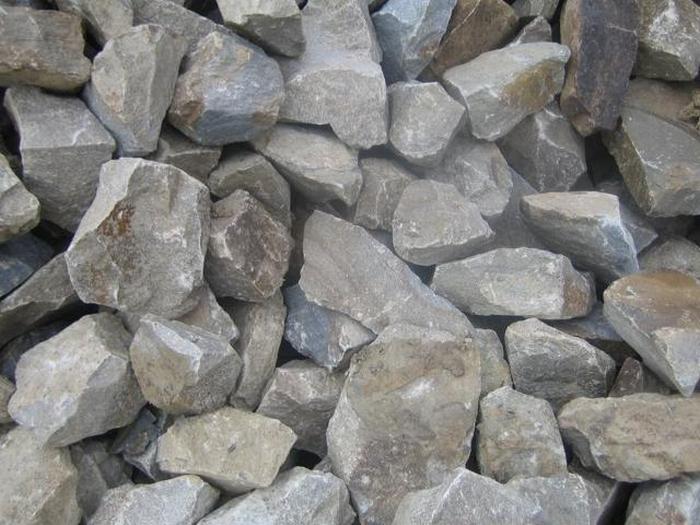
Rubble is a stone of natural origin, formed in soil deposits
Rubble is a stone of natural origin, formed in soil deposits. The shape of the stone is usually flat and has jagged edges as a result of its quarrying.
The following deposits act as materials for the formation of natural rubble:
- Granite;
- Shell rock;
- Sandstone;
- Limestone.
In any case, the stone is quite reliable.
Calculation and installation of strip foundations made of rubble
To determine the quality of natural rubble, it is enough to tap it with any heavy instrument such as a hammer or sledgehammer. A good strong boot makes a ringing sound when struck. While a bad stone will respond with a dull echo and even split.
Important: to install a rubble concrete base, it is necessary to select stones of approximately the same size with a cross-section of 20x30 cm, where 20 is the width and 30 is the length. In this case, all stones should have only torn and sharp edges. This will strengthen the adhesion of the rubble to concrete. Rounded stones, on the contrary, will worsen the quality of the finished foundation.
To improve the adhesion of the rubble to the mortar, each stone should be wetted when laying.
Tools and materials
First, about tools and materials. To build a foundation for a stone building you will need:
- Construction hydraulic level (GUS)
- Building level
- Plywood or board
- Jigsaw
- Screws, nails
- Screwdriver
- Hammer
- Bayonet shovel, shovel
- Knitting wire
- Pliers
- Crushed stone
- Buckets
- Master OK
- Fittings with a diameter of 12mm-14mm
- Cement, crushed stone, sand
- Concrete mixer.
Main properties of the stone:
- Durability - breaking natural stone is not so easy.
- Environmentally friendly - the material is created by nature without any human intervention.
- High level of resistance to various chemical and climatic influences.
- Aesthetics - the stone comes in different colors, and on its edges nature creates amazingly beautiful designs. Using these qualities, you can create entire compositions that are distinguished by their pristine beauty.
- Durability - stone buildings can last for centuries.
Not every stone is suitable for construction work. The material of exfoliating and soft rocks is not suitable for the construction of durable buildings and laying foundations.
Note! To construct the foundation, irregularly shaped fragments of durable rocks called rubble stone are used.
To make the stone foundation reliable and strong, and to make work easier, choose flat-shaped stones. Large blocks of rock are split at the construction site or hewn.
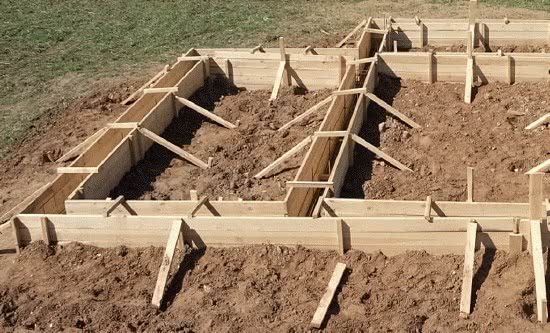
Planning
At this stage, you need to decide on the dimensions of the load-bearing walls (those walls on which the floors will be supported), the number and location of the partitions (those walls that divide the common space into rooms, bathrooms and other premises).
Sketch everything in detail - this will help transfer your idea to the ground. The main rule is that under each of the walls or piers a separate section must be poured, which is an integral element of the entire foundation.
Disadvantages of rubble structures
Some of the listed advantages are conditional, since everything depends on specific circumstances. You can install the base yourself, but during the work you will have to carry heavy stones manually. Calculating the exact quantity can be difficult due to the fact that their shape and mass are not uniform. To simplify installation, you will have to select products with wide edges, otherwise the process may be delayed. In practice, more often than not you still have to hire workers for installation. The price of the material increases if there is no quarry in the region.
Trench preparation
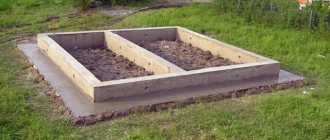
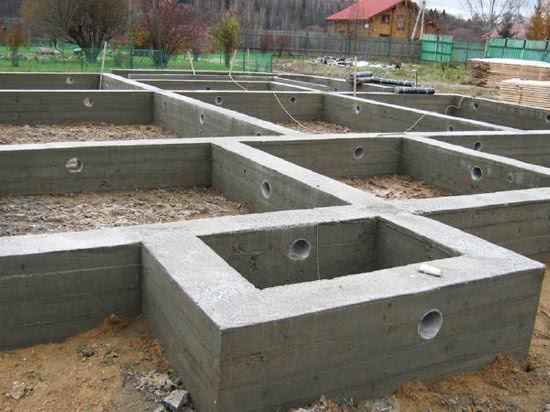
In the next step, you will transfer your diagram to the ground. To do this, you will need to hammer in pegs and pull a strong thread or rope over them. Afterwards, you need to dig trenches along the stretched thread. If you plan to build a cottage up to 3 floors high, then the height of the foundation should be from 60 cm to 100 cm.
In this case, at least 10 cm - 15 cm of the foundation should rise above the soil. To do this, formwork (knocked down with nails or twisted with screws) is placed over the trench exactly along the edge.
The formwork is constructed from plywood or boards. Every meter and a half along the lower and upper edges of the formwork you need to make transverse struts. Thanks to this, the concrete will not be able to crush the formwork structure.
To ensure that the entire foundation plane is absolutely level, the upper edge of the formwork must be level. This can be achieved through a building hydraulic level.
What it is?
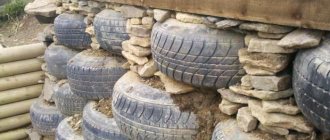
What distinguishes a rubble foundation from the usual strip type is that instead of reinforcement, natural stone is used as an adhesive force, which is popularly called “rubble.” It provides strong adhesion to concrete, which guarantees the strength of a monolithic building.
Do not confuse a rubble concrete foundation and a rubble strip foundation. In the first type, the ratio of mortar and natural stone is 1:1. For the second type, this ratio is 4:1.
Advantages and disadvantages
Pros:
- reliability and durability of the structure: the use of durable rubble allows the structure to stand for more than 150 years;
- high wear resistance: does not collapse under the influence of wind, natural mechanical influences, is not susceptible to ultraviolet radiation, temperature and other factors;
- water resistance: rock, unlike an ordinary monolith, which has a porous structure, has a higher density, therefore does not absorb water, and, therefore, does not collapse under the influence of moisture;
- aesthetic appearance: the finished base does not require additional finishing;
- savings: fairly cheap building material. Only transportation costs can make it more expensive if the deposit is located at a considerable distance from the construction site;
- the ability to carry out work independently without the involvement of specialized organizations and special equipment;
- environmental friendliness: natural cobblestone is completely safe for health.
Minuses:
- accurate calculations are required;
- time- and labor-intensive process.
Application area
The use of this type of subwall is only possible on hard soils with low groundwater . If the soil is subject to seasonal heaving, or groundwater will touch the base, then this technology cannot be used.
To clarify the composition of the soil and its suitability for this type of construction, an analysis needs to be carried out. These indicators will also help with design and calculations.
Some tips on the device
Some advanced craftsmen can lay out the structure in the form of a trapezoid: the wide base of the first layers gradually turns into the established width of the foundation on top. This technology adds stability to the frame.

Even and identical copies of blocks are quite an expensive pleasure, and sometimes it’s not easy to find them.
Therefore, more often for construction, assorted cobblestones are purchased , which can later be adjusted to the required dimensions independently.
The smooth surface of the boulders allows you to use less solution when filling voids. A tighter fit makes the structure stronger.
Despite the good moisture-resistant properties of the rock, a layer of waterproofing consisting of roofing felt and mastic must be applied to the walls of the recessed part of the frame.
Foundation reinforcement
Thanks to the reinforcement, the foundation will not crack, but will lie as a single mass. Reinforcement also helps reduce settlement and deformation of walls. Therefore, it is necessary to make a reinforcement box for all foundation trenches and along their entire length.
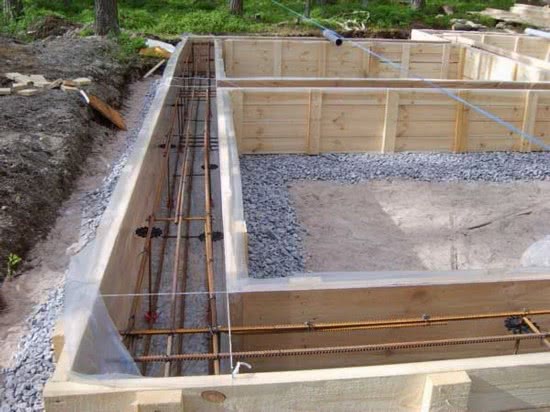
The box should have the shape of volumetric rectangles, which are connected to each other at the corners of the future structure. When making a box, you can use welding, but you can also simply tie the reinforcement with wire using pliers.
Pouring concrete
Well, if the cushion is poured, the box of reinforcement is tied, the formwork is in place, then you can start pouring the foundation. The main rule here is solid casting, i.e. All of your foundation trenches must be filled at one time.
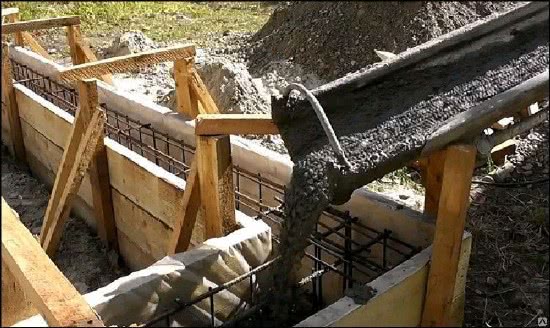
Of course, in this case it is necessary to use a concrete mixer or a ready-made solution, and also use the help of a team of friendly assistants. Concrete is poured into the trenches in buckets, you can do this in layers - alternately pour layers to the top of the formwork.
If the depth of the trench is more than 60 cm, then backfilling is allowed: after laying the first layer of concrete, large granite blocks, large pieces of broken old concrete or any other dense stones are placed in the trench.
When you start pouring the formwork, for better shrinkage of the concrete you need to tap the outer sides of the formwork with a trowel. The ideal option here is to use a deep vibrator, but tapping will do. Finally, so that the surface of the foundation is smooth, go over it with a trowel.
It is important to know!
There are cases when, in the presence of a box of reinforcement, trenches are filled with a break of seven to ten hours. This is allowed. However, the places where already poured and fresh concrete will be joined must be wetted.
Well, the foundation for your “fortress” is ready. Now we need to wait until the concrete “sets” completely, and in the meantime, bring building materials to the site.
If the work was carried out in dry, hot weather, then the poured structure must be periodically moistened with plenty of water at first. The ideal period for drying the foundation is 24 days.
Video. Slab foundation
Video. Strip foundation
Articles about the foundation
- Types of foundations
- Wooden column foundation
- Brick columnar foundation
- Columnar foundation made of bored piles
- Solid slab foundation
- Columnar foundation
- Screw foundation
- Strip-column foundation
- Influence of soil type on the choice of foundation design
- Choosing material for the foundation of the house
- Construction of a foundation for a frame house
- Construction of a frame house
- back to the section “Building a house with your own hands”
Do-it-yourself rubble foundation
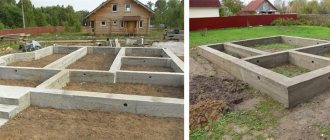
Preparatory work. The construction of a rubble foundation begins with geological surveys, the purpose of which is to determine the type of soil, the height of groundwater and the slope of the site. The construction site is cleared of debris. The outline of the future building is being marked. With twine tied to pegs, the position and dimensions of the tape of the supporting base are marked.
Excavation. A trench for a rubble strip foundation is dug depending on the depth of the foundation, taking into account the sand cushion. On average, it can be 50-150 cm depending on the type of soil, groundwater levels, and the weight of the structure. The width of the trench is 10-15 cm greater than the width of the rubble masonry. If excavation work is carried out in loose soil, then to prevent the walls of the excavation from collapsing, formwork made of boards or OSB boards is installed.
Sand pillow. Compacted sand is used as a compacting layer (layer at least 15 cm). The compaction of its pre-moistened surface is carried out using a manual tamper. If rubble concrete masonry is used, then roofing material is laid on the surface of the sand as waterproofing.
Types of masonry
Laying a rubble foundation is carried out in several ways:
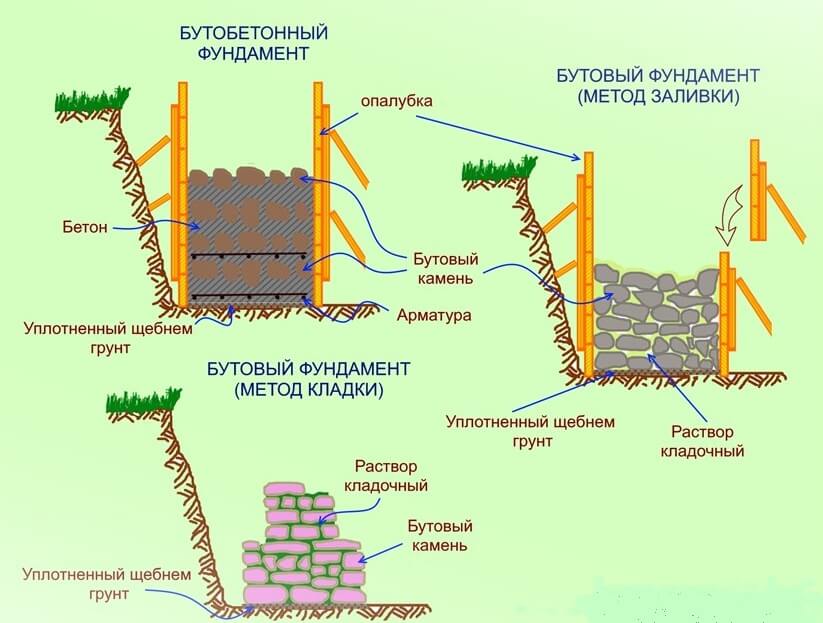
“Under a shovel” - a bedded and torn stone is used. The torn one is further processed by knocking down the protruding edges (pinning, plinting). The row height for one masonry pass is 25-30 cm.
“Under the bracket” is a type of masonry “under the shovel”. The stones are selected more carefully in size. The masonry resembles brick - it is done with bandaged seams.
“Under the bay” - rounded or torn stone is used. No selection or pinning is performed. The stones are placed as tightly as possible in the trench. After that, crushing is done (the voids are filled with ready-made crushed stone or small crushed stone) and filled with liquid cement mortar. The row height is no more than 25 cm. Such masonry is allowed only on non-heaving load-bearing soils for small structures.
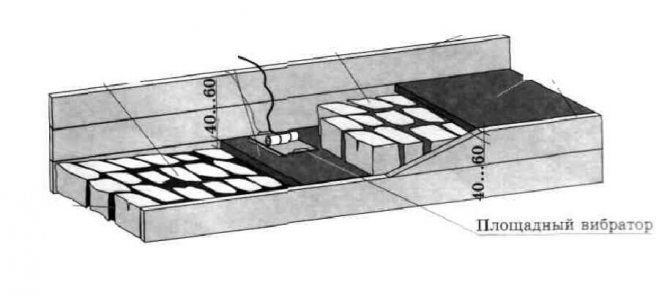
With vibration compaction. This method is a combination of “under the shovel” and “under the flood” installation. The rows are laid “under the shovel”, after which the crushed stone is crushed and filled with liquid mortar. Then a vibrating screed is installed on top to compact the masonry. While the vibrating screed is operating, the solution is periodically added until it stops leaking inside.
Masonry on a relief landscape
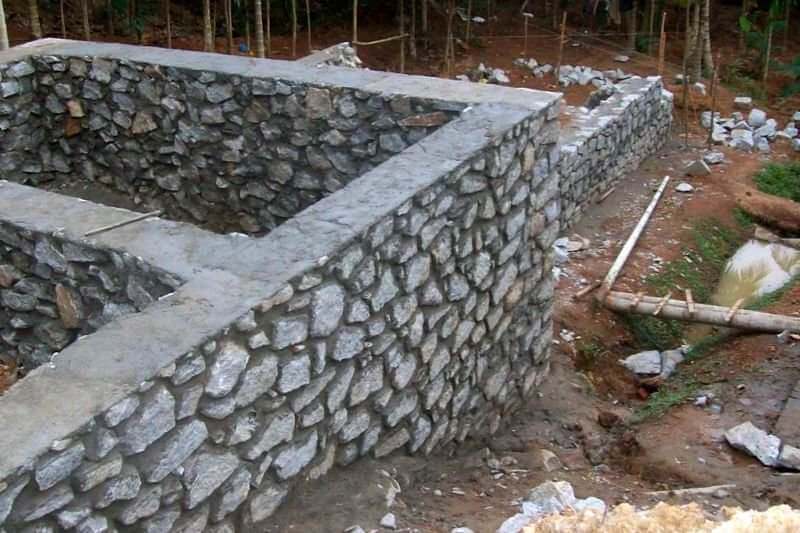
If you have to build a house on a site with a significant slope, the installation of a rubble foundation begins from the lower mark on the terrain. Transitions between levels are made by ledges, each of which consists of two rows of masonry. The height of one ledge should not exceed 50-60 cm. Laying is carried out in tiers up to 1 m wide. The lower ledge must be tied to the upper one. It is also recommended to carry out reinforcement both between the ledges and along the entire perimeter of the foundation. In places where the ledge joins - through a row, general reinforcement - through 3 rows.
Waterproofing
Initially, the waterproofing of the rubble foundation was carried out with clay. After kneading it with water and compacting it, it was hammered between the foundation and the rock of the trench. Today, the use of more reliable modern means is recommended. The underground part of the foundation is treated with tar-based waterproofing materials. It is also possible to install waterproof membranes. Regardless of the waterproofing method, a concrete blind area 50-100 cm wide with a slope of 15° is installed near the foundation.
To prevent erosion of the binder mortar, it is recommended to treat the masonry surface of the plinth with profiled water-repellent compounds. For example, decorative and protective varnishes for stone with a “wet” effect.
Scheme of a strip rubble foundation: a – underground part of the foundation, b – base, c – blind area
- Sand pillow.
- Rubble masonry.
- Bitumen waterproofing.
- Backfilling the trench.
- Finishing of rubble stone with hydrophobic impregnations.
- Protective and decorative plaster.
- Brickwork.
Strengthening rubble foundations
The strength of rubble foundations is increased by giving its structure a special “stepped” shape. To do this, the lower part of the rubble masonry is made twice as wide as the wall of the structure. Every two rows the width of the foundation is reduced by 25%. The total number of ledges does not exceed 3-4. This design increases the strength of the base several times.