The construction of a barn involves the choice of foundation, material for building walls and soil characteristics. When choosing to build brick walls, you will need to calculate the foundation for heavy loads.
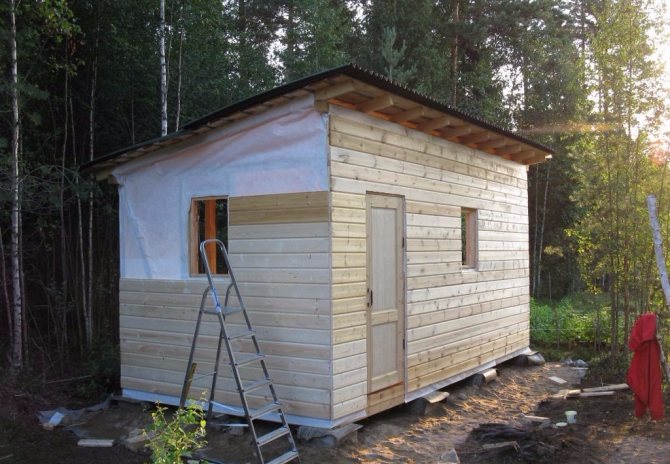
At the same time, a wooden shed is built much faster and there are much fewer requirements for the foundation; the work can easily be done with your own hands. That is why before starting construction it is necessary to determine the purpose of the outbuilding.
Why do you need a foundation for a barn?
A barn is an indispensable building in private homes. It is used to store tools or necessary things for which there is no room in the house. It is indispensable for breeding domestic animals and birds. Some people equip the barn as a workshop or garage. It is not surprising that every owner expects long service from this structure.
Although the easiest way may seem to be to abandon the foundation when building a shed, there are some disadvantages to such a solution. Firstly, a layer of earth never stands still. Due to fragile soil and groundwater, it can move to the side and fail. This will lead to the fact that the walls of your building may tilt and move in different directions, which will lead to the collapse of the structure. It is possible that every year the barn will gradually sink deeper and deeper into the ground.
Secondly, compared to residential buildings, a barn has less weight, and without a foundation it will be difficult for it to withstand the onslaught of rain, strong winds and other weather vagaries.
Therefore, the foundation for a utility block is an important point in construction planning.
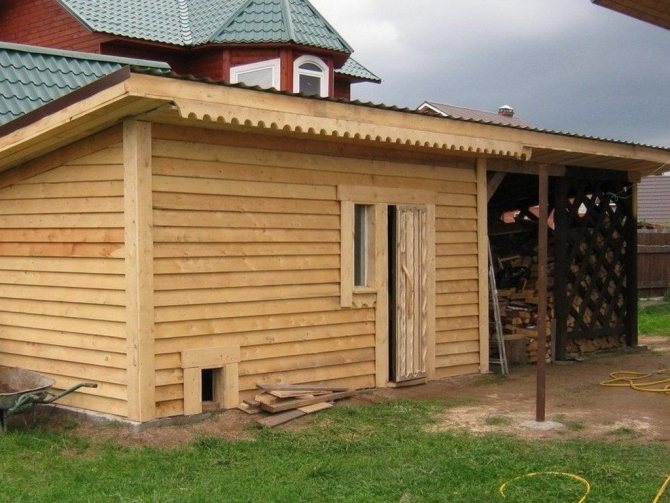
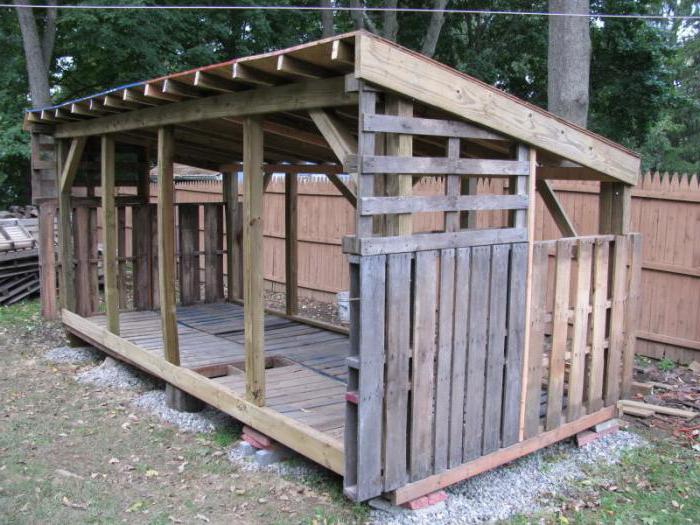
Barn on a columnar base
What to consider when choosing a foundation
Modern construction techniques offer a large number of options to lay the foundation for a future building project. When choosing a foundation for a brick shed or woodshed, you must consider the following factors:
- Terrain. It is necessary to understand whether the barn will be located on a flat piece of land, or whether there is a slope in the place chosen for construction.
- Knowing the groundwater level will help determine whether the foundation will require additional waterproofing.
- Knowledge of the soil structure is also necessary for choosing the type of foundation, since clay or sandy soils are more conducive to the shrinkage of the structure, while hard rocky soil makes it possible to use minimal forces on the foundation, since it will help in maintaining the immobility of the structure.
- The selected materials will definitely have an impact on the foundation for the cabin. The weight of the building and its strength will depend on them.
Taking into account all the above factors, you can choose and build the optimal foundation for the shed with your own hands. What are the manufacturing steps for some of the main types of bases?
Features of arranging a supporting structure for a barn
Before settling on a specific version of the supporting structure, you should study the factors influencing it during operation. The popular solution to use concrete blocks for a shed is not always acceptable. Problem situations that may arise are:
- Clay soil is subject to heaving forces, so it can overwhelm a columnar support on its side or squeeze it out from below, acting on the sole.
- The light weight of the shed cannot cope with heaving forces, and in this case it is a disadvantage.
- Spring floods or heavy rains provoke destruction of the reinforcement inside concrete blocks or lead to cracking of the material during subsequent freezing.
Therefore, when choosing the type of foundation for a shed, they are guided by the following indicators:
- groundwater level;
- freezing depths;
- soil structure;
- relief features.
Inviting a specialist for geological research when planning the construction of a barn is economically ineffective. Taking a neighbor's foundation as a model is risky - the occurrence of layers is uneven. The best way is to independently study the nature of the soil by screwing in a screw pile. This method will give an effective answer to points of interest.
Comment! The bearing layer must be below the soil freezing line to prevent heaving forces from affecting the foundation.
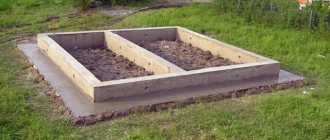
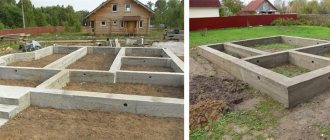
Strip foundation type
Such a foundation is considered the optimal foundation for construction on different types of soil. Its main disadvantage is the relatively high cost of materials for manufacturing.
To pour a strip foundation for a shed with your own hands, you need to dig a ditch around the perimeter of the future building to a depth of approximately 70 cm, having previously made markings with pegs and string. The exact calculation of the depth of the ditch for the foundation is calculated individually depending on climatic conditions. It is important that it is below the soil freezing level.
Barn on a strip foundation
If you plan to build a large shed, filling around the edges will not be enough. A concrete base will be required over the entire area of the structure so that the floor does not sag.
Layers of crushed stone (10 cm) and construction sand (up to 8 cm) are placed at the bottom of the ditch to strengthen the soil. All this must be compacted thoroughly.
The next stage of manufacturing a strip foundation is to install formwork from boards. It should protrude approximately 30 cm above the ground. This is how the bottom of the shed is usually protected from rotting. For reliability, it can be additionally reinforced.
At this stage of work, care must be taken to ventilate the base to avoid moisture accumulation. To do this, cut pieces of metal or plastic pipes are placed inside. The holes should be in different places to create air movement within the foundation.
Now you need to prepare the concrete solution. It is a mixture of sand, crushed stone and cement in a ratio of 5:3:1. All this is stirred until a homogeneous mixture and poured into the prepared ditch. This needs to be implemented in 2 stages. First you need to make a thin layer of concrete around the entire perimeter and let it harden a little. This will create insulation that prevents water and cement laitance from leaving the concrete mixture, which can greatly reduce its strength. And then you can fill in everything else.
The prepared mixture must be used up within a day, since later, due to the hardening process that has begun, it will be unusable.
In conclusion, all that remains is to wait until the solution dries and remove the frame. It is important to remember that construction can continue 1.5-2 weeks after pouring the foundation, when the concrete has hardened by 70%. Maximum foundation strength is usually achieved in 24-27 days. A properly poured strip foundation will become a reliable foundation for a shed of any weight and load.
Types of light foundations
Foundation structures are not usually called this way. That is, there are no heavy or light concretes (this is the name of concrete), they are classified according to design features: strip, slab, pile, and so on.
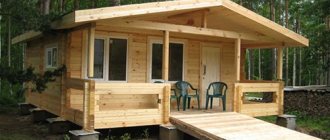
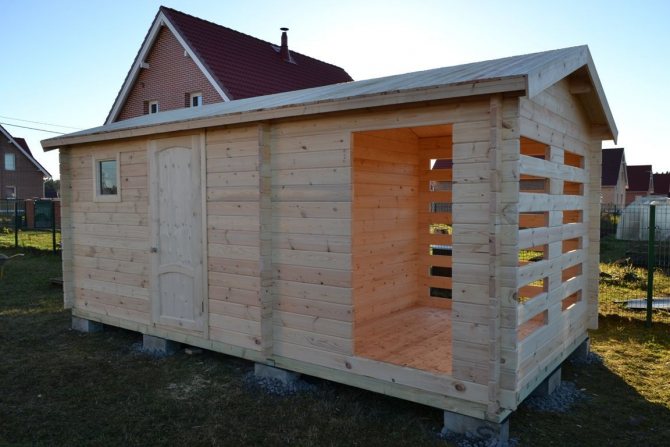
But in everyday life such a name is present, only it means that a light structure such as a frame, panel or any other wooden structure will be erected on the foundation structure.
So, as for the foundation for a barn in the country. There are several simple options:
- bored piles;
- screw piles;
- columnar design.
Let's look at each variety separately, but first note one point. There is a strict requirement that the foundation must be laid below the freezing level of the soil. When it comes to lightweight buildings, this requirement can be neglected. The maximum possible depth is 1 m, which is more than sufficient.
Panel shed on a light foundation structure Source michaelrtaylor.com
Preparing for the construction of the foundation
Regardless of what type of foundation structure is chosen for the shed, it is necessary to carry out markings. Be sure to lay foundation elements at the corners of the building, as well as in areas where external and internal walls join. All other, so to speak intermediate elements, are installed in increments of 1-2 m, depending on the weight of the structure itself.
Bored foundation
This foundation structure can be called a bored structure with an interference fit. But, in any case, the technology is very similar:
- In places under the foundation elements, wells with a diameter of 200 mm are drilled, for which a manual or electric drill is used. Drilling depth – 1.0-1.2 m.
Drilling wells under the foundation with an electric drill Source recn.ru
- If it is necessary to increase the bearing capacity of the rack, the hole at the bottom is expanded to 400 mm.
- The bottom is covered with sand or gravel 5-10 cm thick and compacted.
- A pipe is rolled up from a piece of roofing felt so that it is two-layered. Pipe length: well depth, plus 10 cm (this is the base part).
- The upper part of the pipe is secured with tape.
- Install the roofing felt sleeve into the well.
- A pre-fabricated reinforcing frame consisting of three reinforcement bars, assembled in a triangle section, is inserted into it.
- The well is filled with concrete mortar, which must be pierced with reinforcement or a piece of steel pipe. The goal is to remove air from the solution, which reduces the strength of the concrete product.
- All drilled wells are filled in this way. After 28 days, the foundation can be loaded.
Ready-made poles for a concrete shed Source prohor-stroy.ru
See also: Contacts of construction companies that offer foundation design and repair services.
It should be noted that instead of roofing felt, you can use any ready-made pipe: metal, plastic, asbestos or cement. The main task of the work manufacturer is to pour concrete elements so that their upper ends are located in the same horizontal plane. This is not always possible. And the greater the difference in planes, the more difficult it will be to align the frame under the shed on stilts along the horizon.
Screw piles
Screw piles for a shed are an excellent option. These metal structures made of a pipe and a screw tip can easily cope with quite serious loads. The main thing is to choose the right pipe diameter. It is clear that the larger it is, the more powerful the pipe, the more loads it can withstand.
Products with a minimum diameter of 57 mm are suitable for the shed. True, the length of finished piles is standard - 4 m. But in our case, only 1.2 m is needed. Therefore, they will have to be cut to the required length, and this is a significant expense. Therefore, before deciding which type of foundation to lay under the shed, take this circumstance into account.
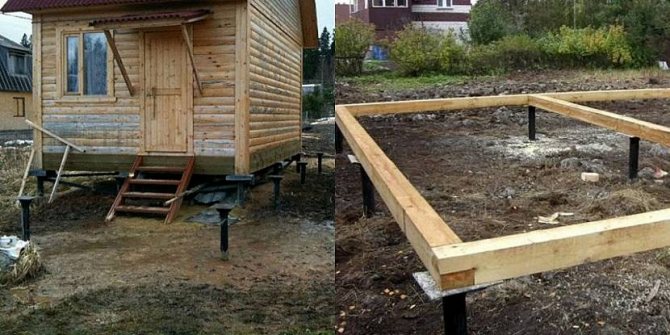
Shed on screw piles Source qusyzi.tozemyxi.ru.net
Of course, you can separately purchase screw cones and weld them to the remaining pipes. But everything will depend on the equipment of the craftsmen you invited. If they have a welder on their team and an electric welding machine in their arsenal, then the problem can be solved quickly and easily. Costs will be minimal.
Now, as for the installation. There is nothing complicated about this. Each pile is accurately installed according to the markings made on the ground, and they begin to rotate around their axis clockwise. If the soil is without stones, then one pile takes 10-15 minutes. It is believed that this is the fastest way to build a strong foundation. And one important warning - screw piles must enter the ground strictly vertically. Therefore, during the screwing process, they must be periodically checked with a level.
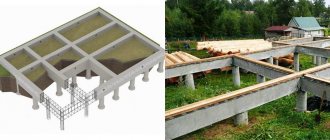
Foundation on screw piles
This method, which allows you to pour the foundation for a change house with your own hands, was developed relatively recently. It is able to hold the structure even on the most unreliable soils.

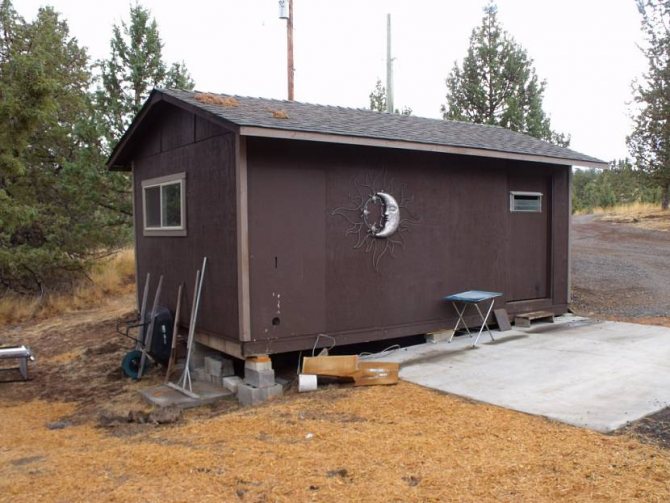
Barn on stilts
The table shows the dependence of the pile load on its size and soil type.

Installing a pile foundation does not require large material costs. It is possible to build a shed on screw piles without special machines. Using a crowbar or a piece of pipe, two adult men can cope with this task.
You should start working with markings. Then small holes are dug in the places where the piles will be located. Their goal is to direct the pile blade in the desired direction. Afterwards you can start driving the piles.
The structure must be mounted on piles vertically, avoiding deviations.
Therefore, you can check the work using a building level or invite a third person to ensure that the installation is correct. After completion, it is necessary to check that the piles are at the same horizontal level.
Now the cavities between the ground and the piles need to be filled with concrete. This will help protect the base from corrosion. Finally, it is necessary to install the heads in order to begin the construction of the utility block itself.
Stages of constructing a pile foundation for a barn
Both when installing a strip base or slab, and when building a screw foundation, it is necessary to carry out preparatory work to clear the space for the shed. Watch the video on how to clear an area for a shed.
After this, the work steps are as follows:
- The top fertile layers of the soil are removed.
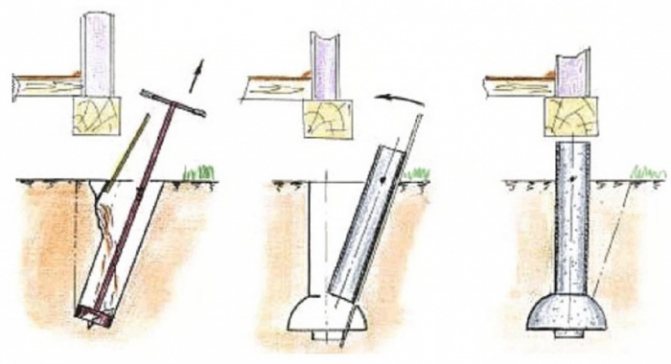
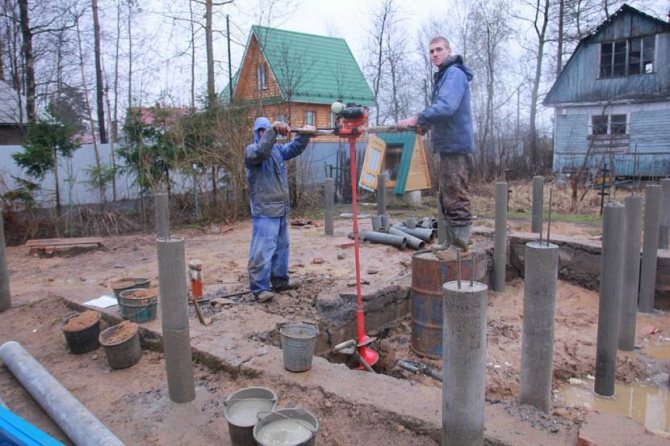
- If the drilling is done with your own hands, then a long lever is installed in a specially made hole in the pile in the upper part.
- 2-3 people screw the pile clockwise using the corkscrew principle. In this case, it is necessary to constantly monitor the vertical level so that in the end your pillar stands up straight and the structure does not tilt. Most often, workers split up - 2 do the work of screwing in the pile, and the 3rd ensures that the level is maintained.
When the pillar deviates by just 2°, there is a critical danger to the stability of the future structure. If the pile “goes unevenly,” you need to unscrew the product again and start screwing it in 30-40 cm from the previous hole.
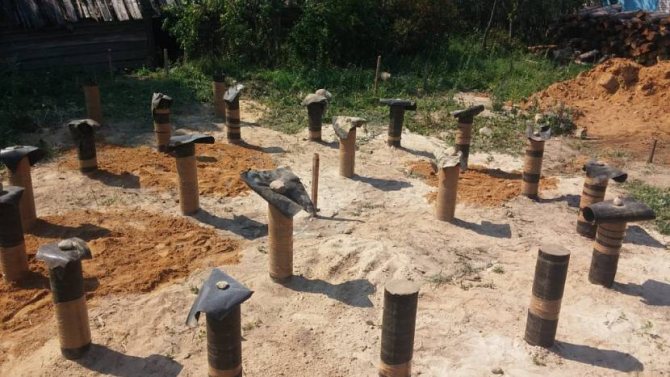
- When the required depth is reached, the heads are checked again for level. After which the upper part along with the hole must be cut off with a grinder.
- Inside the pile we pour concrete, prepared here on the site with our own hands. After it hardens, all that remains is to weld a few channels to the finished pillars. The ceilings and walls of the barn will be installed on the channels. To improve the resistance of the metal to moisture and acids, it is necessary to treat the piles along with the channel on top with a solution of bitumen mastic.
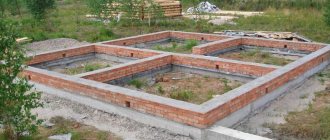
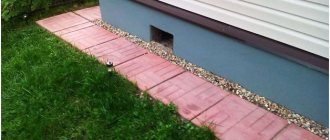
Columnar foundation
As the simplest foundation, a columnar foundation is chosen by those who do not have sufficient experience in construction. It does not require large material costs and physical effort to manufacture. The only drawback is the inability to use this option on unstable soils. There is an algorithm for how to construct a columnar foundation for a barn.
Barn on a columnar foundation
First you need to clean and prepare the space where you plan to build a shed. Clay soil will have to be covered with a 10 cm layer of gravel. Now the points for installing the posts are marked. In these places, holes up to 1 m deep should be dug.
Before you begin installing the posts, the bottom of the made recesses must be covered 15 cm with sand and crushed stone, and then compacted. The posts used can be made of wood, bricks or concrete blocks. If the planned structure is heavy, the columns should be strengthened with reinforcing bars.
After fixing the columns, you need to install the formwork and fill it with concrete solution. Construction of the barn itself can begin 5-7 days after the concrete has hardened.
What to build from and how: review of materials and methods
In order to have a good idea of what we will encounter when building a foundation for a barn, we will briefly describe how the most common versions of such foundations are made.
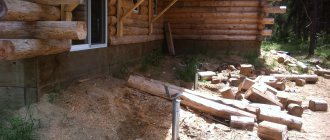
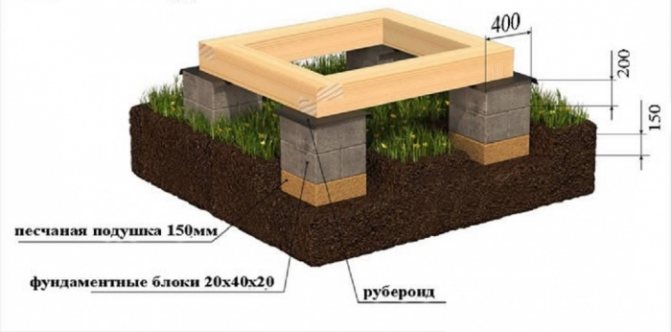
From large section timber
- We mark and dig a trench. With its shallow depth, the timber lying on a 30-centimeter-thick sand cushion and roofing felt (for waterproofing) will be slightly above ground level. You can dig a trench to the depth of the pillow.
- Sometimes you need the beam to be at ground level. Then the trench is deeper, and the timber is wrapped in roofing material.
- The connections in the corners are reinforced with metal corners.
- The timber is additionally secured against horizontal movements by rods driven into the ground through holes.
A recessed timber foundation is very simple.
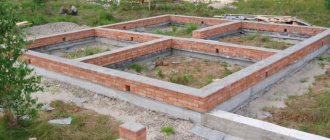
From blocks and bricks
Such a foundation is quite difficult to implement.
- We mark (usually 0.5 meters deep, 0.4 meters wide, plus reserve for formwork) and dig trenches.
- We make a sand cushion 30 centimeters thick.
- Place a small amount of self-prepared mortar (M400 cement and sand in a ratio of 1:3) into the trench in an even layer. There is no point in buying a ready-made solution, since you will only need a little of it.
- We place hollow cement blocks on it and wait for the solution to set.
- We put the solution into the voids of the blocks.
- We lay the bricks on the mortar.
- You need to be careful in the corners.
- Unstitch the seams.
Foundations made from blocks and bricks are a complex undertaking that requires extraordinary skills.
Strip concrete foundation
- We mark trenches on the ground (usually 0.5 meters deep, 0.4 meters wide, plus reserve for formwork), drive in pegs, and pull strings.
- We dig marked trenches to the required depth and width.
- We make a sand cushion 30 centimeters thick.
- We build formwork that is the same height everywhere.
- If the shed is heavy, then reinforcement can be used.
- Pour the prepared solution yourself (M400 cement, sand and crushed stone in a ratio of 1:2:5) or ready-made solution into the formwork.
- Cover the filling with polyethylene and keep it moisturized all the time.
- The formwork can be dismantled after a week. But the filling will gain strength only after a month.
- We install the frame for the shed.
The stages of constructing a strip foundation must be carefully followed
Piles and grillage made of timber
- We mark the site, prepare supports covered with metal profiles.
- We dig pits, make a sand-crushed stone cushion 30 centimeters thick in them, put supports there, and fill them with a solution we prepared ourselves (M400 cement and sand in a ratio of 1:3). There is no point in buying a ready-made solution, since you will only need a little of it.
- The supports are connected with a grillage.
- The grillage connections are reinforced with metal corners.
- You can add stiffening ribs from boards.
The procedure for installing a point foundation made of timber
Concrete piles
- We mark and dig wells, make a cushion of sand 30 centimeters thick, strengthen the formwork above the ground surface, pour a self-prepared solution (M400 cement, sand and crushed stone in a ratio of 1:2:5) into the wells, leave for two weeks; You can put squares of bitumen-impregnated boards in the columns in advance to attach the strapping. There is no point in buying a ready-made solution, since you will only need a little of it.
- We assemble the components for the grillage.
- We attach the binding to the squares.
- We strengthen it with a corner.
- We attach supports for the shed frame.
A board foundation on concrete pillars is often the best solution.
We'll talk about the columnar foundation made of concrete blocks in more detail later.
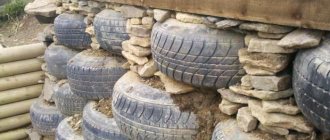
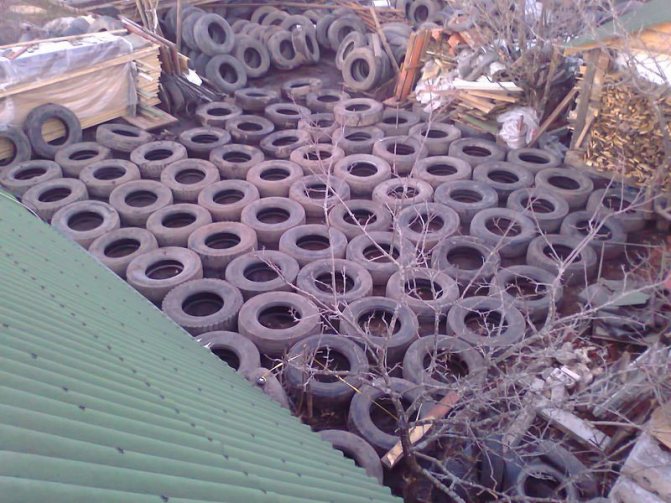
Foundation made from car tires
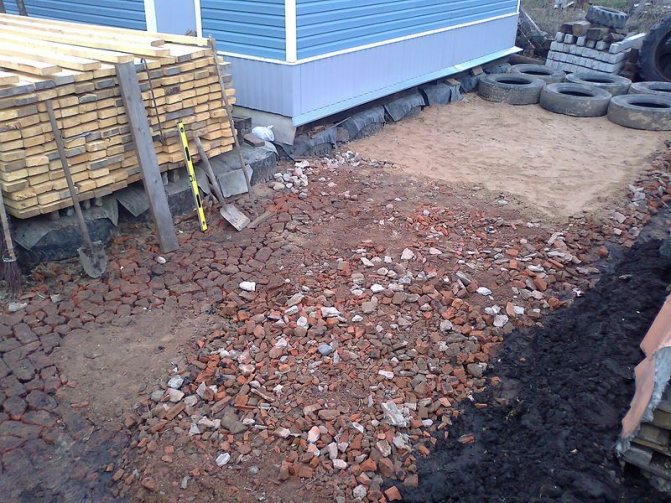
Tire Shed
For car owners, this is a good opportunity to give a second life to tires that are no longer suitable for driving. The structure can be built with a tire base in two ways.
On unstable soils, it is necessary to dig holes with a depth below the freezing level of the ground. Their size must match the tires. The bottom is strengthened with a compacted cushion of crushed stone, and the tires are stacked. All this is covered with inert material.
On more durable soil, it is enough to remove the fertile layer, strengthen it and compact it with sand. The tire placed on top will serve as formwork for the concrete. It is worth remembering that after the concrete dries, such a base loses some of its strength, so it seems to be a less reliable option compared to the first one.
Foundation construction on car tires
The disadvantage of such a foundation is the wide diameter of the tires. Since the wall of the shed is in the middle of the tires, they will be clearly visible after the construction of the shed is completed. Therefore, they need to be painted or masked so that they do not spoil the overall appearance. When using a base made of tires, voids are formed in the subfloor of the utility block, favorable for the penetration of moisture and favorable for the appearance of rodents.
To make protective padding, openings are cut in metal sheets to fit the size of the protruding parts of the tires.
New technologies
Thanks to the development of the field of laying such foundations, it becomes possible to carry out high-quality construction on gravel, clay soils, as well as on sandy loam and loam. This makes soil subsidence, its significant compression, as well as the presence of quicksand and frost heaving less important.
Soil heaving can occur both on the sides of the structure and under it. Shed foundations can be protected from this in the following ways:
- removing heaving soil at the construction site and replacing it with crushed stone and coarse sand;
- creation of a monolithic foundation;
- waterproofing and insulation of the base on all sides;
- deepening the foundation below the freezing level.
Foundation for a barn made of blocks
Constructing a foundation for a shed from blocks is similar to a strip foundation, only it costs the future owner of the barn less. First, a trench up to 60 cm is dug, the bottom of which is also reinforced with crushed stone and sand. A layer of concrete is poured on top, on which you can begin laying blocks. After waterproofing the base, the trench must be buried.
The bottom of the foundation for a shed made of foam blocks will be slightly shallower, since this fairly light material shrinks less. The width should match the size of the block so that it fits without much effort. A concrete pad is also important when working with a foundation for a shed made of foam blocks, so after installing the formwork, it is poured in a layer of up to 20 cm, and laying the blocks begins after the concrete has hardened.
Pouring solution
High-quality foundations for sheds ensure the reliability and strength of buildings. Particular attention should be paid to the components of the solution. Standard Portland cement has sufficient characteristics, but it must have a recent production date. It is advisable to purchase crushed stone of a fine fraction, due to this, the consumption of materials is reduced, the solution becomes denser when laid and more monolithic when hardened. It is important that there are no impurities or debris in all components, including water. To obtain a solution, mix cement, crushed stone and sand in the established ratio, then pour water in portions to form a uniform thick mass.