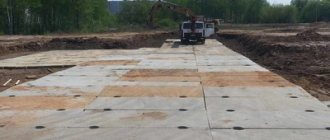
The foundation for partitions is usually installed during the construction of the house. But if this is a private building, then if it is necessary to redevelop the space and use heavy materials for new walls, the foundation is already completed at the moment when people live in the house. If the new structure is made of lightweight materials such as plasterboard, wood or plywood, a solid foundation will not be required. You just need to properly prepare the floor surface.
Do I need to pour a foundation for partitions?
The need for a foundation for the internal partitions depends on the weight of the partitions themselves. Brick and aerated concrete block partitions require a strip base, and partitions made of gypsum plasterboard, chipboard or plywood can do without support.
Construction of the foundation involves a number of nuances:
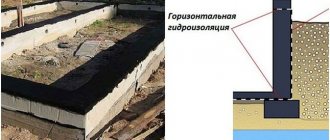
- Mandatory waterproofing. It extends the service life of the building.
- The foundation will be stronger if it is connected to the basement part of the load-bearing walls. Ideally, this is a simultaneous construction with a load-bearing foundation.
- The depth of laying the foundation for interior partitions may be less than the height of the supporting structure.
Foundation ventilation
When choosing any strip foundation - monolithic or block - builders are faced with the issue of ventilation of the underground space. Ventilations are arranged for this purpose.
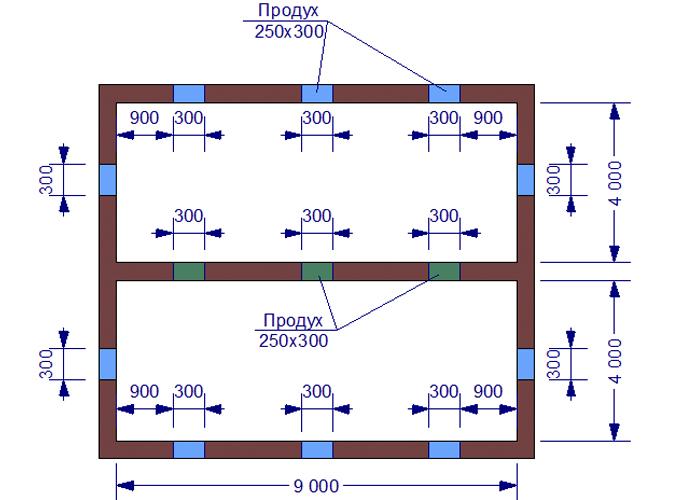
Without air access, harmful anaerobic bacteria, fungi and mold grow in the basement. The number and cross-section of vents strictly depends on the area of the basement and is calculated according to SNiP 31–01–2003 (updated as SP 54.13330.2011) “Residential multi-apartment buildings” (clause 9.10). The total area of the vents should be at least 1/400th of the basement area - but at least 0.8 m2. The cross-section of one vent should not be less than 15x15 cm. There should be an even number of vents, and they should be located opposite each other, but no closer than 0.9 m to each corner of the foundation.
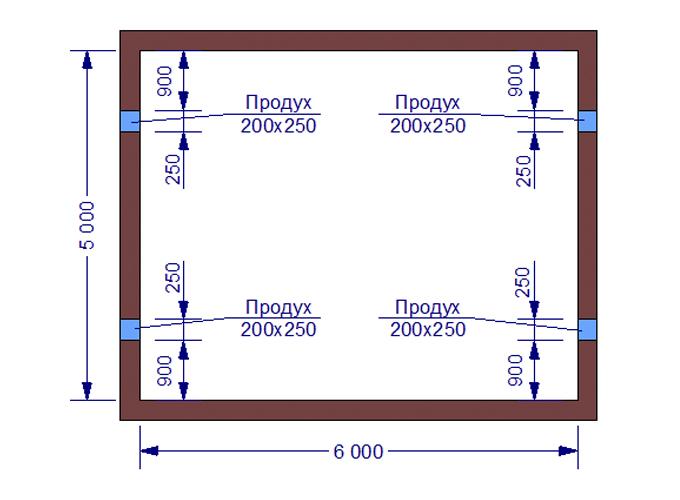
The distance from the vent to the corner of the building must be at least 90 cm
If a house has internal load-bearing walls, then there is a foundation underneath them. And it should also have internal vents so that there are no sealed basements under the building. These products are also made according to very specific rules.
It is also necessary to install vents in the internal foundation strips so that there are no unventilated areas under the floor of the building.
In villages, air vents are often closed for the winter with bricks laid on mortar or tow. But according to SNiP 11-3-79 “Construction Heat Engineering”, which regulate the temperature ratio in the basement and outside, this should not be done due to the formation of condensation in the underground. It is better to carefully insulate the floor structure.
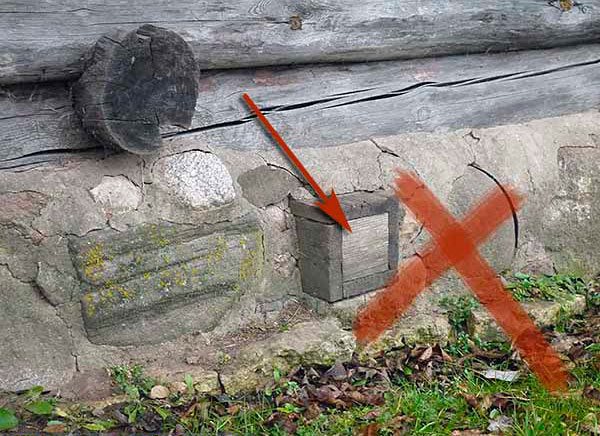
If the vents are closed, the space under the foundation will cease to be ventilated and condensation will begin to form there.
Typically, vents are made using sewer pipes - plastic or asbestos-cement - inserted into the formwork between the reinforcement bars. Then the vents turn out perfectly round.
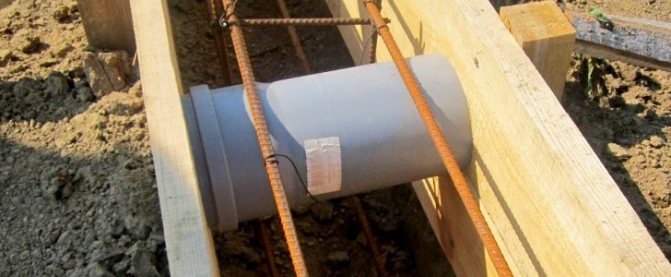
The space for vents is prepared even before the foundation is poured using sections of sewer pipes inserted into the formwork
In the case of a prefabricated block foundation, vents are made from special blocks with holes, or ventilation ducts are simply left during laying.
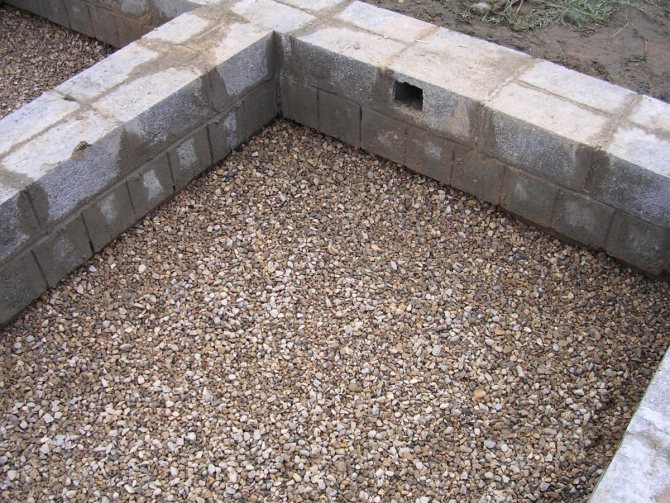
To install vents in a block foundation, special blocks with ready-made holes are used
If you forgot to make vents when pouring the foundation (or simply didn’t think about it), then don’t panic: you can easily punch holes with a grinder or hammer drill, especially while the foundation is relatively fresh.
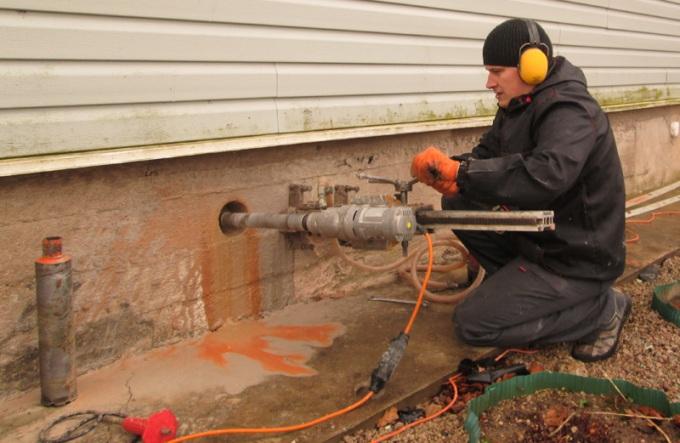
If the vents are not made when pouring the foundation, they can be punched later with a grinder or hammer drill
To prevent mouse-rat dynasties from appearing in your underground, it is advisable to provide the vents with grates. If they are also aesthetic, then this will greatly decorate your facade.
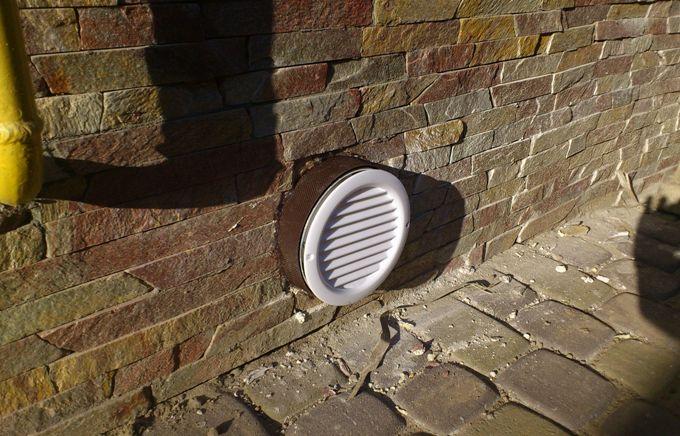
The vents can be closed off from mice and other small living creatures with special grilles.
Let's take a more specific look at which foundations are suitable for houses built from different materials.
Laying reinforcement
Iron and steel elements are used as reinforcement for the base. The metal frame increases the strength of the structure.
Reinforcing elements are laid under the future foundation after the following stages:
- Drawing up and approval of the project;
- Territory preparation;
- Marking;
- Digging trenches;
- Laying the “pillow”;
- Laying waterproofing;
- Installation of formwork.
A layer of sand of about 15 cm is poured onto the bottom of the trench, and removable or permanent formwork is installed. The latter differs in that, in addition to the main load-bearing function, it provides additional insulation for the base.
Then the reinforcement is laid. The reinforcing elements must be firmly held in the prepared trench and connected to each other. If the internal foundation is installed after the external walls are erected, the reinforcement is attached to the base of the load-bearing walls with anchor bolts.
Pouring technology
A layer of gravel with sand is a kind of cushion on which the concrete solution is laid. A layer of waterproofing, such as polyethylene or roofing felt, is laid on top of it to extend the service life of the structure.
You should not prepare a large amount of cement at once, as it hardens quickly.
Filling is carried out in several stages:
- A layer of concrete (30-50 cm) is poured into the prepared trench with a cushion, reinforcement and formwork.
- Compact the material with a hand tamper to release air bubbles, which make the base less durable.
- Allow the layer to set (1-2 days) and continue working.
Using this technology, the foundation is poured to the required height.
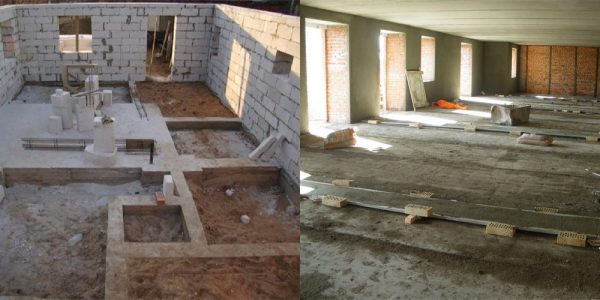
Construction inside the house
Such a foundation is characterized by the complexity of preparatory work. If you need to separate a room in a house that has been in use for a long time, you will need to tear out the floors, rearrange the joists and the entire underground pie to prepare the space. It is better to make do with a partition made of lighter materials, for example, plasterboard.
For decent sound insulation, insulation is laid inside the structure, and the frame is attached with a special backing.
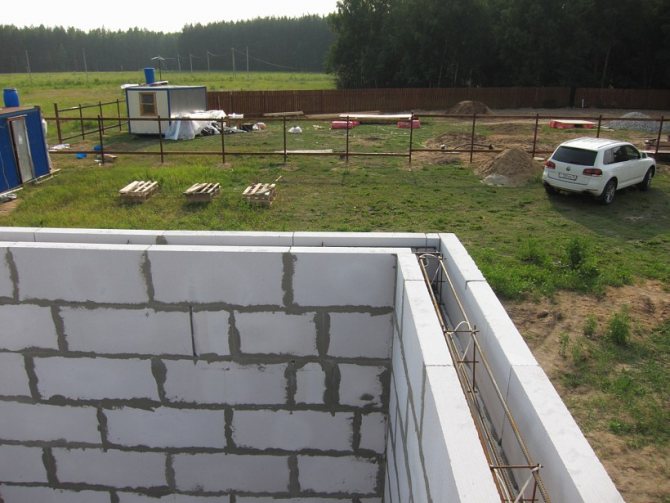
If only a “box” is built, there is soil inside the house, the following algorithm of work is possible:
- Marking;
- Digging trenches;
- Preparing the sand bed;
- Installation of waterproofing;
- Installation of formwork;
- Installation and bundling of reinforcement;
- Filling and leveling.
If there is a basement in the house, the task is somewhat simplified.
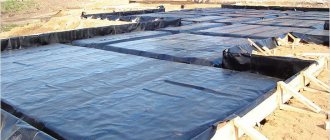
Laying waterproofing
To prevent groundwater from having access to the supporting system of the building and causing damage to the structure, waterproofing is used. To do this, you will need any liquid or roll material (mastic, roofing felt, resin, polyethylene, waterproofing, etc.).
It is usually more convenient to use rolled materials, but sometimes, on the contrary, liquid ones.
- We cut a piece of material in accordance with the length of the base and twice its width.
- Fold the material in half lengthwise.
- We lay the prepared substrate on top of the supporting structure and glue it with bitumen or resin.
The basement part of the internal foundation does not need external waterproofing.
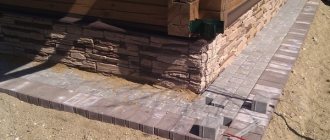
Partitions on top of the waterproofing can be installed after the base has gained sufficient strength. This usually takes from 25 to 35 days.
How to make a foundation for partitions
A partition is an enclosing structure of small thickness that does not take the load from the overlying elements of the building. This concept should not be confused with full walls, load-bearing or non-load-bearing. A foundation for partitions will be required when constructing floors on the ground and strip foundations.
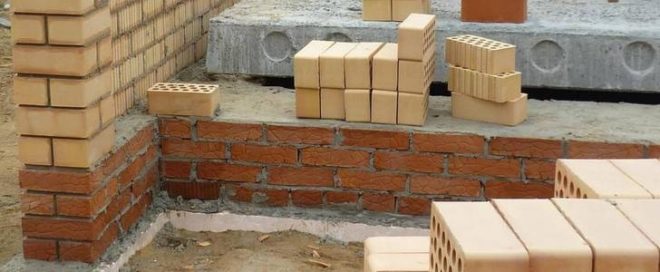
In this case, the partitions are mainly laid out of brick. The thickness of the structure is 12 cm. A brick fence with a thickness of 25 cm or more should be treated as a wall and full foundations should be provided for them.
There are several options for installing foundations for partitions in a house.
Aerated concrete partitions price for work
The cost of laying partitions starts from 400 rubles per square meter. But if the volume of work is large, and for example, you need to erect several partitions in one building, then the builders can make a discount. The fact is that a large volume of work is more profitable for builders, since they do not need to transport tools and materials to different sites several times, and thus they save their time, and time is money.
Reinforced concrete screed
This method is often used in the construction of multi-apartment residential buildings, administrative and public buildings. The performers are professional workers. For those who are building a house “for themselves,” this option is not recommended. If the technology is not followed, cracks will appear on the partitions.
The essence of the method is to install a widened cement screed at the point of support of the enclosing structure. If it is poured 80 mm across the entire width of the floor, then the thickness under the partition is 200-300 mm. In this case, the width of the reinforced section is taken to be 120-500 mm plus 90-200 mm on each side for the slopes. Ideally, the slope should be 45 degrees.
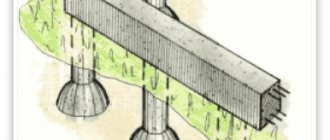
Transom beams supported on external walls
This option can be called more suitable for non-professionals. There are fewer opportunities to disrupt technology here. The role of the foundation for interior partitions in this case is played by reinforced concrete beams thrown between the walls of the building.
Section and reinforcement
The cross-section of such a beam is taken to be 350x500 mm with a length of no more than 6 m. In this case, 350 mm is the width of the element, and 500 mm is the height. If the span is 2-3 m, the section of the beam can be reduced to 200x300 mm (the larger size is the height). Confusing width and height is prohibited. If the crossbar is installed incorrectly, its load-bearing capacity is significantly reduced.
If the span is more than 6 m, intermediate supports will be required. To do this, columnar foundations are made from monolithic concrete or factory-made foundation blocks.
Beams are reinforced using steel reinforcement class A400 or A500C. Four rods with a diameter of 10-12 mm are used as working longitudinal reinforcement. To allow the rods to work together, clamps made of reinforcement with a diameter of 8 mm are installed. The clamp spacing is on average 200 mm. When reinforcing, it is important to maintain a protective layer of concrete - 40 mm.
Leaning
The beams must rest on the walls by at least 200 mm. For this purpose, when constructing the base, special niches are provided. If the foundations are already completed, niches for installing crossbars are made with a hammer drill.
The niche is designed so that the top of the beam is located 10-15 cm below the finished floor level. Waterproofing material is placed under the support of the beam. This is especially true when there is contact between materials with different properties. For example, if the base is made of brick. Rolled types are used as waterproofing: roofing felt, linocrom, waterproofing, etc. Waterproofing is also needed between the concrete beam and the brick partition.
Important! When using this method, it is important not to forget about frost heaving of the soil. This phenomenon occurs when the soil is simultaneously exposed to cold and moisture. The base increases in volume and tries to raise the building.
Preventing damage
The fight against frost heaving is important for owners of areas with clay, loam or sandy loam. The surest way to avoid the effects of frost heaving on the foundations of partitions is to prevent the beams from contacting the ground. This is easy to do; you just need to lift the crossbar above the surface.
The recommended gap width is 10% of the soil freezing depth, but not less than 100-150 mm. The freezing depth is calculated using the formulas from SP 131.13330.2012. To simplify calculations, you can use special maps and tables that show values for different cities.
A layer of low-density foam can be placed between the transom and the ground. When pressure from the ground increases, this material will become a damping layer and prevent damage to beams and partitions.
The main problem that arises during the construction of building support structures is soil deformation. It is not so acute when building on coarse sand or coarse soil, but it is important to remember that a reliable foundation for partitions in the basement or on the first floor is the key to the absence of cracks and troubles. On the second and subsequent floors, such structures are installed directly on the floors.
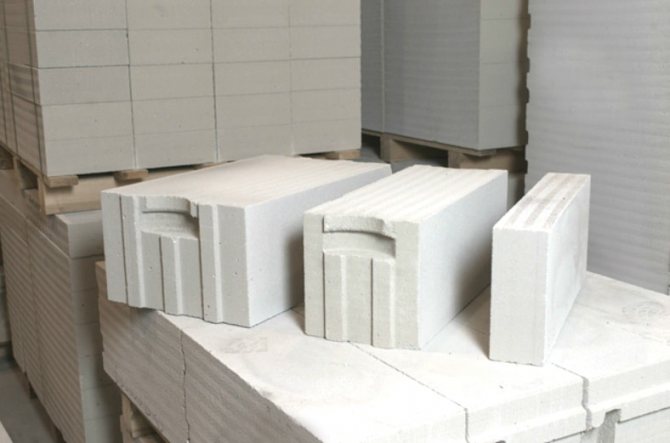
Thickness of aerated concrete partitions
On sale you can find aerated concrete blocks with a thickness of 75 to 375 mm. For non-load-bearing partitions, 100 mm and 125 mm blocks are usually used. The dimensions of the height and length of the blocks are standard - 600 mm by 200 mm, but there are also double gas blocks, the height of which is 400 mm. The larger format of the blocks significantly speeds up laying and reduces glue consumption.
How to make a foundation for the internal partitions of a house
The foundation for partitions inside the house is created, as a rule, at the stage of foundation construction. But there are times when it is necessary to remodel and move interior walls. Depending on the material used, internal partitions can be heavy (for example, brick, block) or light (made of plasterboard, wood, OSB, plywood). Under the main walls, a more solid support is made that can withstand the load so that they do not deform or crack. At the same time, a foundation is not made for structures with insignificant weight.
Types of bases for partitions
The base for internal partitions is often created simultaneously with the support for load-bearing walls. But it happens that they cannot be built together, for example, due to the lack of a final plan for the rooms. It is also often necessary to redesign rooms in the house. Then you have to create a foundation for the interior walls.
Ready foundation for load-bearing and internal walls
For a private house, you can make a foundation of various types. The choice is determined by the following main factors:
- design load on the supporting structure;
- the type of soil at the construction site and its structure.
The most common types of bases are presented in the table below with the features of their use.
| № | Foundation type | Application area |
| 1 | pile | suitable for the construction of relatively light residential premises on frozen or heavily moistened soils or with weak bearing capacity, as well as when located close to the surface of the groundwater horizon |
| 2 | columnar | used for light structures |
| 3 | monolithic slab | It is practically advisable to use a slab foundation if it is necessary to erect a heavy, permanent building, especially when the soil of the construction site has a weak bearing capacity |
| 4 | tape | constructed with a large area of the building under construction, as well as a large load on the base |
Pile and column supports are used for buildings made of lightweight materials, for example, foam blocks, aerated concrete or frame structures. Such foundations are relatively inexpensive and are erected faster than slab and strip counterparts. But columnar supports are not used when the topography of the area being built is uneven or sloped, and the soil is subject to severe swelling or movement.
The monolithic slab ensures uniform distribution of the weight of the building over the entire area of the supporting structure. It can be built on any soil, and a wide variety of buildings can be erected on it. The slab is a ready-made basis for internal partitions. There is no need to strengthen anything. You just need to install the new walls correctly. But the high cost of a monolithic slab limits its use only to complex construction conditions.
The foundation tape is the best option in terms of the ratio of costs to structural reliability. This makes it popular and widespread in the construction of housing, as well as utility buildings. In each case, it is necessary to perform a preliminary calculation of the foundation in order to build it efficiently.
Types of foundations for load-bearing walls
Several types of foundations are used in the construction of buildings:
- For multi-storey buildings or houses with a huge area, tape is used;
- Columnar is suitable for lightweight construction;
- Buildings with high loads or additional plinths are placed on a monolithic base;
- Construction on frozen ground involves the pile type.
Small-area buildings made of lightweight materials (aerated concrete, foam blocks) are installed on a columnar base. This type is affordable and easy to assemble in a short time. This type should not be used if the construction site is uneven, bumpy and has slopes. The pile foundation is similar to the previous one, differing only in the depth of reinforcement and support elements. It is known that earth rocks are constantly moving and this type is not the best option. It is used when installing another option is impossible.
Monolithic foundations are used in the construction of any residential premises. This type of foundation is strong, stable, and the load can be evenly distributed over the entire area. The downside is its cost; it is so expensive that it is used in the most difficult construction cases.
The most popular ones are tape ones. They have the best price-quality ratio. Installation is possible on any type of soil, at different depths. This type is the most popular for the construction of residential buildings.
The need for a foundation under interior walls
The duration of operation is determined to a large extent by the reliability of the foundation structure. Construction time and costs are largely determined by the material used.
Laying reinforced concrete beams as supports
Whether a foundation is needed for interior walls depends on their weight:
- if you plan to build brickwork or build from various blocks, then you will need to make a solid foundation;
- when partitions are made from lightweight materials (plasterboard, plywood, OSB, chipboard), then the creation of a supporting structure for them is not required.
The construction of the foundation should be carried out taking into account a number of nuances:
- to extend the service life of the structure being created, it is waterproofed;
- the strongest foundation for interior partitions is obtained when it is securely connected to the foundation under the load-bearing walls: the best option is the simultaneous construction of supporting structures;
- the laying depth may be less than that of the main foundation.
Trench for foundation tape
Before construction, the weight of the partition being created is calculated in order to determine the parameters of the foundation. Determining the dimensions makes it possible to calculate the required amount of building materials.
Connecting the foundation structure into one whole will give maximum reliability and strength. On sandy types of soil, the laying depth is from 0.5 m. The wider the partition, the greater the similar support parameter should be. The amount of building material can be calculated either independently or using a special calculator on the Internet.
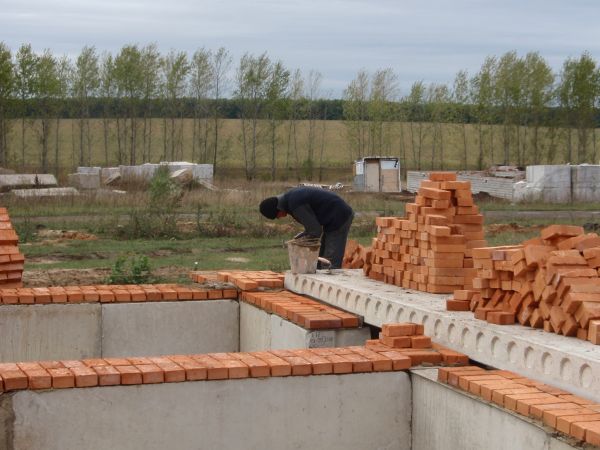
Materials for load-bearing partitions
The construction of various types of structures often involves not only the construction of external walls, but also the construction of internal partitions. The foundation for the partitions can be installed from bricks or blocks. They are used to reduce the load on the base and soil. Before you begin, you should choose the type of foundation for the entire house.
The service life of the room will directly depend on the quality of the foundation for load-bearing partitions. Often the cost of the foundation can be up to 15% of the total construction budget. It depends on the material that is used to create the internal walls of the building. Partitions made of lightweight materials do not need to be further strengthened at the bottom. But it is important to determine the size of the support and the material for its manufacture. Blocks require a wider base, as opposed to a brick internal partition.
When calculating the dimensions for a quality foundation, you should consider:
- how many floors are expected;
- load;
- load-bearing walls;
- soil mobility and purpose of the building.
Proper construction involves the simultaneous construction of the base of the external walls and partitions inside. Shifts in the earth will lead to distortion and even collapse.
The foundation for brick walls is made at a depth, as for an external wall. The construction of a heated and living space on loose soil involves laying a foundation to a depth of 0.5 m. The foundation should be equal to the width of the brickwork.
Rolls or liquid waterproofing agents are used as a base on any soil. This prevents distortion of the base, and in the future, the partition from moisture.
Foundation construction technology
The foundation for interior partitions can be done either immediately, by constructing the foundation, or during the process of internal reconstruction of the housing. Construction will require the following tools:
- shovels for digging and excavating soil;
- level;
- tape measures, pegs and ropes;
- scrap;
- hammer drill.
The material selected for construction is purchased after the required quantity has been calculated. If you plan to pour concrete, you will need:
You can use ready-made concrete grades starting from M300. If the construction of partitions is carried out directly during the construction of the base, then the use of technology will speed up the work process. The construction of a monolithic strip foundation occurs according to the following algorithm:
- clear and prepare the land;
- make markings;
- they dig trenches, under the partitions inclusive;
- pour a sand cushion;
- install formwork;
- lay waterproofing on the bottom;
- install the reinforcement frame;
- pour the solution.
After the concrete has hardened, the panels are removed. Further construction begins after the monolith has reached the required strength (in about a month). The base should rise above the ground surface by at least 0.5 m.
Simultaneous construction of the entire foundation is the best option when everything is done in order. If redevelopment is necessary, it is less convenient to make the foundation, because you will need to dismantle the floor and remove the soil.
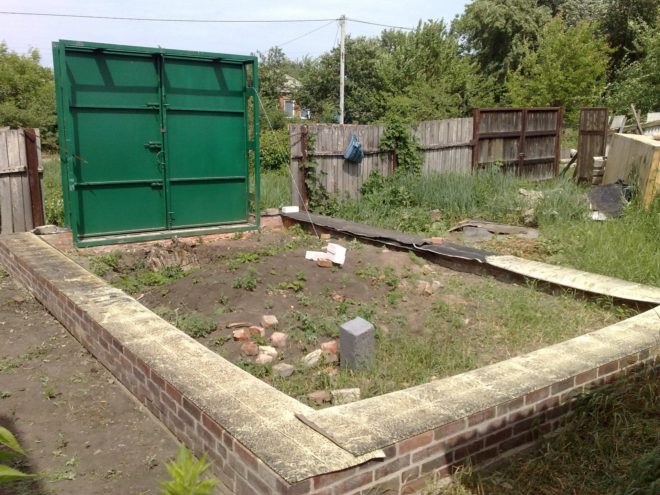
Features of the foundation for the construction of smaller objects
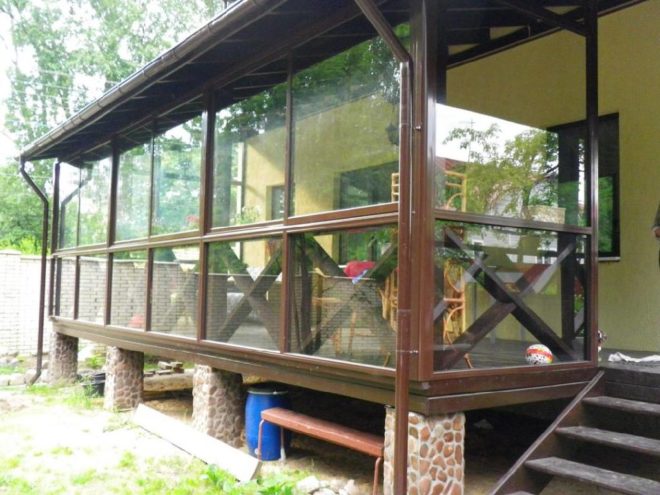
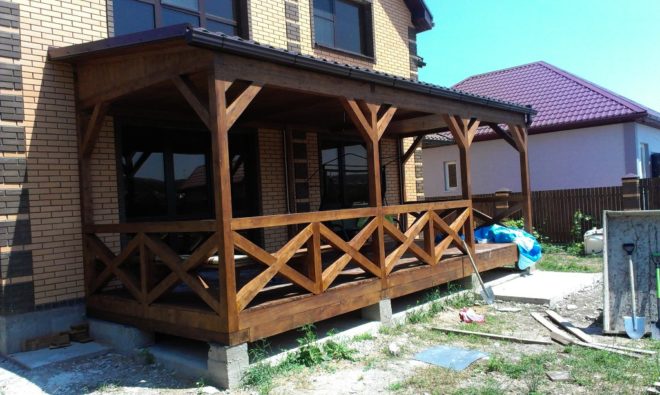
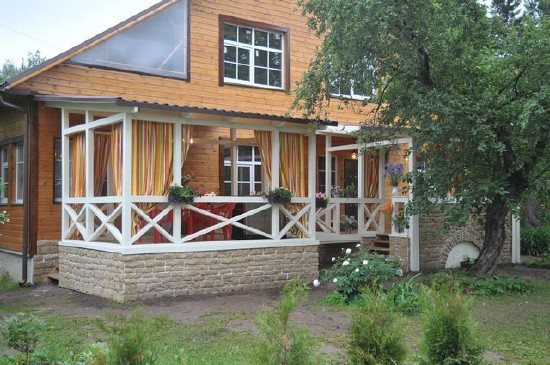
Any building on the site, be it even a toilet or a more or less permanent enclosure for a dog, needs a foundation. Of course, the requirements for such foundations are much lower than for foundation structures for residential buildings. But there are cases when they are almost identical. For example, when building a foundation for a veranda.
Foundation for the veranda
The veranda is lighter than a house, but also has a noticeable weight, and is susceptible to freezing of groundwater, heaving and movement of the soil, and moisture penetration into the structure itself. In addition, the veranda is usually built along with the house and is therefore placed on the same foundation. In this case, the foundation is selected based on the recommendations described above. But if the veranda is added after the house has been built, then due to its light weight, all types of foundations are suitable for it, including the lightest ones:
- monolithic slab;
- tape monolithic;
- prefabricated strip - from ordinary small concrete or aerated concrete blocks, brick, from rubble stone;
- columnar monolithic;
- columnar block;
- piled from screw piles;
- foundations made of barrels, polyethylene and asbestos-cement pipes and even tires.
When adding a veranda to an already finished building, there is a common mistake: many people believe that the foundation of the veranda should be the same and as deep as the foundation of the main house. This is wrong. The only mandatory rule: a so-called technological joint must be left between the foundations - a gap into which the ends of the reinforcement are brought out. A year later, when the new foundation shrinks, the reinforcement can be welded and the joint filled with concrete.
Photo gallery: verandas and their foundations
The pile foundation will withstand the pressure of a massive veranda even on weak heaving soil
If the veranda is built together with the house, the foundations of both buildings can be made the same
A foundation made of stone pillars looks beautiful, but it takes a long time and is difficult to do.
The easiest way to place a small veranda is on pillars made of blocks
Wooden piles have a limited service life, so it is advisable to build such a foundation only under temporary buildings
When laying a foundation for an extension to a house, it is necessary to leave a technological joint
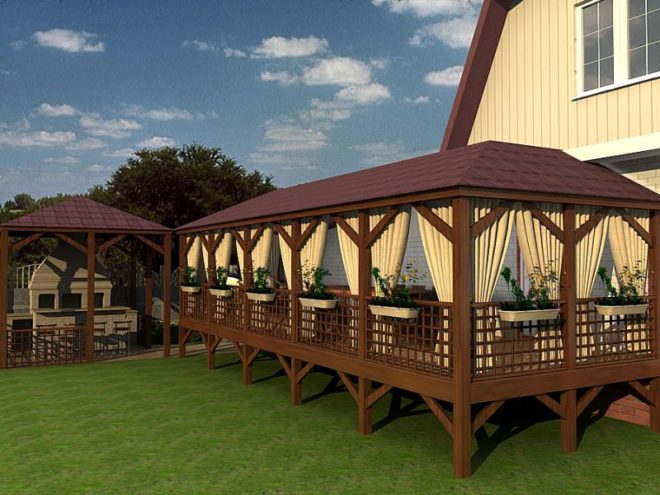
Foundation for a summerhouse
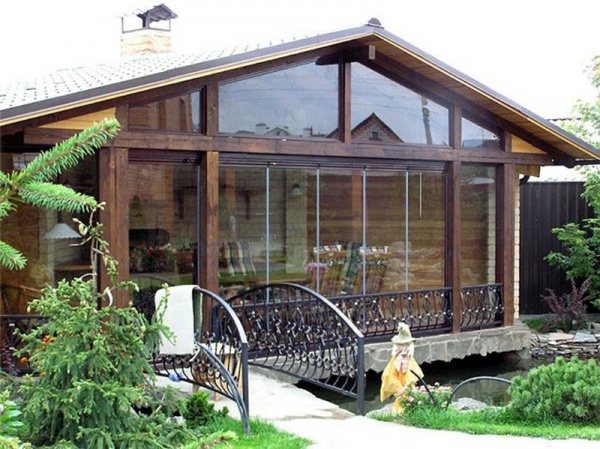
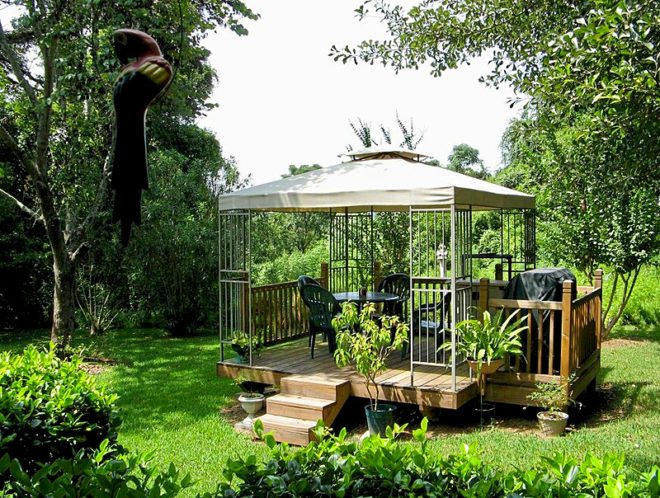
This is exactly the case when a foundation is not always needed. The classic gazebo has a door and glazed windows and makes it possible to enjoy nature in the comfortable conditions of a mansion. An open gazebo, at a minimum, has no windows, and either consists simply of supports and a roof, or a light, low wall is fixed on supports on three sides, and a porch with steps is built on the fourth side. There is a circular bench mounted on the wall, and a table in the middle on a fixed support. The third type of gazebo is the “belvedere”, a green gazebo. "Belvedere" is translated from Italian as "beautiful view." Its roof rests on openwork lattice walls - “trellises”, which are often woven with climbing plants. Sometimes a gazebo is simply a platform on the grass, protected from rain by a roof and fenced either with trellises or densely planted bushes. This type of gazebo does not need a foundation. And if the gazebo has a floor, then the following light foundations of shallow or shallow design are suitable for this light, almost weightless building:
- monolithic thin slab;
- tape monolithic;
- strip made of small concrete or aerated concrete blocks;
- columnar monolithic;
- columnar block;
- foundations made of barrels, polyethylene and asbestos-cement pipes and even tires.
Photo gallery: gazebos and their foundations

Most often, classic-style gazebos are placed on a columnar foundation
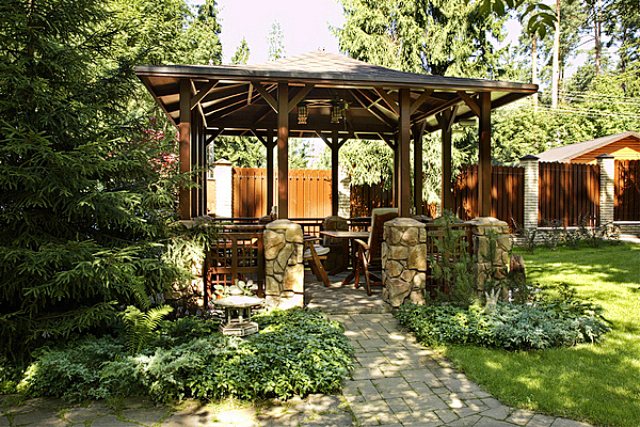
The supports of the gazebo can be made in the form of pillars decorated with rubble stone
When installing a gazebo on a high foundation, you will need to make a staircase to enter

Due to their heavy weight, such gazebos are best placed on a powerful monolithic foundation
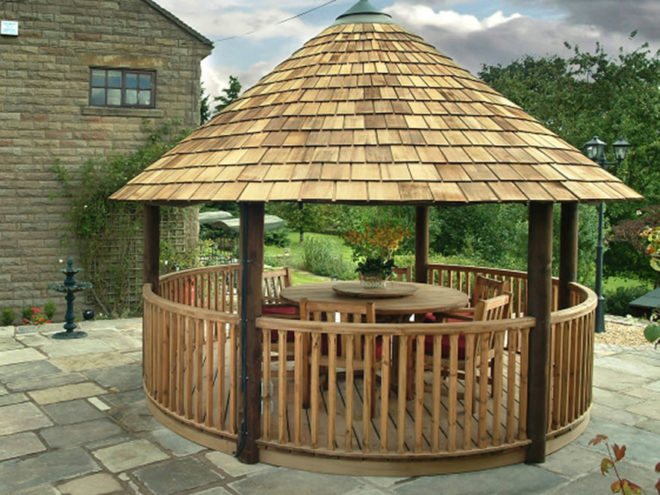
Round arbors can be installed on a thin slab or on poles

For a gazebo with an iron frame there is no need to make a foundation
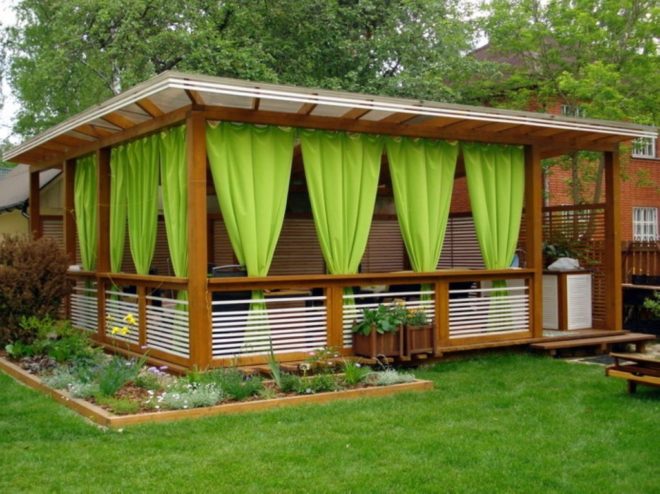
Large spacious gazebos, as a rule, have significant weight, so it is better to pour monolithic foundations under them
Video: building a foundation from blocks for a gazebo
Garage foundation
The garage is also most often a lightweight building, but with one important feature: it must have a concrete floor, and preferably a “pit” for diagnosing and repairing the car. There are also garages for several cars, in which case the building immediately turns into a permanent one. The obvious solution would be a monolithic slab, but to save money, you can make a combined foundation: under the walls there is a strip - monolithic or made of blocks, and in the middle - a monolithic slab of smaller thickness. You can leave the natural soil in the garage by laying it with tiles or filling it with sand. The following foundations are suitable for a garage:
- monolithic slab;
- tape monolithic;
- prefabricated strip - from ordinary small concrete or aerated concrete blocks, brick, stone;
- columnar monolithic;
- columnar block;
- columnar from different pipes;
- piled from screw piles with low resistance to loads;
- foundations made of barrels, polyethylene and asbestos-cement pipes and even tires.
Photo gallery: garages and their foundations
If you plan to build a brick garage, it also makes sense to make the foundation for it from brick
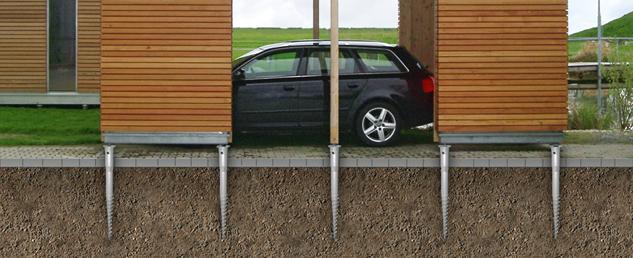
The lightweight structure of a wooden garage can be conveniently erected on not very deeply buried piles
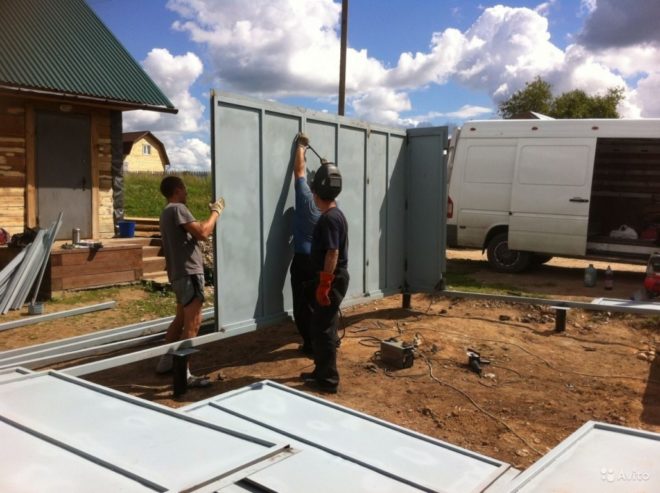
Prefabricated garages are often built on pillars made of metal pipes

A garage made of foam blocks requires a strong strip base
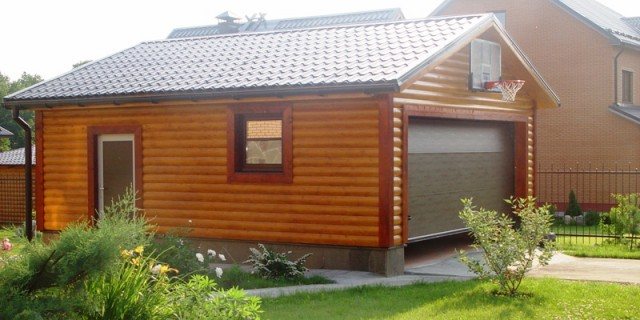
A permanent garage made of timber is equivalent to a bathhouse in terms of the load on the foundation, so it is best to place it on a concrete strip
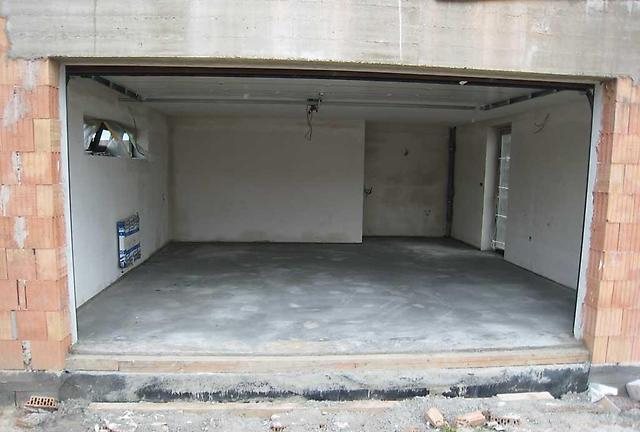
The monolithic slab of a brick garage is both a durable and airtight floor
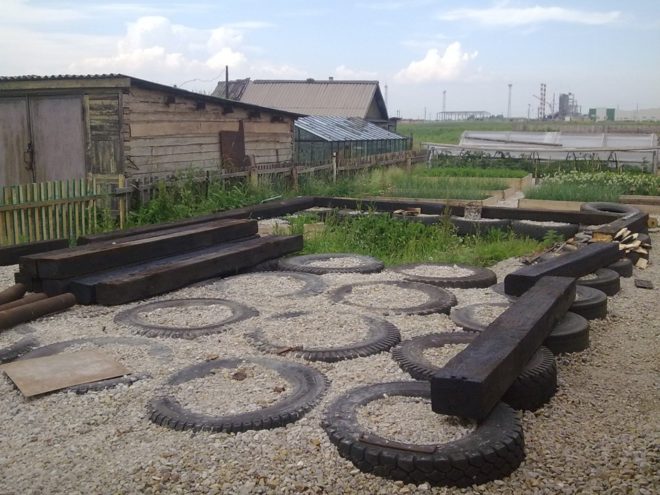
The construction of such a foundation will allow you to easily dispose of old rubber
Foundation for a greenhouse
Greenhouses, like gazebos, are also different. From a lightweight structure with plastic film on pipes stuck into the ground, to serious greenhouses made of double-glazed windows on solid foundations. Therefore, the spread of foundations here is incredible. The following foundations are suitable for greenhouses:
- monolithic thin slab;
- tape monolithic;
- prefabricated strip - from ordinary small concrete or aerated concrete blocks;
- columnar monolithic;
- columnar block;
- timber frame;
- foundations made of barrels, polyethylene and asbestos-cement pipes and even tires.
Photo gallery: greenhouses and their foundations

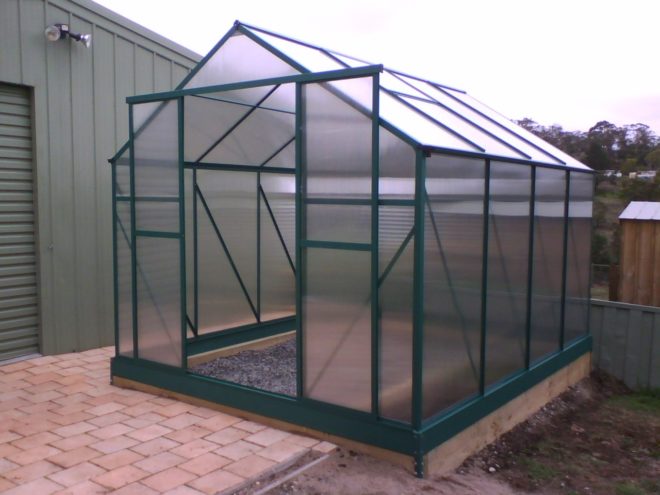
A brick foundation for a polycarbonate greenhouse is somewhat redundant
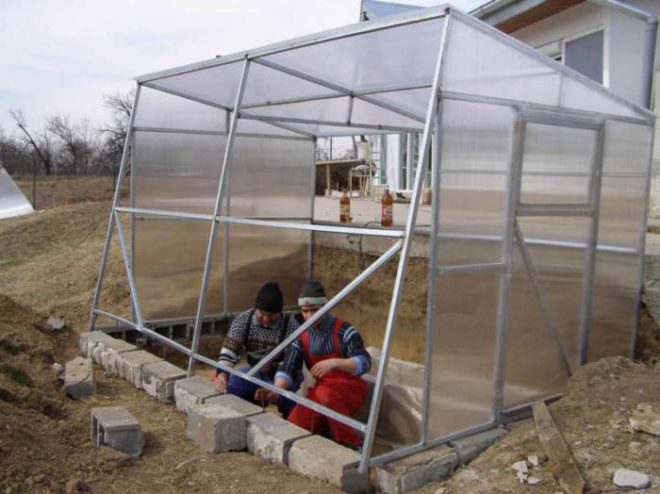
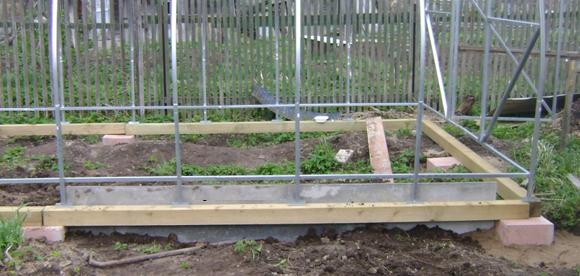
The profile greenhouse will be securely fixed on a prefabricated strip foundation made of concrete blocks
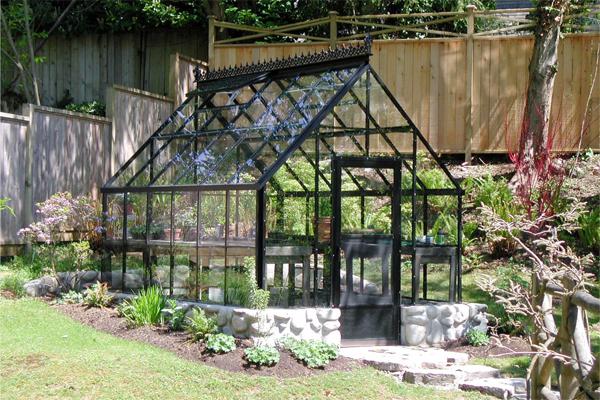
A greenhouse from a corner looks very nice on a foundation made of large cobblestones

For greenhouses made of light metal profiles, a foundation is often laid in the form of a frame made of timber.
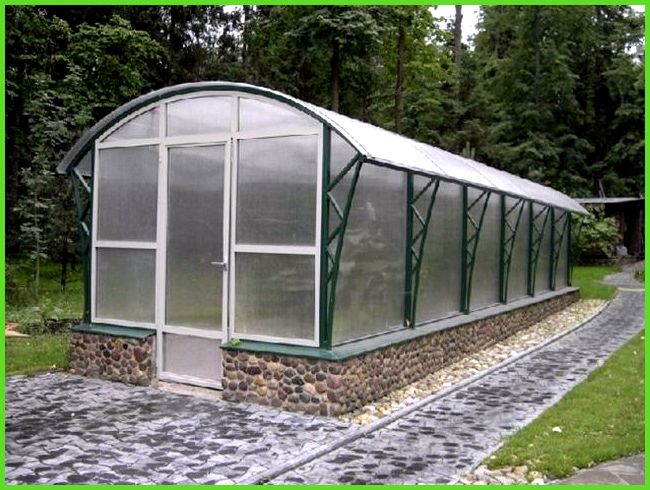
A strip concrete foundation trimmed with stone will be a good decoration for a large permanent greenhouse covered with polycarbonate

A polycarbonate greenhouse can also be placed on a pile foundation
The greenhouse can be firmly fixed to a monolithic slab with metal anchors
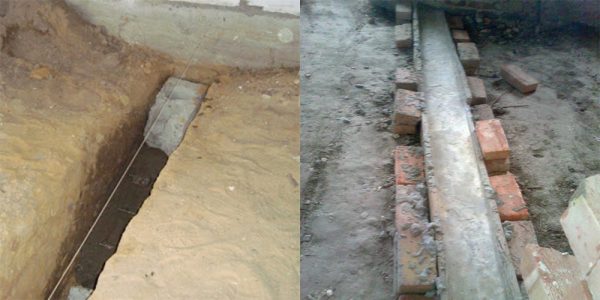
The future greenhouse will stand on a columnar, shallow foundation made of blocks
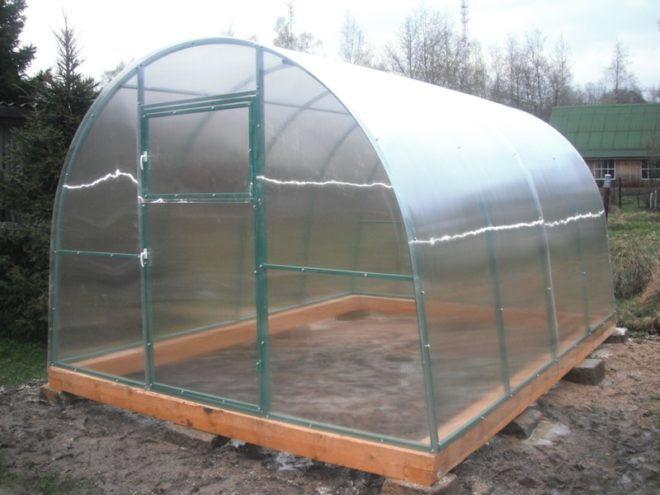
To better preserve the wooden base, the timber frame can be laid on concrete blocks
Video: timber foundation for a polycarbonate greenhouse
Building the foundation inside the house
When partitions are made of heavy materials (brick, cinder blocks), then a foundation is required.
Formwork with reinforcement cage for pouring tape
The construction process includes the following stages:
- the floor inside the building is dismantled;
- mark the location of the foundation trenches;
- dig recesses of the required depth (approximately 0.5 m) and width;
- cover the bottom with a sand cushion about 10 cm thick;
- install shields;
- lay waterproofing material;
- a reinforcement frame is installed inside, connecting it, for example, with anchors to the main foundation;
- pour concrete;
- The surface of the monolith is leveled, checking with a level.
After the supporting structure has gained strength, the construction of partitions begins. The width of the tape is determined by the dimensions of the material used. It should exceed the thickness of the interior walls by approximately 5 cm on each side.
Lightweight partitions can even be installed directly on the floor, securely fastening them to it, the ceiling and adjacent walls. This is done by creating recesses, using anchors or reinforcement.
After dismantling the floor, you can pour a monolithic slab, and then build partitions on it.
The entire process of building a foundation for interior partitions with your own hands is shown in the video below.
The construction of a foundation structure designed to support interior partitions during redevelopment is necessary if you plan to use heavy material. The simplest option is to use technology similar to the construction of a strip foundation. In addition to concrete, various blocks can be used. Correct calculation is important so that the support can withstand the load and the partition does not deform.
Foundation for interior partitions
Foundation for internal partitions
One of the stages of building a house or any building is the construction of internal partitions. Depending on their purpose, these elements are made from lightweight building materials such as plywood or OSB board. But sometimes the internal space requires the installation of capital partitions. They are made from heavier materials such as bricks or blocks.
Is it necessary to make a foundation for interior walls?
The service life of houses largely depends on the foundation. But a high-quality, solid foundation requires significant costs. Therefore, first of all, the material for the manufacture of partitions is determined. Depending on this, they conclude whether it is necessary to build a foundation for the partitions:
- Chipboard, plywood or plasterboard are lightweight materials. Partitions made from them will have little weight. Therefore, no additional foundation is required for such walls.
- Brick and concrete walls, as well as interior walls made of block materials, require a solid foundation. Therefore, there is a need to build a foundation.
Foundation for interior walls
When building a foundation for interior walls, some nuances should be taken into account:
- A high-quality foundation can only be obtained by simultaneously pouring the foundation under the main walls and interior partitions. This will avoid warping of the walls during seasonal ground movements.
- Laying the foundation for interior walls is carried out at a shallower depth than the main foundation. However, when building a house on sandy soil, you need to dig a trench to a depth of at least 50 cm.
- A layer of waterproofing must be laid on the foundation under the partitions. This will slow down the process of destruction of the foundation due to moisture penetration.
Construction of foundations for different types of houses
It is clear that houses come in a variety of sizes and number of floors. But still, both the size and number of storeys are dictated by the material from which the house is built.
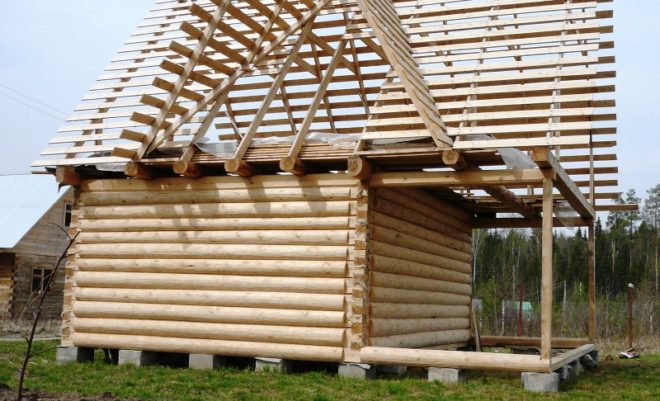
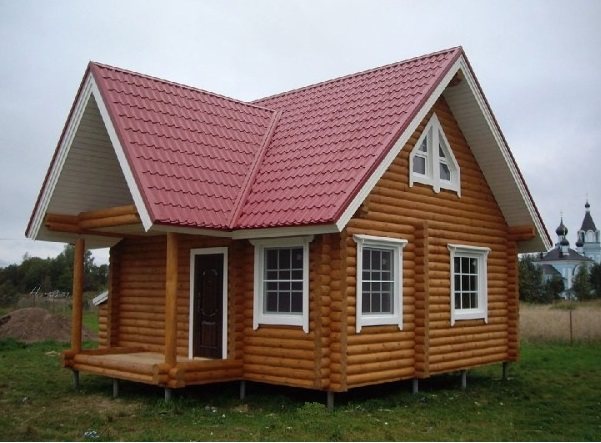
Foundation for a house made of timber or logs
These houses are very environmentally friendly, not very heavy, can be one- or two-story, have an attic or attic. But this is still a solid house that needs a solid foundation. In addition, both timber and logs are very hygroscopic and susceptible to rotting. Therefore, the requirements for waterproofing foundations for these houses are especially high. Almost all shallow and deeply buried foundations are suitable for such houses:
- monolithic slab;
- monolithic tape;
- prefabricated tape - from ordinary small concrete or aerated concrete blocks, from FBS and FL concrete blocks, brick, stone;
- piled from pipes or screw piles and even from logs.
A pile foundation made of pipes is conditionally suitable. Its resistance to load is low, so you will need to carefully calculate such a foundation. A foundation made of FBS and FL concrete blocks is redundant for a wooden house. A log pile foundation is good, but short-lived.
Photo gallery: houses made of logs and timber and their foundations
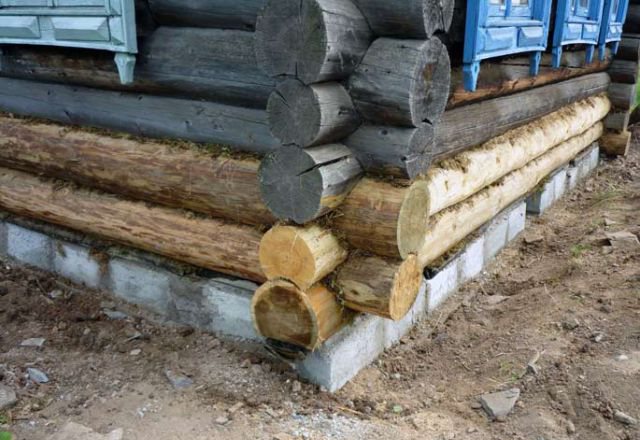
For a log hut, a foundation on a prefabricated strip of blocks is quite sufficient
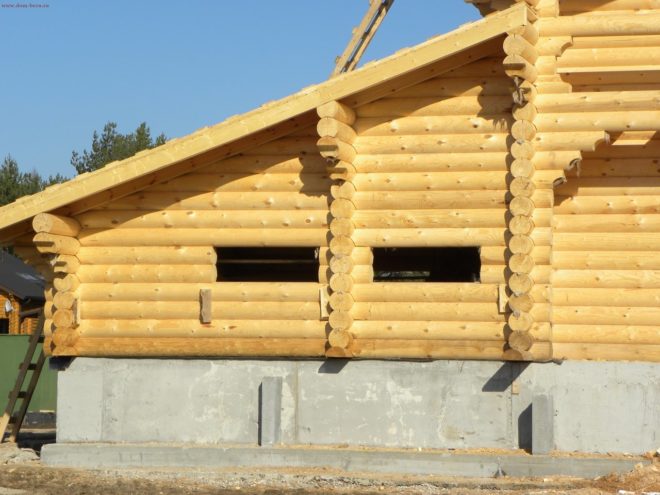
On sandy soils with low groundwater levels, a shallow strip foundation can be laid under a log frame
Small and relatively light houses are often built on a simple concrete block foundation.
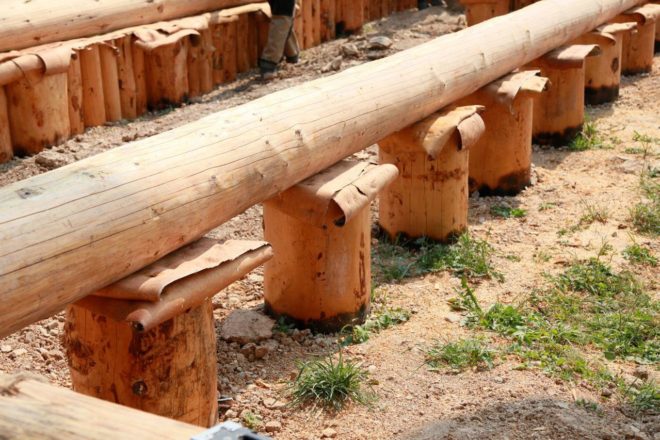
Wooden poles need to be very well treated with antiseptic compounds before being immersed in the ground.
A pile-screw foundation can be built in a few days with the efforts of two or three people
If the task is to build a massive house on soft soil, the choice can be made in favor of a bored foundation
Video: construction of a strip foundation for a light wooden house
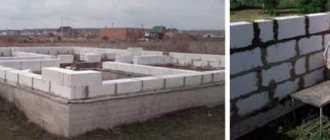
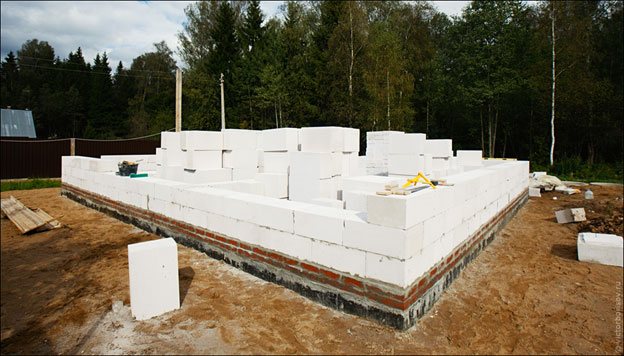
Foundation for a house made of aerated concrete, expanded clay concrete and cinder blocks or bricks
This is the heaviest and most capital type of house. The foundation for such a house must be significantly deep and carefully calculated for the load - especially if the house is not one-story. The following foundations are suitable for such houses:
- monolithic slab of sufficient thickness with good reinforcement;
- monolithic tape with good reinforcement;
- prefabricated strip - from ordinary small concrete or aerated concrete blocks, from FBS and FL concrete blocks, brick, stone, all - with reinforcing concrete belts and good masonry reinforcement;
- piled from screw piles with a strong metal or concrete grillage designed for heavy loads.
A brick foundation is still more suitable for a brick building, but for houses made of blocks it is better to choose any other of the listed options.
Photo gallery: houses made of blocks and bricks and their foundations
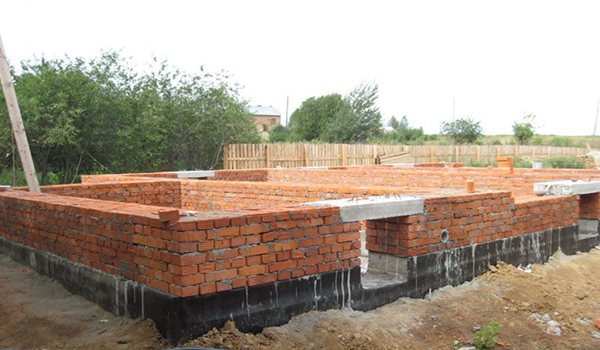
A red brick house can be built on a strip of heavy concrete blocks
Sand-lime brick cannot be used to build a foundation, so the foundation for this house is made of red solid material
A slab foundation is best suited for a heavy house made of foam blocks.
The weight of a house made of aerated concrete blocks must be evenly distributed onto a block strip foundation made of large and heavy elements
The monolithic tape forms a strong and perfectly level base on which you can build the frame of a brick house
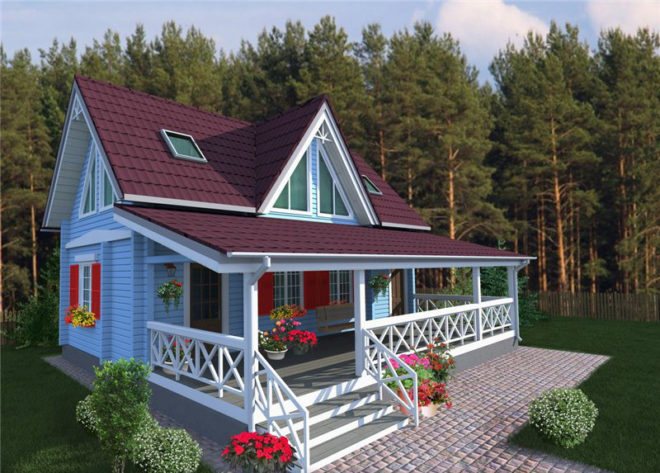
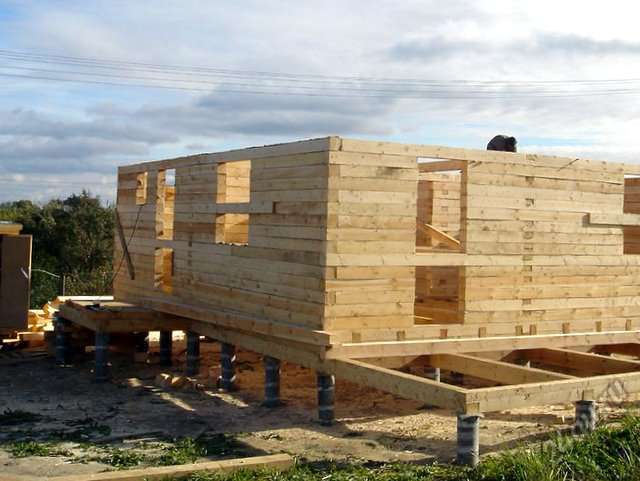
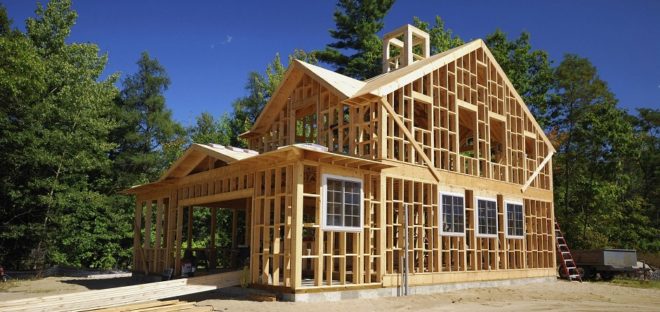
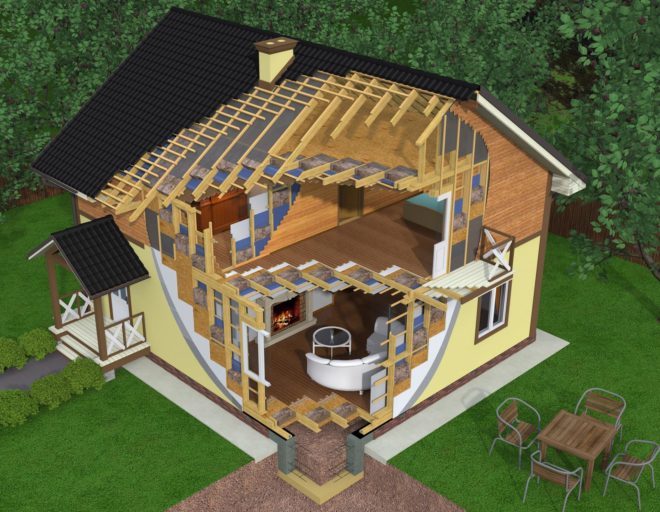
Foundation for a frame house
A frame house is a structure whose design is based on a load-bearing frame, which is a post-and-beam system. The frame, as a rule, is made of timber (sometimes from a metal profile), and the walls are made of a so-called sandwich: an outer covering, an inner covering, and between them there is a heat insulator (mineral, basalt or other type of wool). Frame houses have gained immense popularity due to the ease and speed of construction and the extremely low cost of construction. A frame house is very light, it is a rigid structure, and therefore can easily withstand slight ground deformations. Almost all types of foundations are suitable for it, including shallow ones:
- monolithic slab;
- tape monolithic;
- prefabricated strip - from ordinary small concrete or aerated concrete blocks, brick, from rubble stone;
- columnar monolithic;
- columnar block;
- piled from screw piles;
- foundations made of barrels, polyethylene and asbestos-cement pipes and even tires.
We must still remember that foundations made from barrels, polyethylene and asbestos-cement pipes and tires are not very reliable, and they should only be used for very small frame houses.
Photo gallery: frame houses and their foundations

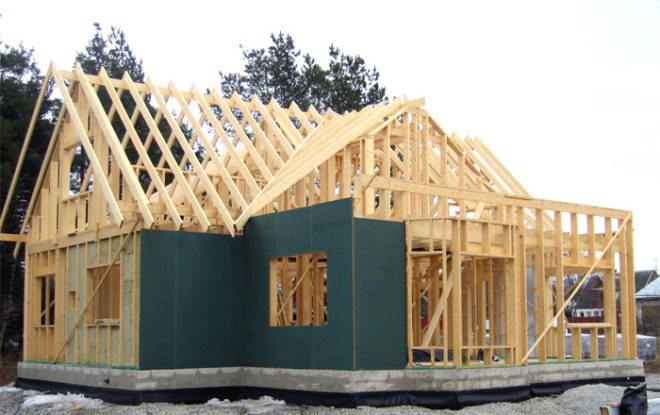
In order to save money, small frame houses are often placed on shallow columnar block foundations
For large frame houses designed for permanent residence, they try to install capital foundations, for example, monolithic slabs
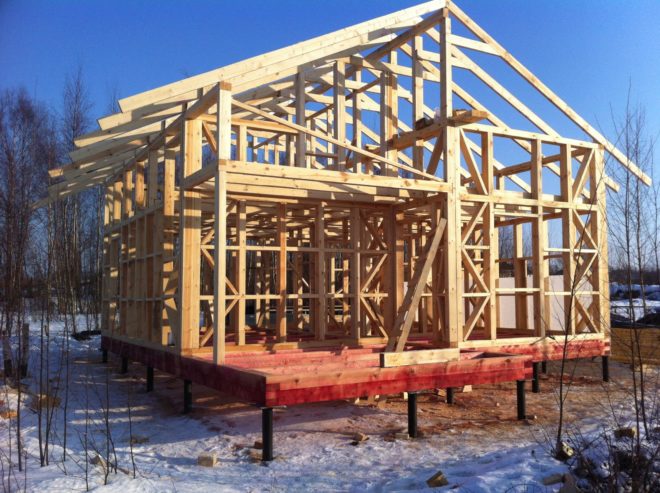
If the soil condition allows, for a two-story frame house you can limit yourself to a strip foundation
A pile-screw foundation can be constructed at any time of the year
When installing a strip foundation made of foam blocks, you need to carefully calculate the loads acting on it
Video: building a foundation for a frame house
Construction of a foundation for interior walls
Foundation for heavy interior walls
A high-quality foundation for internal partitions is obtained if the foundation is poured simultaneously under all walls. However, in some cases it becomes necessary to erect partitions in an already built house. In this case, work on pouring the foundation for the internal walls is carried out in the following order:
- Inside the house, a hole up to 50 cm deep is dug across the entire area. The bottom of the hole is covered with sand and thoroughly compacted.
- Mark the trench. To make the partitions even and straight, you need to lay the foundation evenly. Therefore, at this stage it is recommended to use a building level.
- Now you can start digging a trench. The soil should be removed to a hard layer. The width of the trench depends on the material chosen for the manufacture of the partitions, plus a small margin of about 2 cm. This will prevent the partitions from settling and cracks appearing on them.
- For greater strength, it is necessary to connect the common foundation with the base intended for interior walls. To do this, holes are drilled in the foundation using a hammer drill. This is done in those places where the trench comes into contact with concrete. Reinforcement rods are installed in the resulting holes.
- The finished trenches are filled with concrete mixture.
- The upper part of the new base is carefully leveled and smoothed. On this basis, you can build a high-quality partition.
- Any construction work on such a basis can be carried out only after 3-4 weeks. During this time, the concrete solution will completely harden and the base will become stronger.
The foundation for the partitions can be made in another way: pouring the base of the floor with concrete mortar. Using this option requires significant material costs and careful soil preparation.
- First, remove the top layer of soil.
- In places where it is planned to erect partitions, trenches are dug to a depth of 50 cm.
- The entire area, including the bottom of the trench, is carefully compacted, generously wetting and adding crushed stone. A mesh of reinforcement is additionally laid in the trenches.
- The entire area is filled with concrete mortar in one step. This will ensure the connection between the main foundation and its branches.
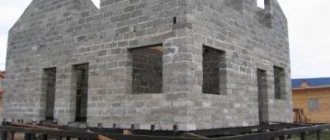
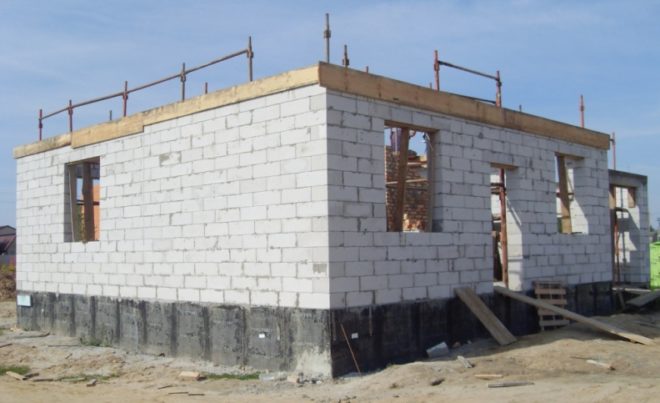
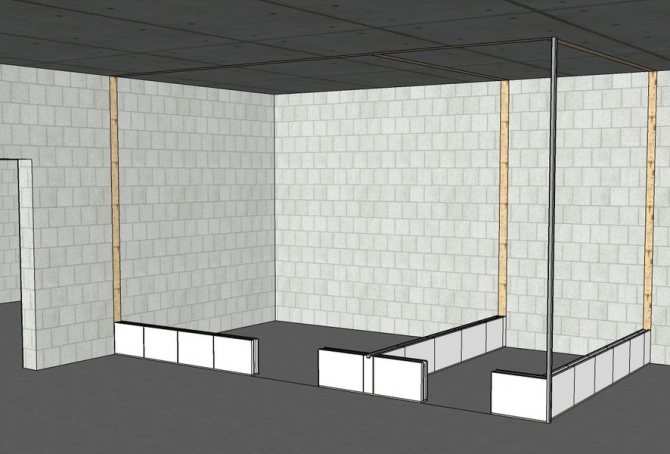
Construction of partitions
The construction of aerated concrete partitions is not associated with the laying of load-bearing external walls; it is carried out in a ready-made box. It is important that the blocks are not exposed to moisture before construction begins. Therefore, they need to be stored in a place protected from precipitation.
Preparatory work
Before laying an aerated concrete partition in a house or apartment, you need to thoroughly clean the floor and walls at the site of the masonry from construction debris and dirt. And prepare all the necessary tools and materials.
From materials in addition to the blocks themselves, you will need a special adhesive for aerated concrete, with the help of which a very thin bonding layer no more than 3 mm thick is formed. And also, in case of an uneven base, a small amount of cement mortar.

Adhesive for laying aerated concrete blocks
In addition, you need to stock up on mounting foam, metal rods for reinforcing the masonry and L-shaped metal connectors for attaching the partition to load-bearing walls.
The following connectors can be used:
- Hand saw or grinder for cutting blocks;
- Notched trowel;
- Master OK;
- Wall chaser for making grooves in blocks for reinforcement;

Manual wall chaser
- Building level;
- Cord;
- Rubber hammer;
- Grinding tool for smoothing out defects on the surface of blocks;

Planer-grater for aerated concrete blocks
- Drill with attachment for mixing glue and masonry mortar.
First row
The first row must be laid out perfectly evenly, then there will be no problems with the laying of subsequent rows:
| Image | Description |
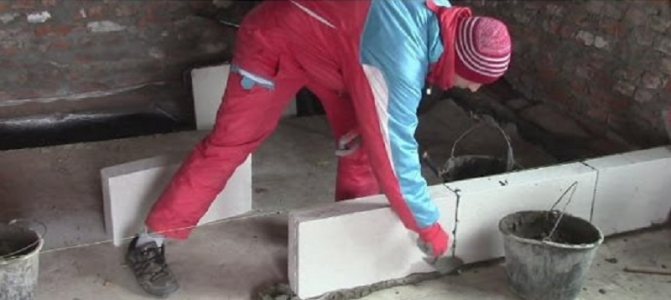
| Installation of aerated concrete partitions begins with marking the first row on the walls and floor and determining the horizontal level of the floor. |
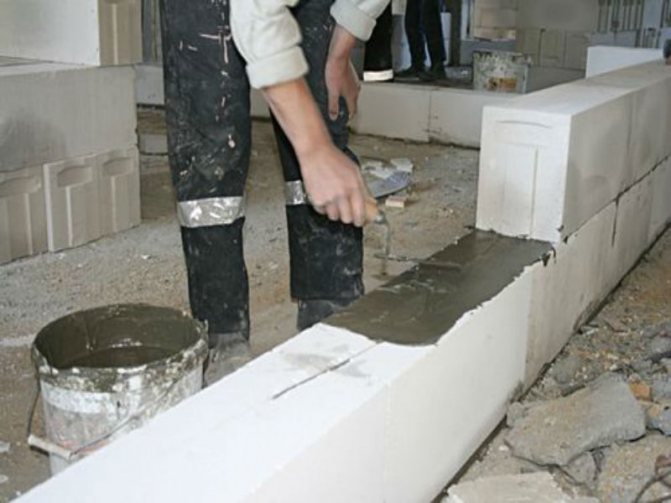
| According to the markings, prepared glue or, if the floor is uneven, cement mortar is applied to the floor. With its help, alignment is performed; |
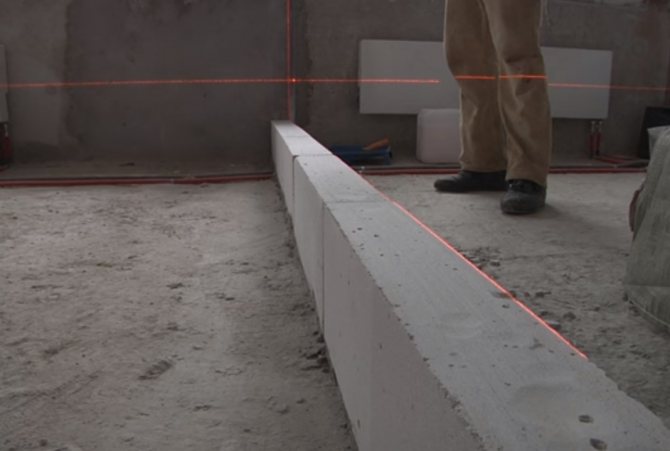
| The first row of blocks is laid out along a cord stretched horizontally along the top level of the row. But it is much more convenient to use a laser level; |
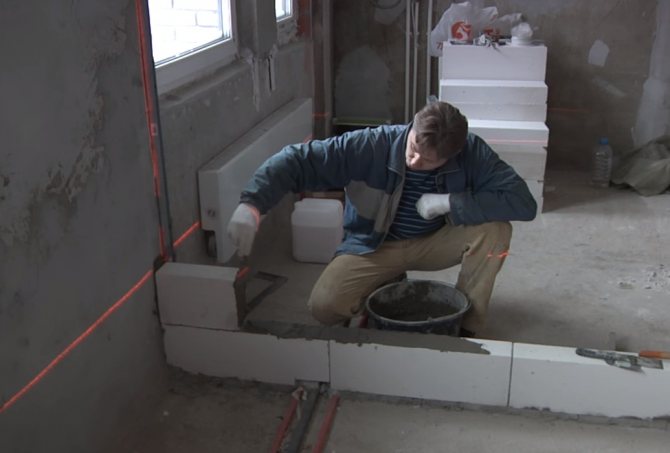
| The seam between the first block and the wall should be half a centimeter thick. The ends of the following blocks are coated with glue, applying it with a notched trowel so that the composition is not squeezed out onto the front side of the masonry, and its thickness is no more than 2-3 mm; |
| If the partition blocks have connecting grooves and protrusions at the ends, there is no need to lubricate them with glue. |
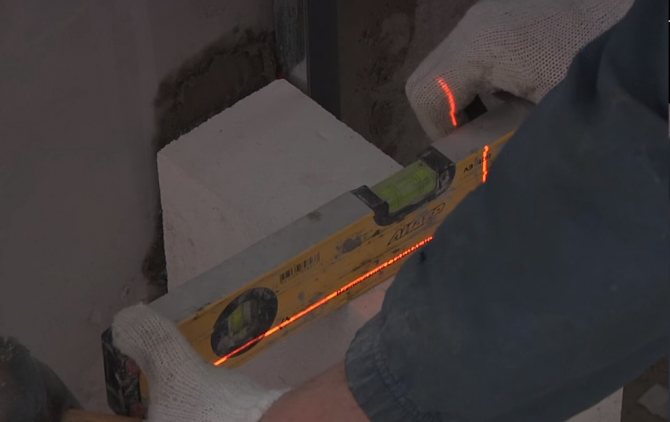
| To ensure that the aerated concrete partition is level, the masonry is constantly checked with a building level and the blocks are tapped and cased with a rubber hammer; |
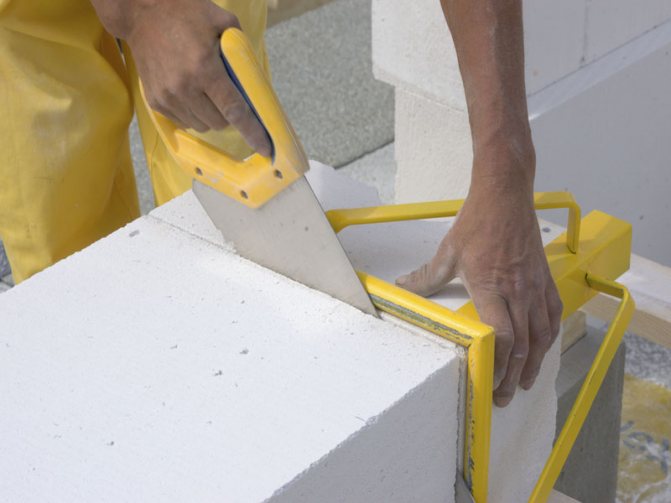
| If necessary, the last block is cut with a hacksaw so that it is 0.5 cm shorter than the distance between the penultimate block and the wall. |
After laying the first row, take a break of several hours for the cement mortar to set.
Subsequent rows
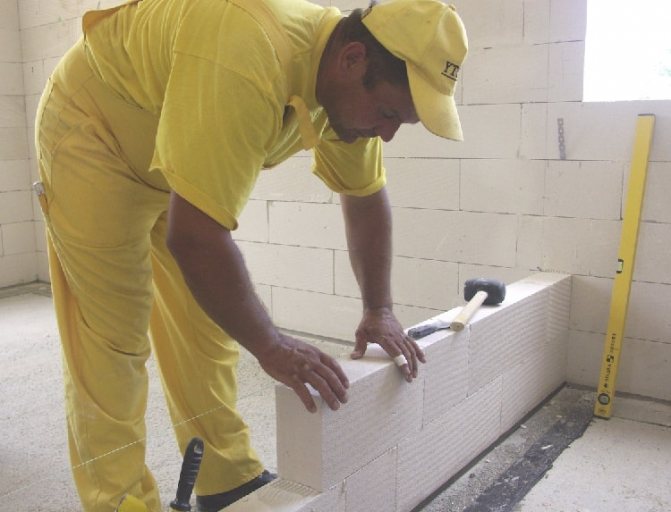
Next, the aerated concrete partition is built with your own hands, shifting the blocks by half the length. When laying each stone, it is leveled, and the row is guided along a cord or laser beam.
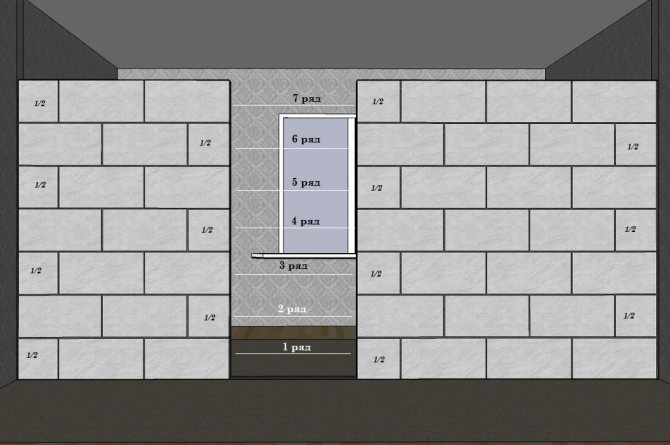
Scheme of stacking blocks with offset
Advice. Since the adhesive solution is applied in a very thin layer, it is important to maintain horizontality and perfect evenness of the rows. Therefore, the surface of each already laid row is cleaned with a brush and, if necessary, sanded with a special plane.
Installation of aerated concrete partitions, unlike masonry made of brick or concrete blocks, has its own nuances:
- The connection of the partition with the load-bearing walls is carried out in every third row using T-shaped anchors, stainless steel corners or pieces of galvanized punched paper tape bent at right angles. Such metal connectors are attached with dowels to the vertical plane of the wall and the horizontal plane of the laid out row of gas blocks.
- Aerated concrete partitions are reinforced every 2-3 rows with metal rods with a diameter of 10 mm. For reinforcement in the center of the laid row, longitudinal grooves are made using a wall chaser, into which, after dust removal, the rods are laid and sealed with adhesive.
Note. Instead of reinforcement, you can use galvanized metal strips 2 mm thick and 50 mm wide. They are laid directly into the masonry joint when laying out the next row.
- If the height of the partition is more than 3.5 meters and the length is more than 8 meters, it is reinforced with a monolithic armored belt.
The armored belt is made in the same way as for load-bearing walls
The last row
Since aerated concrete does not have high strength, serious vertical loads on it should be excluded. Therefore, partitions in a house made of aerated concrete should be approximately 20 mm below the distance between the floor and the ceilings, the pressure of which can cause deformation of the blocks.
When laying out the last row, this must be taken into account, cutting the blocks to the required height and not filling the gap between them and the ceilings with glue or cement mortar. Instead, the resulting gap is filled with polyurethane foam, forming a springy expansion joint.
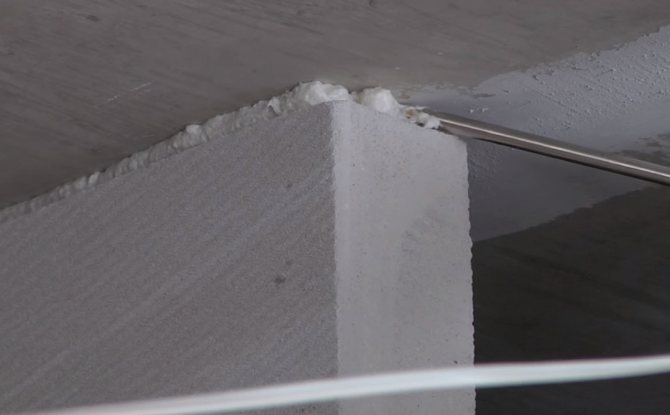
Foaming the gap between the partition and the ceiling
Arrangement of openings
The choice of method for covering openings depends on their width:
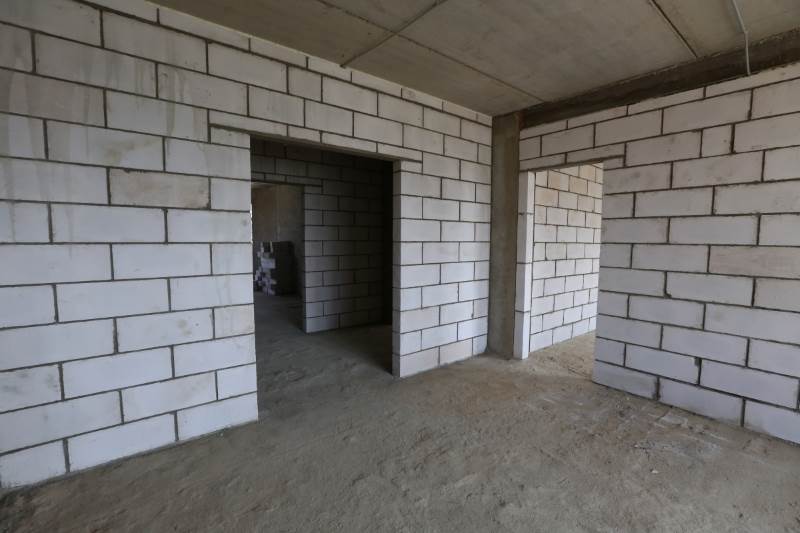
- If they are less than 80 cm, it will be enough to lay out the ceiling with ordinary partition blocks without using lintels. To do this, they are installed on a temporary supporting frame so that the joint between the blocks is in the middle of the opening. The next rows are laid out as usual, with the seams offset, and after the glue has dried, the frame is removed.
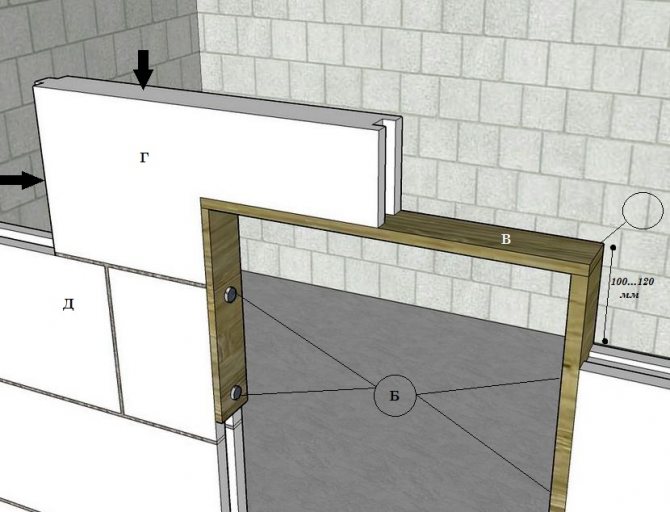
Covering the opening with partition blocks
- Wider openings are covered with monolithic concrete, metal or wooden lintels.
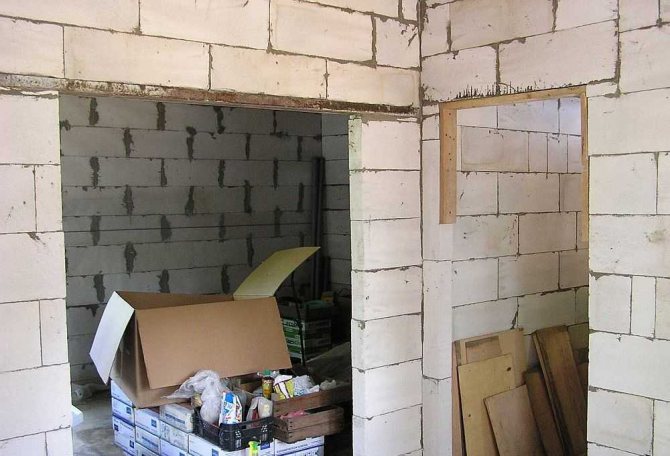
In this photo, the wide opening is blocked by a metal channel
- On partitions with a thickness of 200 mm or more, an option with permanent formwork made of hollow U-shaped aerated concrete blocks is also possible. They are also installed on a temporary supporting frame and glued at the ends, and a reinforcing frame is installed in the resulting tray and filled with concrete. It is carefully leveled along the upper plane of the masonry and left for a while to gain strength. After which the support can be removed and masonry can continue.
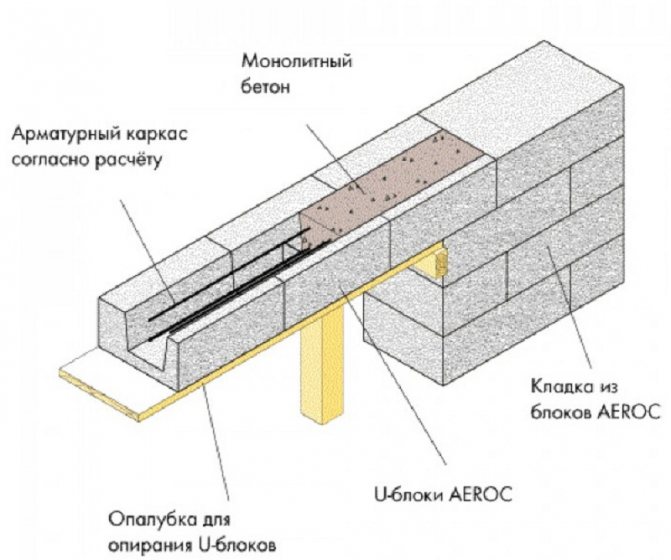
Diagram of the design of prefabricated monolithic jumpers