February 17, 2020 Stroyexpert Home page » Foundation » By construction project
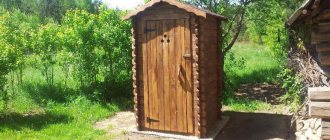
Foundation for a summer shower
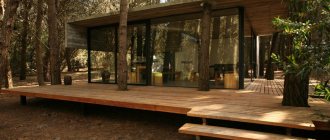
Setting up a summer shower in your dacha is not difficult. And this place is very popular among summer residents who get the opportunity to enjoy a refreshing shower on hot days. If the structure is constructed correctly, the shower guarantees ease of use and durability of the structure.
The foundation for a garden shower must meet minimum technical requirements in order to withstand constant exposure to water. Before building the base, you should decide on the location where the shower will be located. This is determined by several criteria:
- Approach to the shower.
- Water supply and drainage organization.
- No interference from neighboring buildings.
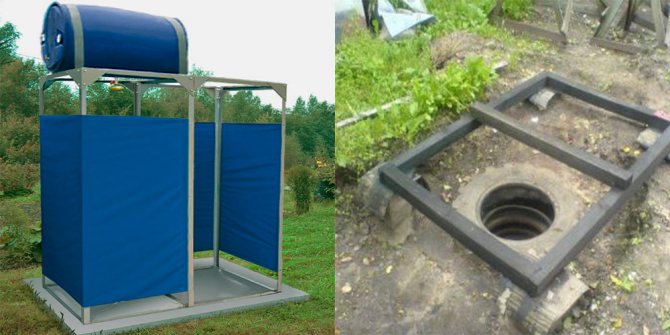
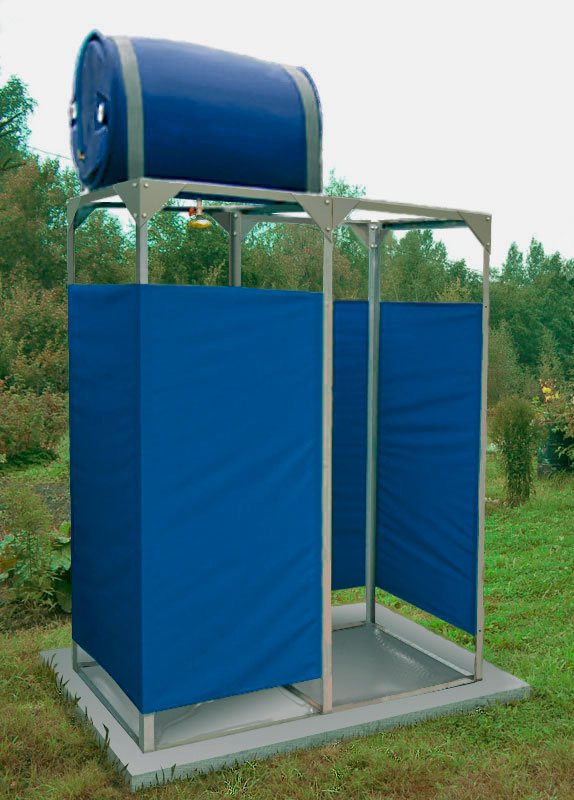
A particularly popular design is one in which water is heated by the sun’s rays and poured into the tank using an outlet hose.
Foundation criteria for a summer shower
It is not difficult to build a foundation for a shower. To do this, a person will need the following list of tools:
- Shovel and other tools for digging a pit.
- Concrete mixer or special container for preparing the solution.
- Hydraulic level for monitoring geometric parameters.
- Cord for securing the foundation level.
- Hacksaw.
- Drill.
- Master OK.
The materials for a summer shower will require:
- Wooden beam.
- Cement.
- Sand.
- Crushed stone.
- Metal poles and pipes.
- Boards for installing formwork.
- Fastening elements.
The foundation for a country shower will not experience serious loads, so its construction does not require much effort or precision. In its standard form, the foundation for a shower is built in 1 day and a minimum time is allowed for the mixture to harden.
Influence of design on the type of base
The foundation for a country shower is selected based on the weight of the structure and the degree of capital construction. Therefore, you should first figure out what kind of shower can be installed on a summer cottage, and only then move on to building the foundation.
In general, one of the following types of shower can be used in the country:
- Treadmill shower is the simplest option . In this case, a container with water (which can be installed at ground level) and a symbolic frame are sufficient; it is sheathed with wooden planks or simply curtained with an opaque film. There is simply no point in talking about any kind of foundation, the weight of the frame does not exceed 10-20 kg, and the main drawback of the design is its dependence on the weather, suitable only for periodic visits to the dacha;
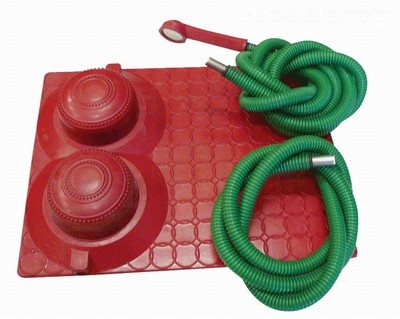
The simplest country shower
Note! The shower got its name - trampler - because the necessary pressure is created through human efforts; the principle of operation is similar to car pumps.
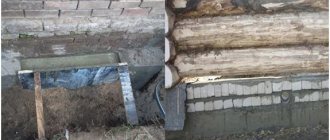
- shower on a counter - the main difference from the previous option is that the water supply can be organized either from a water supply or from a water tank installed on the roof of the shower stall . If the water supply is organized from a water supply system, then you can do without a serious foundation, but in the second case you can’t do without it. The soil may not be able to support the weight of the water tank, the cabin will warp and collapse;
This design does not require a serious foundation.
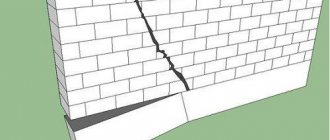
- a foundation for a shower in a country house is also considered mandatory if the shower is built of brick . Of course, you will have to tinker, but you can use it not only on a hot summer day.
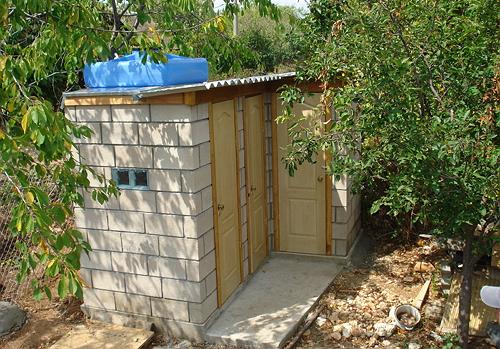
In this case, you can’t do without a foundation.
Drain and septic tank (septic tank)
Before installing the frame, consider a water drainage system . It is not recommended to place the septic tank under the cabin, otherwise an unpleasant odor will soon appear there. The same applies to the direct discharge of water into the soil under the shower, otherwise problems with soil destruction will occur.
Equip a septic tank or a regular settling pit a few meters from the cabin, connecting them with a drain pipe and a ditch covered with film, roofing felt, etc. Make the water drain under the shower slope towards the trench or sump. You can also use a special tray from which you can drain water to the side using a hose. It will be good if plants that strongly absorb moisture grow nearby.
Types of foundations
We can recommend several options for a country shower:
- columnar;
Note! A columnar foundation is often confused with a pile foundation; their design is very similar, but it is not entirely correct to identify these concepts. The fact is that piles can be used on weak soils, but the columnar version is used only on soils with good bearing capacity. But a country shower is a simple design, so such inaccuracy is forgivable.
- columnar with concrete grillage;
- tape;
- solid - used quite rarely.
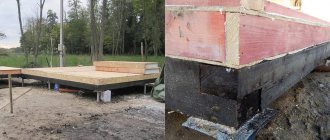
Lightweight structure installed on a concrete slab
As for the columnar foundation, you can imagine it as several concrete pillars placed around the perimeter of the shower stall. You can simply fasten a wooden beam on top (analogous to the bottom frame in frame construction) and only then proceed to the construction of the above-ground part.
It is allowed to combine the pillars on top with a concrete grillage. This design will be much simpler and quite capable of withstanding the load from the brick walls of a permanent building.
Due to the larger area of the base, a do-it-yourself strip foundation for a shower is suitable for weak soils. The main disadvantage can be considered the increased volume of excavation work compared to a columnar foundation.
Selecting a location
The wooden shower cabin should be located in a sunny, well-ventilated place. Constant humidity requires quick drying of the boards, otherwise the structure will become moldy and rot.
What is taken into account:
- Lack of tall trees.
- Sufficient height for the tank to heat up in the sun.
- Good ventilation of the area where the shower is located.
- Possibility of installing a pit for drainage or a drainage system.
Important ! Even a light shadow from a nearby building or tree significantly reduces the heating of water in the tank. Therefore, a summer shower for a dacha, made by yourself, is installed in an open, well-lit place.
Technology for constructing foundations of various types
The procedure for constructing foundations of different types is quite different, as well as the labor costs for their construction. Therefore, the construction technology of each of the mentioned types will be considered separately.
Pile and column foundations
Even before you start constructing the base, you need to draw out the contours of the shower from the project into nature. Typically, the dimensions of the structure do not exceed 2.0 x 2.0 m, so this can be done using ordinary twine and tape measure, and mark the corners with metal pins.

Scheme for bringing out the shower circuits in real life
The step between individual piles can be 1.0 - 1.5 m, so depending on the size of the future cabin, it may be necessary to either install them only in the corners, because 1 more pile will be placed in the center of each wall.
To facilitate the work, it is very convenient to use ordinary asbestos-cement pipes as permanent formwork. In this case, it will be much more convenient and practical to carry out excavation work using not a shovel, but a hand drill, which will literally “drill” holes in the ground for pipes.
Hand drill
Further instructions for performing work will look like this:
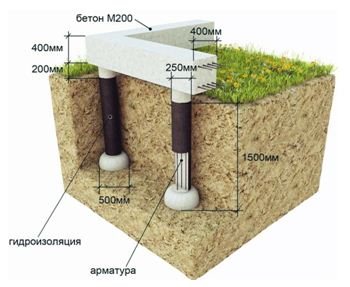
- At the bottom of each hole, it would be a good idea to lay a sand and gravel cushion (a layer of sand and a layer of crushed stone on top). With a pit depth of about 1.1-1.5 m, the thickness of each layer can be 10-15 cm. Each layer must be thoroughly compacted, first moistened with water;
Note! A piece of ordinary roofing felt or other waterproofing material is laid on top of the crushed stone layer; this is necessary to ensure that the water from the concrete mixture does not leave too quickly.
- then formwork (asbestos-cement pipes) is installed in the prepared pits and fixed so that it does not warp when pouring concrete;
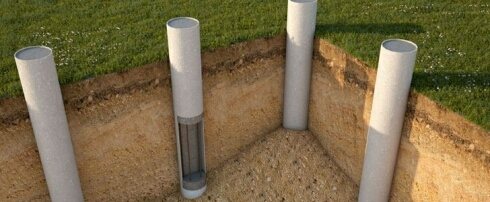
In cross section the foundation will look something like this
- you also need to remember about the reinforcement frame, and it’s not enough to just stick a couple of metal pins in, you need to build a full-fledged frame. Considering that we plan to build a regular shower, we will give preference to a knitted frame. For a pile diameter of about 20 cm, 6 reinforcing bars with a diameter of 12 mm will be enough; we combine them into one whole, tying them with ordinary wire (hence the name);
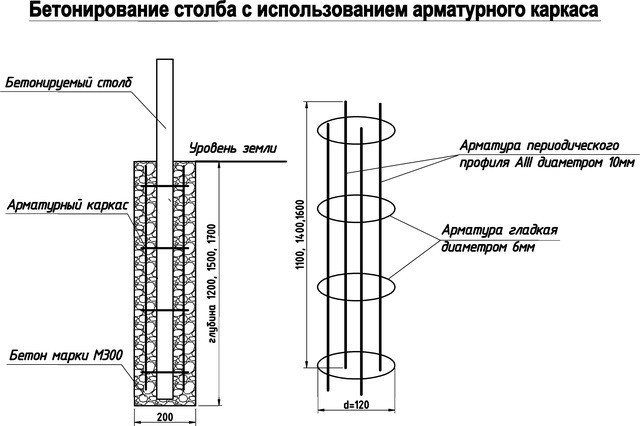
Diagram of a simple reinforcement cage
- After this, you can already pour concrete into the pipes; using large crushed stone is not recommended - it can get stuck between the reinforcing bars.
If you plan to lay a wooden beam on top of the piles (bottom frame), then a short reinforcing bar must be fixed in the upper part of the pile so that part of it (about 10-15 cm) rises above the concrete surface. It will be useful when laying beams; you can drill a hole in them and literally string it on it, the strength of the connection is guaranteed.
Scheme of fastening the strapping beam to concrete
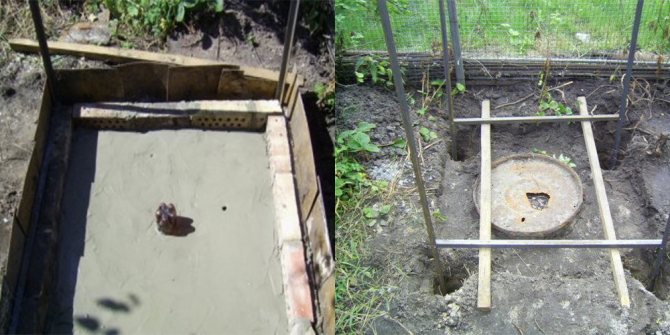
In the case where the foundation of the summer shower is planned to be columnar, the order of work remains almost the same. The difference is that the holes will definitely have to be dug by hand.
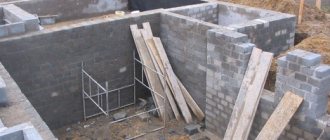
The foundation itself consists of separate pillars (ordinary brickwork can be used for their construction). To reduce material consumption, it can have a stepped shape, that is, the lower part has large dimensions in plan (for a more uniform distribution of loads on the base).
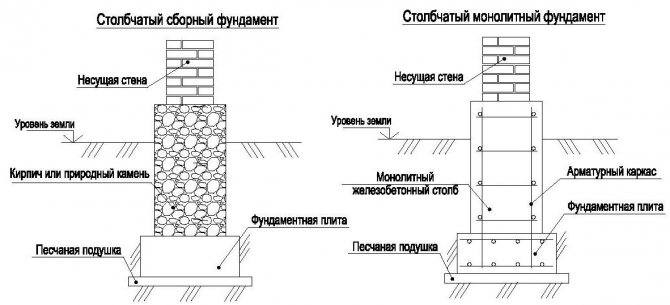
Columnar foundation options
At the bottom of the pits under the pillars, a gravel-sand cushion is placed in the same way, and when installing the pillars themselves, reinforcing outlets are left for attaching the strapping beams. Separately, it is worth highlighting foundations that use a concrete grillage. This design can be used, for example, in the construction of a brick shower.
In this case, the work is carried out in 2 stages:
- first, the piles themselves are concreted, and reinforcement outlets for all frame rods must be provided;
- then wooden formwork is constructed and the grillage is concreted. This type of foundation is more reliable, but it is also more labor intensive, so it can only be recommended for a major shower.
The structure of a columnar foundation with a grillage
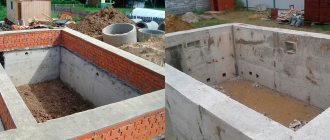
Strip foundation
If you do not take into account the larger volume of excavation work, then it can be considered the best option for a capital building made of brick or concrete blocks.
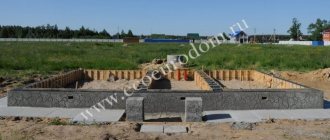
Do-it-yourself strip foundation for a summer shower is arranged in the following sequence:
- the contour of the shower is taken out into reality and a pit is dug around the perimeter with a width slightly larger than the width of the future wall. As for the depth, you need to exceed the soil freezing depth for a given region, usually 1.0 m is enough;

One of the strip foundation options
- More serious reinforcement cage will be required. In the lower part (stretched zone) it is recommended to use A-III reinforcement with a diameter of 12 mm; the remaining rods will not experience serious loads, so a smaller diameter can be used;
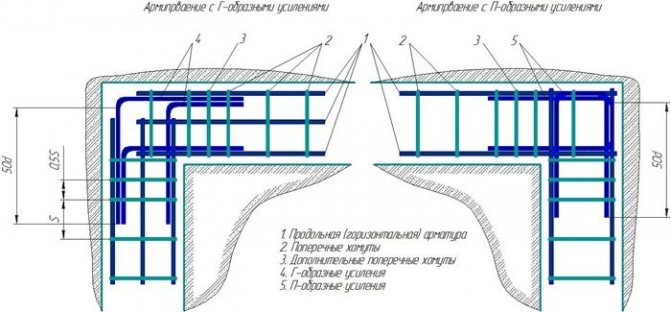
Strip foundation reinforcement options
- along the edges of the dug trench, formwork is installed from wooden boards approximately 30-40 cm high. The edge of the foundation should rise above the ground surface;
- Concreting is done in one go; the ideal option would be to additionally compact the mixture with a vibrator, but not everyone has this tool. Therefore, it can be recommended to simply not use too coarse aggregate so that voids do not form in the foundation during concreting.
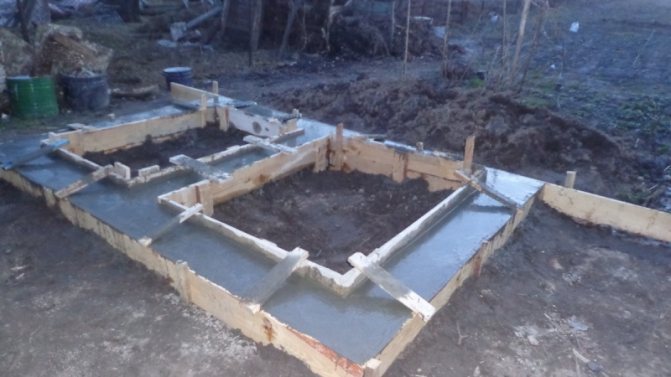
In the photo - concreting is completed
Compared to the types of foundations already discussed, more material will be used for a strip foundation, which means its price will be higher than that of a pile or column foundation. (See also the article Sewerage for a shower stall: features.)
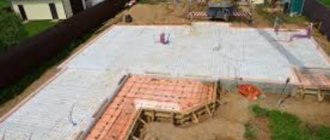
Slab foundation
In fact, this type of foundation is used mainly in the construction of houses, when a large load needs to be distributed over a large area. For installing a shower in a country house, this option cannot be called recommended.
The main difference is that the entire area that the shower will occupy will be concreted.
The main steps remain the same:
- the contours of the shower are brought out;
- a pit is being dug. Its depth does not have to be below the freezing depth. The thickness of the slab will be approximately 15-20 cm; it is also necessary to provide 2 layers of sand and crushed stone of approximately the same thickness. So, taking into account the sand and gravel cushion, the thickness will be approximately 60 cm;
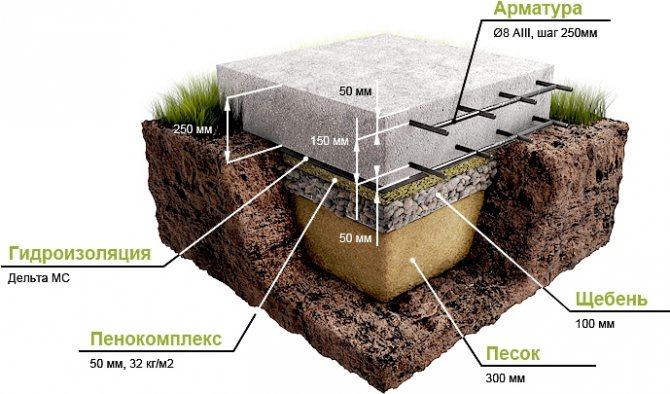
The structure of an ideal slab foundation
- Before concreting, reinforcing bars must be laid on the shower waterproofing layer. The lower part will work in tension, so reinforcement is very important here.
In terms of labor costs, this type of foundation far exceeds all of the above. That is why it is used relatively rarely under the shower.
Cabin dimensions
Plan your shower to be relatively spacious so that you can not only move comfortably in it, but also place towels, bathrobes, shampoo and other bath accessories there.
The total height of the cabin is usually taken to be 2.3-2.5 m, the height from the floor to the shower head is 1.9-2.0 m. In this case, design the length and width of the cabin based on the size of the person, but with a side of at least 1 m The width of the shower should be slightly greater than the “depth”.
The most convenient parameters for a shower stall are 1.6 * 1.0 * 2.5 m, as well as 1.9 * 1.4 * 2.5 m.
By the way, you can plan a shower consisting of two sectors: a changing room and the actual bathing area, which is separated by a curtain and a threshold.
In conclusion
Any building requires a reliable and solid foundation. In the proposed material, the main emphasis is on the foundation for a more or less capital shower; simplified options, such as digging in wooden pillars, were not considered due to their fragility.
The video in this article discusses the features of different types of foundations. And although the review in the video is made in relation to the construction of houses, the design of the foundation does not change when it is used for a shower.
Did you like the article? Subscribe to our Yandex.Zen channel
Frame and harness
Of course, tall metal pillars can be concreted as supports to the very top of the cabin instead of frame beams, but metal is more difficult to work with and costs more.
To make the frame stable, use a strong hewn wooden beam 10*10 cm for its installation. Treat the beams with a water-repellent agent - thanks to this the wood will last much longer.
First, attach the bars with bolts to the pipe caps, tying them around the perimeter - this will be the lower frame of the future frame.
Now, separately, on the ground, mount the upper frame and attach 4 racks to it in the corners with bolts, nails and metal squares. Then tack the vertical beams to the bottom frame already installed on the foundation. As a result, all axes of your structure should coincide.
Start dressing already inside the booth itself. You should start from the floor boards, while the bars of the bottom ligation of the foundation are used as logs for the flooring. If necessary, leave gaps between the floor boards to allow water to drain.
To make the structure reliable, be sure to attach wooden struts diagonally to the side posts into the thickness of the future walls (not into the trim).
Covering a country shower
Having finished installing the frame, you can begin covering it with metal profiles on three sides. The metal profile is attached to the created frame with self-tapping screws or rivets, which are located through two waves. Self-tapping screws are screwed evenly into the bottom of the wave, otherwise they may corrode.
NOTE! The best fastening element for a country shower is a self-tapping roofing screw with a washer made of self-vulcanizing rubber. When choosing the length of the fasteners, make sure that they do not “stitch” right through the cross members of the harness. After finishing fixing the sheets with a metal profile, cover the trim with waterproof paint or a special sealant.