The construction and sale of log houses made of round timber, cleared of coniferous forest bark, is experiencing a real boom.
At the same time, such popularity obliges companies and private developers involved in wooden architecture to consider new, more appropriate methods of building houses that differ from the generally accepted ones. Installing a wooden building on piles is a fairly well-known, but due to its specifics, rarely used construction method. Our grandfathers installed, if necessary, houses and bathhouses on wooden piles. The modern construction industry offers screw piles made of metal as one of the simplest, most economical, and at the same time universal and durable methods for constructing a foundation. We will consider the pros and cons of such a foundation below. Let's dwell on when is it appropriate to build a building made of round timber on screw piles?
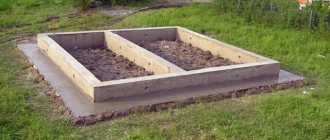
Monolithic foundation
A monolithic or floating foundation for a log house is used if a house needs to be built in an area where groundwater is located close to the surface or seasonal soil movements are noticeable. This option is also suitable for working in swampy areas. With slight soil movement, the walls of the building will deform.
Disadvantages of a monolithic foundation:
- high price;
- impossibility of constructing underground premises (cellar, garage);
- long construction period.
A monolithic foundation is made under heavy buildings. Houses made from logs weigh little. After installing the foundation, you need to wait 45 days for the concrete to gain maximum strength. Accordingly, it will not be possible to quickly build a house.
When constructing the base, the area is first leveled and a recess (pit) is prepared. Its height is on average 25 cm. Then, a layer of gravel and sand, hydro- and vapor barrier is laid. After this, you need to install the formwork, a frame made of reinforcement and pour the concrete mixture. In order for the base to withstand the load, air bubbles must be removed after pouring the solution.
Construction of a foundation for a log house
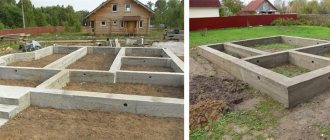
Making a foundation is mandatory during the construction of absolutely any structure; another thing is that in some cases it is necessary to make a heavy monolithic foundation, and in some places you can limit yourself to point supports. In this situation, the log house is in the most advantageous position, since wooden houses are comparatively light and it is not necessary to construct expensive foundations for them.
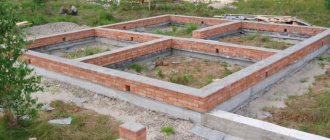
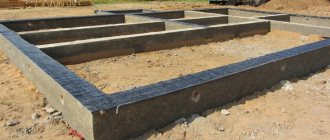
An example of a strip foundation for a wooden house
Columnar foundation
A columnar foundation for a log house is only suitable when working on stable soils. In cold regions of the country, where the phenomenon of frost heaving is observed, you should consider other types of structures. It will not be possible to build a house even if the fluctuations in the height of the site in its various places exceed 2 m. A foundation of this type cannot withstand heavy loads. It is used in the construction of one-story buildings of small mass (baths, summer kitchens).
The advantages of the design include:
- speed of construction;
- low cost.
When constructing the foundation, columns are used from various materials: brick, asbestos pipes, reinforced concrete or ready-made blocks. Pre-level the soil and dig pits for supports in increments of 1.5-2 m. Gravel and sand and waterproofing are placed in each of them. Then the pillars are installed.
Replacing the crown
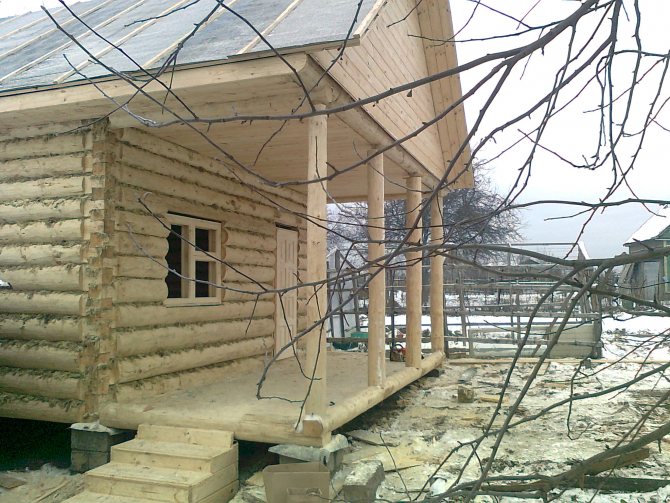
We didn’t buy logs of suitable diameter; we bought a standard beam with a cross-section of 150 x 150 mm. The dimensions of the log house were 6.2 x 6.2 m. Therefore, even beams were selected for the lower crown, with a length of at least 6.3-6.4 m.
For ease of work, it was necessary to dismantle the entire floor in the house, and this resulted in a whole problem. The partitions had to be carefully dismantled in order to restore them after renovation, and cabinets and other furniture had to be removed. It was not possible to put everything outside - the territory of the site did not allow it, and there was nothing to shelter it all from the weather. Therefore, they decided to leave the most bulky things inside the house, lowering them to the ground.
The log house on the north side had the largest number of splices of logs in the crowns, and there were also three openings in the wall - two windows and one door, which posed a certain danger when raising the house. The fact is that when working with jacks at two corners of the house, the log of the lower frame bends noticeably, taking on a significant part of the weight of the entire building, so there was a possibility that with uneven lifting the crowns would separate. The most dangerous case seemed to be if the lower log of the frame broke.
To be on the safe side, we fastened the crowns on both sides of the doorway with two pairs of boards with a cross-section of 50 x 150 mm outside and inside the frame (Fig. 1). Moreover, the logs of the lower crown and the boards were tied together with steel pins 0 20 mm with nuts at the ends, and the upper logs were fastened by nailing the boards with 200 mm nails.
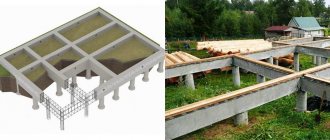
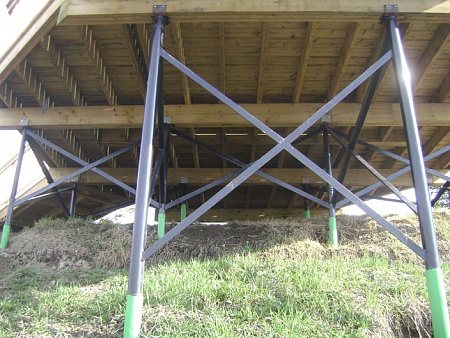
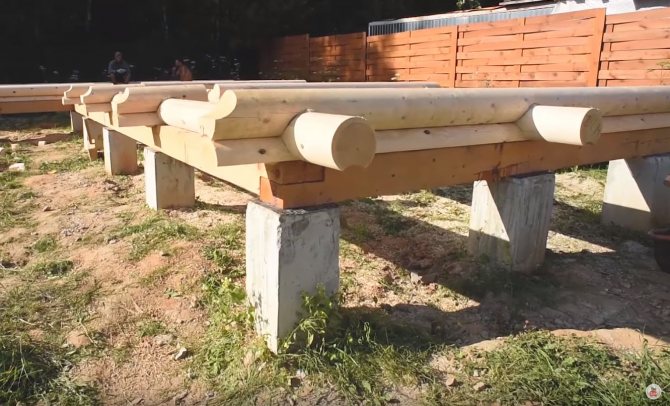
Pile-screw foundation
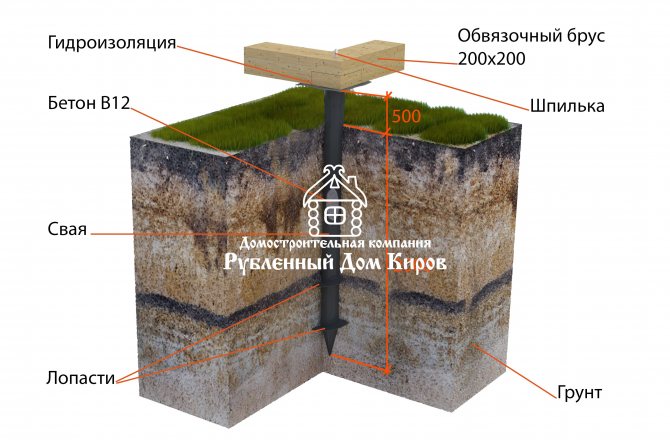
This type of base can be considered a type of columnar structure. However, piles used as load-bearing elements can withstand significant loads. This foundation is suitable for a log house with several floors or a large one-story building.
When installing a pile-screw foundation, you will not have to carry out a large amount of excavation work, which will reduce construction costs. It can be installed on an area where the height difference at different points exceeds 2 m. Depending on the type of soil, piles are used from:
- become;
- reinforced concrete.
At the end of each pile there are blades, which make it easier to install them in the ground. To prevent deformation of the pile during operation, it is necessary to select its diameter correctly. If the shape of the support changes, the load on the foundation will be distributed incorrectly. And this will lead to a reduction in the operational life of the house.
When constructing a pile-screw structure, the site is marked. Then, they dig small recesses for the supports. Piles can be screwed in manually or using special devices. After installing the supports, mounting plates or a monolithic reinforced concrete grillage are welded.
The feasibility of installing a log house on screw piles
The foundation is an essential element of almost any structure. How long and efficiently the structure will perform its functions depends on its quality. The properties of the soil and the topography in the area of the proposed construction can become a serious obstacle during the zero-cycle works. Due to their design features, screw piles are the best suited for construction in places with complex terrain and unfavorable physical and chemical properties of soils. A screw pile is a hollow metal rod with a sharp tip and blades designed to be driven into the ground to a set depth by screwing. When constructing a foundation based on screw piles, a method is often used where the shaft cavity is filled with concrete mortar, which effectively enhances the bearing capacity of the elements and allows them to be used at depths exceeding standard ones. The range of possible options for using such piles is very wide. They are appropriate:
- in low-rise construction of residential buildings on difficult soils;
- at the base of frame structures for economic purposes;
- when installing lightweight engineering structures (billboards);
- for arranging foundations for power transmission line supports and communication masts;
- in hydraulic engineering (bridges, piers);
- for the installation of temporary structures that require frequent dismantling;
- as reinforcing elements of monolithic foundations.
The versatility, short installation time and relatively low price of construction using screw piles have led to the justified popularity of this method in domestic conditions. Increasingly, clients of companies engaged in the construction of wooden buildings are ordering a log house project for a house or bathhouse, installed on a grillage made of screw piles. Firstly, log houses, as a rule, are located outside the city, in the territories of summer cottages or cottage villages. Very often, the characteristics of the soil in these places are not conducive to constructing a monolithic or strip type foundation. The complexity of the terrain, heaving soil and high groundwater levels become a real obstacle to construction. Screw piles, which distribute the load pointwise and level out unevenness in the landscape, are an ideal option in this case. Secondly, the simplicity of the production technology, delivery and installation of screw piles for a log house is unattainable for other methods of constructing foundations.
A classic grillage on piles can be built by a team of 2-3 workers in the shortest possible time.
Delivery of the pile kit will require one, maximum two truck trips. The set of equipment for installation is minimal; most operations are performed manually. With minimal qualifications, it is not difficult to build a foundation on piles yourself. Thirdly, efficiency. Even without detailed calculations, try to estimate how much it will cost to create a monolithic foundation or a foundation made of reinforced concrete piles. Comparison of installation costs with other types of foundations clearly speaks in favor of screw piles. The absence of the need for special equipment and a minimum number of installers makes such work cost-effective, while maintaining a high level of quality and reliability.
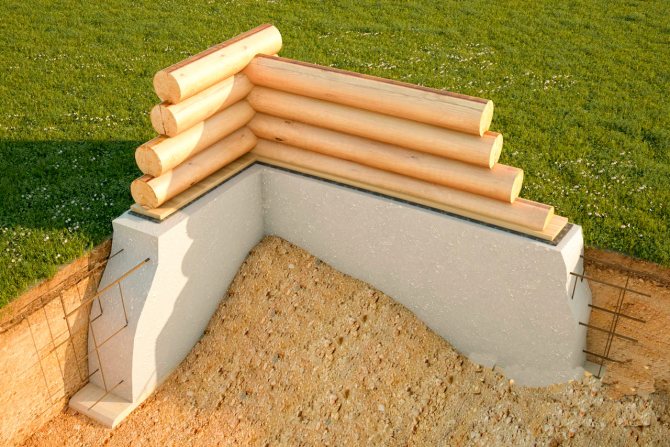
Block foundation
When constructing a block foundation, special blocks are used that have high frost resistance. They can be used for construction on problematic soils. Manufacturers offer blocks of different sizes. This simplifies installation work. Products weighing 30-40 kg can be installed without using special equipment. However, they are not able to withstand significant loads. For large buildings, large blocks are used.
Advantages of a block foundation:
- ease of installation;
- high speed of work;
- versatility (built on any type of soil).
Construction begins with the removal of the fertile soil layer. Then, they dig a pit and lay a bed of sand and gravel. After this, the blocks are laid.
What type of base to choose
As a rule, a strip foundation from different materials or a columnar base is made for a log house. The specific type is determined based on the results of a soil study for its composition and basic properties, as well as according to the level of groundwater flow.
Therefore, before planning to build a house, it is better to contact a company that provides geodetic services. The company’s specialists not only determine the characteristics of the soil, but also recommend the type of foundation, as well as materials for its manufacture.
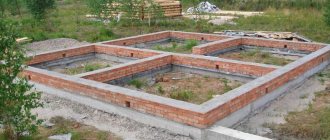
Strip foundation
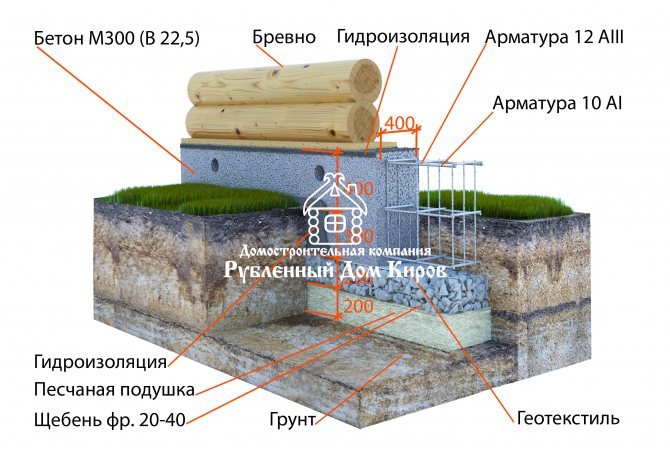
The strip foundation for a log house can be used when working on sandy or gravel soils. Such a foundation is easy to construct and does not require special equipment. Construction will not require much time and money. When installing the foundation, special blocks are used, which are attached to each other with mortar. Due to the fact that concrete needs a certain time to gain strength, subsequent work can begin a month after the construction of the strip-type structure. The blocks form a closed circuit. Their size is selected depending on the weight of the building.
When constructing a strip foundation, blocks are laid to a depth that is 1.5-2 times higher than soil freezing. The technology for constructing a strip foundation is the same as for a block foundation.
How to pour a foundation for a log house
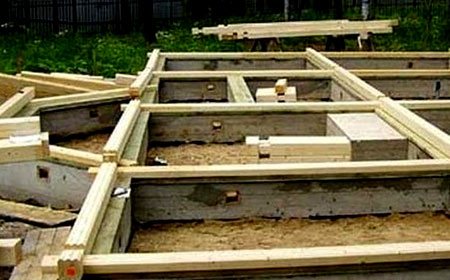
Procedure for installing concrete tape:
1. Mark the site. Width and length are calculated plus 0.5 m for the formwork.
3. Dig a pit 20 cm deeper than the freezing point of the soil (the last figure for the region can be taken from the SNiP tables). If there is no basement, a trench will suffice. Its width is determined in accordance with the calculation, but should not be less than the thickness of the wall with a margin of 10 cm (on average 40 cm). A trench is dug along the perimeter of the house and under the load-bearing internal walls.
4. Pour a sand cushion, compact it, and pour water on it.
5. Make formwork panels from edged boards. The nail heads should be located from the inside of the future structure (this will make it easier to remove the formwork). The ends of the shields are connected with self-tapping screws.
6. Install shields in the trench. Their height should be greater than that of the future tape. Strengthen with supports from the outside and ties on top.
7. Place roofing felt or glassine inside so that the solution does not flow out through the cracks and the cement laitance does not soak into the boards.
8. The reinforcement frame is installed so that its edges do not reach the formwork by 3-5 cm. The reinforcement will require 1.2 cm ribbed rods. Longitudinal rods are placed in two or three rows (depending on the height of the tape).
9. In increments of 40 cm, transverse jumpers and vertical posts are tied to the longitudinal rods with wire.
10. The second and third levels are tied to the verticals: also longitudinal rods and jumpers. Both the upper and lower boundaries of the frame should not reach a few centimeters to the edges of the future tape.
11. Place inside, perpendicular to the boards, pieces of plastic or asbestos-cement pipe with a cross-section of about 10 cm for the installation of vents. They are placed with a slight slope on the street so that the resulting condensation flows outward and not inward. Fill with sand so that the pipes do not collapse under the weight of concrete.
12. To independently prepare the solution, cement from M200 to 400 is used. The proportion is one part to 3 sand and 5-6 crushed stone. When pouring in cold weather, the water is heated before mixing.
13. It is advisable to fill the tape in one day. Pour in layers, tamping each portion. The finished filling is pierced in many places with a metal rod to bleed air.
14. In rain and heat, cover the finished tape with film. In hot weather, it is necessary to spray the tape with water several times a day and cover it again so that the concrete sets more slowly: when it hardens quickly, it loses strength.
15. The tape hardens for a month. After this, the formwork is removed and the surface is waterproofed.
16. A layer of roofing material is laid between the tape and the lower crown, and the logs themselves are impregnated with an antiseptic.
Tamping tow
Having completed the installation of the log house, you can take up the equally important work of compacting the tow. It needs to be caulked from the outside as tightly and thoroughly as possible, otherwise the birds living in the neighborhood will insulate their nests with it, and slanting rain may simply seep into the house. They also add tow on the inside of the walls. We recently published an article that will help you decide on the choice of tow for construction.
The final touch will be sanding the walls, covering them with various impregnations and painting, if other finishing work is not provided, such as, for example, upholstery with wooden clapboard.
How to arrange the flooring?
In log baths, mostly wooden floors are used, less often - concrete . Wood plank flooring is installed after preliminary insulation. The work is carried out in the following sequence.
Logs are installed in the lower crowns, under which skull boards are sewn. Plates of heat-insulating material are laid between the supporting elements. A wooden sheathing is created on top of it, on which the subfloor will later be installed.
A layer of waterproofing is laid on the sheathing to prevent moisture from penetrating the underlying wooden structures. Subfloor boards are laid on top of the waterproofing layer, which are nailed or screwed to the sheathing.
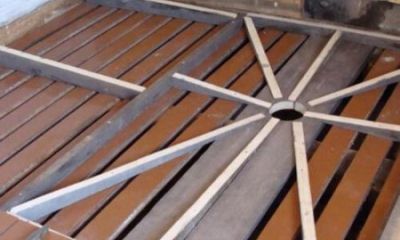
Next, a cone-shaped concrete screed is constructed , in the center of which there should be a drain hole to drain moisture.
Side boards are placed around the perimeter of the room; boards cut at a slight angle are installed inside the formwork (see photo below). Next, the concrete mixture is poured.
The finishing wooden floor is subsequently laid on top of the concrete screed. In this case, the boards must be installed with a gap of several millimeters to ensure the unhindered flow of moisture through the pour-type flooring.
Before arranging the floor in the bathhouse on screw piles, it is necessary to install drain pipes in advance , which will be located under the floor covering. If you skip this stage, further arrangement of the drain will be extremely difficult.
The video will show you how to install floors in a bathhouse on screw piles: