Constructing a basement using the one-brick laying method is popular. For several centuries this technique has been tested by builders for strength and stability.
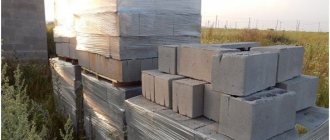
It is necessary to select a building material for cladding before starting to lay the base in 1 brick. Preference is given to red brick. The material from which it is made, namely red clay, provides it with resistance to moisture and a long service life.
It is not difficult to calculate the quantity: 1 cubic meter of brickwork will require 400 bricks, taking into account that the seam will be 12 mm. The next step is to multiply the length of the base by its width and height. We multiply the resulting figure by 400. We use units of measurement - meters.
Why put zero on the foundation with a brick?
In practical terms, displaying 0 on the foundation means giving the upper area of the foundation structure an exclusively horizontal location. It is important to take into account the fact that the level of the foundation is entirely located in one single plane. This need is based on the fact that the “cushion” performs important functions of the building, namely, it takes on the entire load of the structure. To ensure that the weight is evenly distributed over the entire plane, the upper level is set to zero, thereby avoiding premature destruction of the house.
Among the existing options, the optimal solution is when a concrete base is formed at the initial stage of pouring the structure. It is much easier to justify everything in theory than to implement it in practice, so in practice it is not always possible to derive a horizontal level that would be considered ideal. Often craftsmen deal with errors in their work, and such issues have to be corrected at later stages of work, after the base has been filled with mortar. Therefore, the method of obtaining the zero level using brick or stone is relevant.
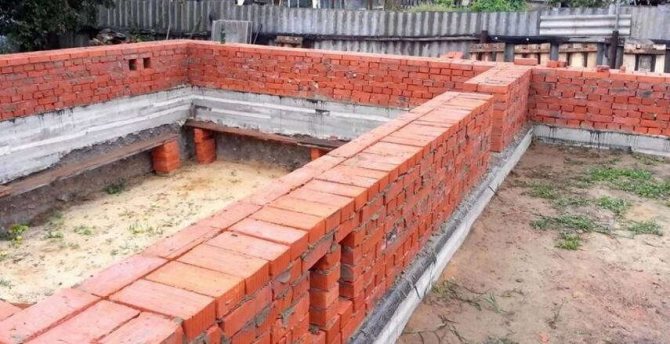
Setting the corners when constructing a plinth.
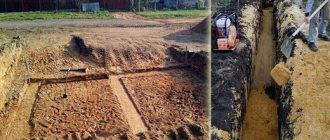
When laying the base, as well as later, when laying the first row of walls, it is VERY IMPORTANT to set the corners correctly. Incorrectly set angles will lead, in the future, to incorrect wall laying. Incorrectly set corners of the plinth, if the deviation is insignificant, can be corrected when laying the first row of walls. However, you shouldn't count on this. It's better to do everything right at once.
The first thing to do is to initially lay out bricks in the four corners without mortar along the width of the future base. The bricks in the corners must be leveled.
Then, using a tape measure or using a strong thread (the thread should not stretch!) we very accurately measure the length and width of the sides of the future house, taking into account the laid out corners. It is also necessary to measure both diagonals. All measurements must be correspondingly equal: the length of one side must be equal to the length of the other side of the wall, etc.
If the measurements are equal, then you have done everything correctly and you can start laying the base. If some measurements do not match, this means that not all angles are equal to 90 degrees. and this needs to be fixed urgently. How can this be done?
It is necessary, by constantly rechecking all the measurements described above, by simultaneously moving the corner bricks along one of the sides (you didn’t use mortar when setting the corners, did you?), to find their optimal location in the corners, at which the measurements of the sides will respectively coincide or have no deviation more than 2-3 cm. With further laying, this difference can be eliminated.
Tools and materials
It is customary to begin work on the construction of the foundation with the preparation of all necessary materials and construction equipment. To lay out the structure during the laying process you will need:
The tools you need to prepare are a hydraulic level.
- trowel,
- shovel,
- order,
- jointing,
- mooring cord,
- pick hammer,
- hydraulic level,
- construction level,
- trough,
- concrete mixer,
- metal rod,
- work gloves,
- bricks,
- sand,
- cement,
- lime,
- fittings
The complete list of materials depends on the nature of the work on a particular site.
Check before work
Checking horizontality is necessary to identify defects in the base of the structure.
Before starting any construction activities, it is necessary to check the horizontal level of the surface. To do this you will have to use a construction hydraulic level. The check is carried out from the corners and gradually moves to areas of the base of the structure. If there are differences in the horizon, the necessary notes are taken and the orientation cord is pulled. After this, they move on to the main initial work processes.
How to level to zero when concreting?
The first step is to set the zero point correctly. To do this, a mark is made from the inner area of the formwork, preferably in one of the corners, which will be the alignment boundary. Next, we use the hydraulic level to determine the remaining three points. If such a tool is not available, an ordinary transparent hose will do as an alternative. To mark the corresponding boundaries, the latter is stretched from the marked area to opposite corners, after which water is released. The zero level is fixed at the primary point; in the process of balancing the liquid, a second point is selected and a mark is placed in this place. The remaining points are located according to a similar principle; no difficulties arise at these stages:
- In the finished formwork, it is necessary to make holes for the hose in the middle section of the planned walls.
- A cord or twine is threaded through the holes, after which the structure is fixed until tension appears.
- The zero level is measured and the concrete solution is poured.
- The construction rule is to level the mixture; it is important to distribute it evenly over all areas of the surface.
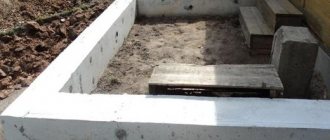
The level foundation is ready for the construction of the basement.
After the concrete solution has completely hardened, the ideally flat area of the foundation is completely ready for further construction of a basement or possible basement. In this case, do not forget about regularly checking the compliance of the horizontal and vertical levels of each brick row or building block.
Purpose of the base
The plinth is an intermediate structure located between the foundation and load-bearing walls.
- One of the purposes of the plinth is to protect the walls of your house from precipitation (melting snow, rain water, dew), capillary suction (moisture coming from the ground). If the house does not have a basement, then capillary moisture can rise up to 3 meters up the wall of your house. This can further lead to mold and rotting of the wall, loss of frost resistance and an increase in the thermal conductivity of the wall material.
- Since our house does not have a ground floor (basement) and the floor is located on the ground, the base takes on the mechanical impact exerted by the buried earth inside the perimeter of the house;
- The plinth bears a constant load from the wall.
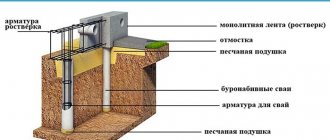
- For our house, we poured a monolithic strip foundation without formwork. In this case, the base will also allow you to “decorate” the perimeter of the future house.
Thus, the base the building is fully impacted. Therefore, to ensure the strength and safety of the base, it must be built from high-quality materials that have frost resistance, minimal moisture resistance and mechanical strength.
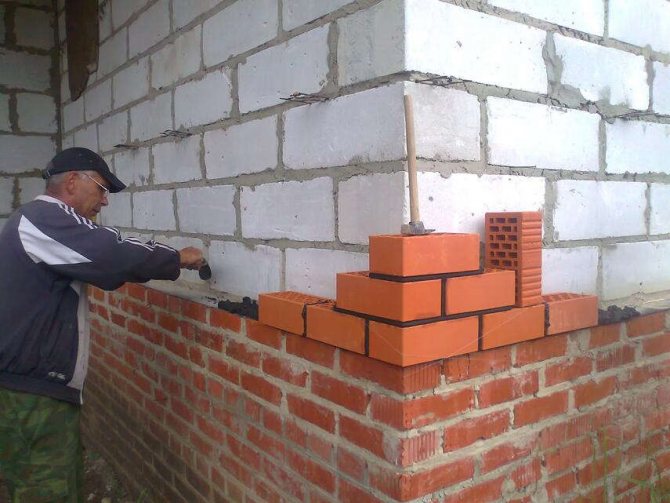
When building the basement for our house, we did not use new brick, but it was quite durable and of good quality. This is clearly visible in the photos attached to the article. Thus, we were able to successfully solve two problems at once:
- minimized the cost of brick for the basement by using old brick;
- Good quality solid brick was used.
Methods for leveling the finished base
Often builders need to reach zero on an already formed base of a brick surface. The algorithm of actions looks different than in the first case and consists of the following steps:
- The initial location must be marked with a hydraulic level or a special hose. The corners should be marked so that the location of all is obvious in relation to each other.
- After this, the wooden formwork is installed. It is important to take into account the moment that the design parameters coincide with the thickness of the base.
- Zero marks are measured in the corners, which in the future are transferred to the inside of the foundation.
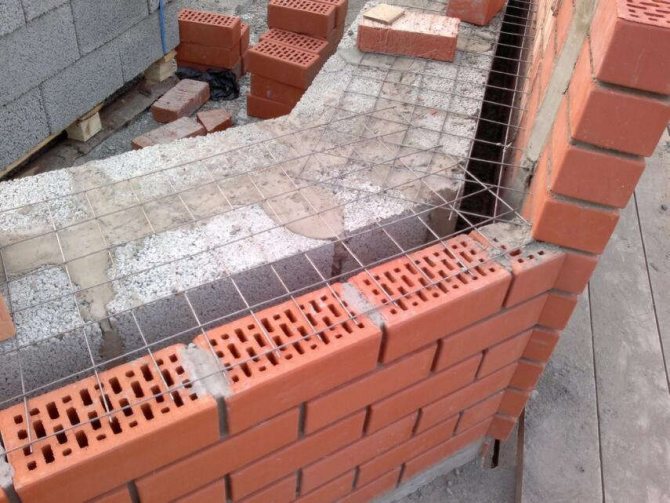
- The reinforcing mesh is being installed in the formwork. The wooden frame is first sawn.
- A solution is prepared if the consistency of the correct mixture is poured into pre-moistened reinforcement rods.
A hose is used in the process of searching for the location of zero marks. However, it is important to remember the point that the water inside the latter moves by inertia. After the solution is poured into the formwork, it is necessary to ensure that the hose does not dry out from cracking. To avoid such problems, you should regularly moisturize the necessary areas.
Permanent address of the article
How to preserve a brick base if construction of a house is temporarily stopped?
If you are building a house over more than one construction period and, due to lack of funds or the onset of cold weather, are forced to suspend construction at the stage of readiness of the brick plinth, you need to take care of its safety.
To do this, the horizontal surface of the base must be carefully covered with plastic film and secured with fragments of brick, pipe scraps or other available materials. The film will protect the masonry from water, which, with repeated freezing and thawing, will destroy the surface of the base.
Articles on the topic
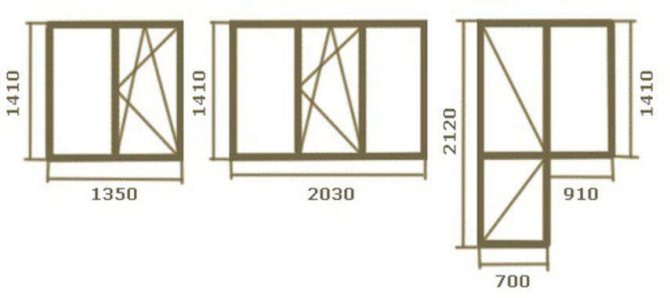
The size of a standard window in a brick house - Brezhnev, Khrushchev, Stalin, instructions, advice from masons
Cladding a house with bricks - how to calculate how much material is needed, instructions, advice from masons

Brick partitions - preparation, construction, instructions, advice from masons
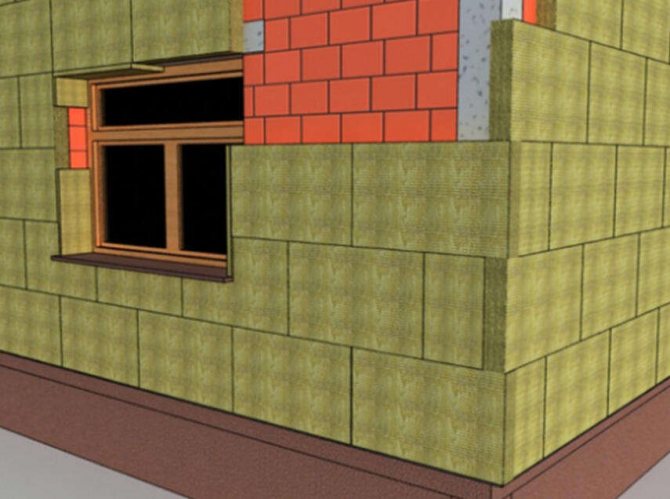
How to insulate a half-brick house with mineral wool and expanded polystyrene?, instructions, advice from masons
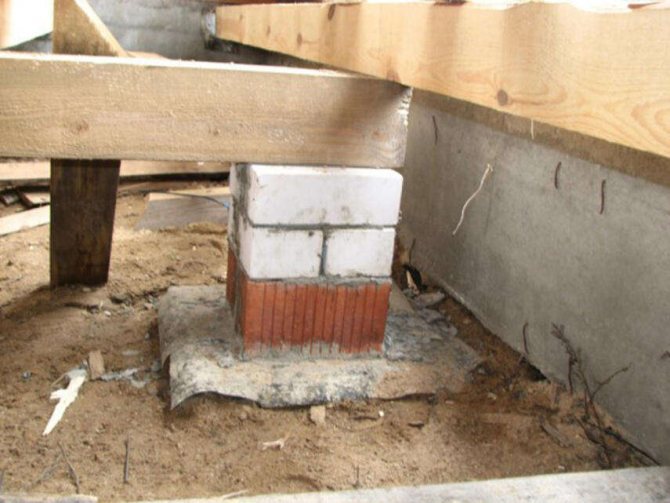
Brick columns for joists - preparation, how to make them, instructions, advice from masons
How to lay a foundation with bricks - stages of work, instructions, advice from masons
Cladding a house made of aerated concrete with bricks - masonry, disadvantages, instructions, advice from masons
Brick plinth on a strip foundation - masonry technology, instructions, advice from masons
Reviews ()
Base types
It should be noted that below we will talk about plinths, taking into account the final insulation or finishing of the walls and the plinth itself. This is an important note because... directly when laying the base and walls, and then when finishing them, the location of the walls and base relative to each other may change.
There are three main types of base.
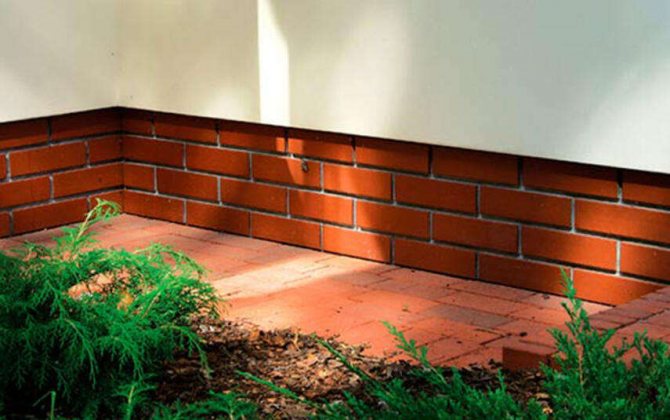
Sometimes you can find houses in which the base protrudes outward relative to the wall - protruding base . Such a base requires the construction of a protective drain. Since this type of base is most susceptible to weathering, it is necessary to use high-quality materials for its finishing. It is advisable to use a base of this type if a thin-walled house has a basement (basement), which requires additional insulation. Or a protruding plinth is the architect’s way of expressing his idea. A protruding base is not often used when building a house.
Sometimes the base is flush with the wall. This is also a fairly rarely used type of plinth for the construction of a country house.

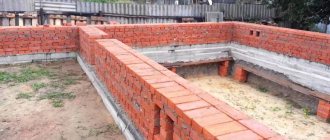
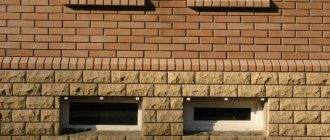
In our case, for walls made of gas silicate blocks, the brick plinth is “recessed” relative to the walls - a sinking plinth. Why did we choose this type of base?
With a sinking base, rainwater flowing down the walls does not reach the junction between the wall and the base and flows unhindered to the ground. In this case, the waterproofing layer, hidden by the wall protrusion, is protected from precipitation and external mechanical influences. In addition, a sinking base allows you to save money during its construction:
- reducing costs for materials for the plinth,
- reduction of construction time;
- no need for a drainage device, as is the case with a protruding base.
It is optimal for the base to “sink” relative to the walls (taking into account the insulation and finishing performed) by at least 5 cm.
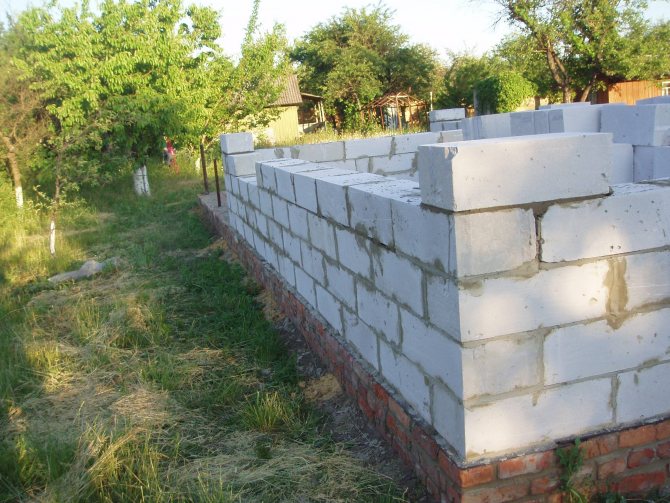
During the construction of our house, the base took on the appearance of sinking after we insulated it with polystyrene foam and plastered the walls. When laying walls from blocks, the base protruded relative to the walls. In the photo on the left, when magnified, you can clearly see how during the laying of the walls, before their subsequent insulation and plastering, the brick base slightly “protrudes” beyond the walls.