The title of the article does not give any real idea of what it is really written about. And it was written about the fact that developers often overestimate the importance of wall insulation to the detriment of such an important element of a warm house as floors.
Dmitry Belkin
This article was written in the wake of user questions and consultations that I give for a fee. In it I would like to consider (once again and in some other words) a fundamental, in my opinion, issue that causes misunderstanding in developer circles. This question is that when building a house, people tend to overestimate the importance of wall insulation to the detriment of the really important element of thermal insulation of a house - the floors.
Here and there I am asked to clarify my position on insulating the walls, but at the same time not much heat leaves the house through the walls! According to scientists' calculations, I recently read in a very high-quality German guide for private developers (author Frank Knippel) that 30 to 35 percent of the heat leaves a house through the walls, no more. Moreover, it is written there that often the insulation of walls does not bring any noticeable effect at all and it, the insulation of the walls, can be easily neglected if the walls themselves are decent. Decent, this means 15 cm of timber, or 20-40 cm of foam or aerated concrete and the like.
Here you are! A deep and bold, but equally incomprehensible statement. It seems to cross out everything we are used to and strived for. But what about the notorious SNPs with their standards for the thermal conductivity of walls? Let's try to figure it out.
Let's imagine that we have a house with floors that are not insulated, or insulated not thoroughly enough. This is precisely the case shown in the diagram above. It is quite clear that in this case, insulating the walls will be of no use. At all. In this case, all our heat will rise up and escape through the cold ceiling. How will it get there? Through the cracks? Well, if there are cracks in the ceiling, then yes, but let's assume that there are no cracks in our ceiling. Then the heat will go away simply by transferring heat from the warm air to the cold ceiling. In other words, the air from below heats the ceiling, and it is cooled by the cold from above.
How intensely will we lose heat? Not much slower than if there were cracks in the ceiling. And this extremely important intermediate conclusion must be clearly understood and realized. Well, if you don’t understand, then trust me. I have tested this statement many times. To illustrate this process, I have used bold vertical upward arrows.
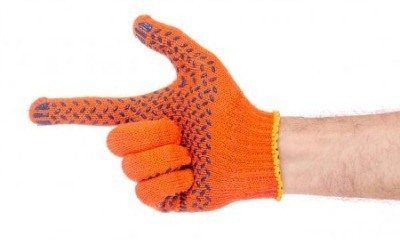
What happens when we insulate our floors a little? Obviously, heat will continue to escape, but will do so more slowly. Since warm air will flow in faster than it will cool, a thicker layer of warm air will accumulate under the ceiling. In this case, if we raise our hand, the hand will feel this warmth.
Further insulation of our ceilings will increasingly increase the layer of warm air under our ceilings and one day you will be able to feel the warmth with your head, then your shoulders, and then your torso. And if we did everything absolutely correctly, then some of the heat may even reach the floor.
Where do we lose heat? It is obvious that we lose it where there is a lot of it. Namely at the very top. At the ceilings. In this regard, the German expert’s statement becomes clearer. What about the walls? Guided by the above diagram, you can see that heat can go where it is, and not where it is not. Moreover, the more of it there is, the more of it goes away. And more of it is under the ceiling and I don’t want to repeat it again. It directly follows from the diagram and from the statement of the German specialist that much more heat is lost through the upper part of the wall, that is, mainly through the junction of the wall and the ceiling. Next is a very interesting consideration. If we accept that only 30 percent of the heat is lost through the walls, and a much larger part of the heat is lost through the upper part of the wall, then how much percent of the heat of the house do we lose through the middle part of the wall? 10 percent? And through that part of the wall that is near the floor? Do we actually have anything to lose? And now the German’s statement becomes completely clear and we are even ready to believe him and take it into service. The process of heat loss from walls is shown in the diagram by horizontal arrows of varying thickness.
Requirements for external insulation
External thermal protection of the base must provide protection from the effects of climate at the location. The main requirements for protection are as follows:

Low thermal conductivity coefficient.- Highest moisture and steam resistance. A material that absorbs water is not able to retain thermal energy and over time loses its protective functions, especially at sub-zero air temperatures; the moisture accumulated in the heat insulator freezes, destroying its structure.
- Highest level of resistance to compressive loads. The soil exerts significant pressure on the base, and for a heat insulator it is very important that this indicator does not affect the structure.
- Resistant to biological contaminants.
If the insulation is subjected to the formation of mold and mildew, it will very soon become deformed. Material with heat-protective functions should also not attract harmful rodents and insects.
Why insulate the basement?
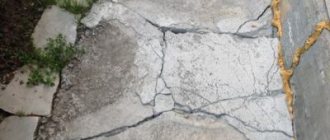
The base is constantly exposed to the destructive effects of the environment: it suffers from moisture and can freeze in winter, since concrete has high thermal conductivity. As a result, cold and dampness penetrate inside the house, which leads to increased heating costs. Experts have found that the base and foundation account for more than 20% of heat loss, so insulating the foundation of a house is just as important as insulating the walls. Insulating the basement will not only affect the temperature and humidity in the house, but will also protect the foundation and floor slabs from destruction.
How and what material to choose?
Structural elements of the plinth in all regions of Russia are subject to negative atmospheric factors:
- increased groundwater levels,
- surface flooding,
- thermal stresses,
- penetration of radon gases,
- condensation,
- the occurrence of mold and heat loss.
In order to completely eliminate them, insulation of both the internal and external walls of the basement will be required.
Materials that can be used for thermal protection of such a surface of a house must have a low heat transfer coefficient, high moisture resistance and low cost.
Based on these criteria, the following is most often used for thermal protection of the base:
- polyurethane foam,
- Styrofoam,
- penofol,
- expanded polystyrene,
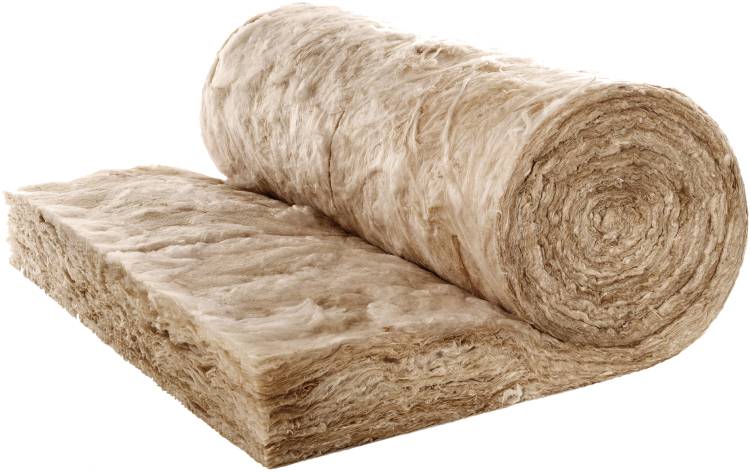
- mineral wool.
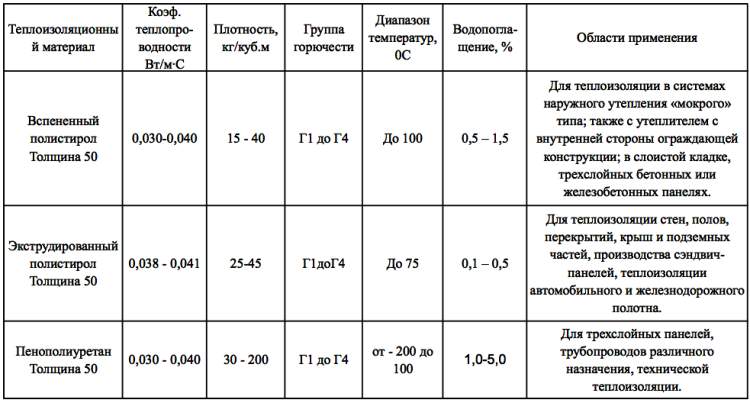
Polyurethane foam
This is a universal insulation and belongs to a polymer sprayed material . According to the application technology, it can cover the surface of any configuration and plug cracks and other surface defects in the structure.
The material hardens after application, acquiring 100% water and steam resistance, reliably protects the base from external negative factors, and therefore does not require additional insulation from moisture. Such insulation can be used reliably for several decades.
The disadvantages of its use include the high cost of processing and the need to use special equipment for spraying. In connection with this, you will need to either rent it or invite specialists to apply polyurethane foam.
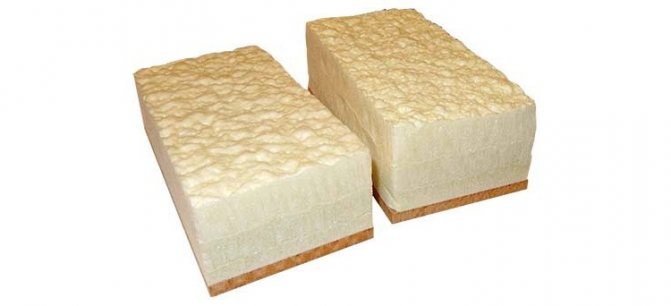
Expanded polystyrene
This material has a low strength characteristic with short-term compression <0.1 MPa and long-term compression <0.03 MPa , which makes it possible to use it only for internal insulation of the base, since the backfill soil will exert a pressure significantly exceeding 0.03 MPa.
In addition, water absorption during prolonged interaction of building materials with water by volume increases to 4-5%, which reduces cold resistance and thermal characteristics. According to experimental studies, it has been proven that every 20-25 freezing/thawing cycles reduce the strength of the foam by 13-15%.
Due to the high quality of the original building material, which has a closed cell structure that prevents the accumulation of moisture, it additionally has good thermal characteristics and an increased service life. These circumstances make it possible to successfully implement it for thermal insulation of the base.
Advantages of expanded polystyrene:
- Able to withstand temperature fluctuations from -50 to +75 C.
- It is easy to install and has a long service life, about 50 years.
- Highest frost resistance.
- Endurance to biological damage from insects and rodents.
- The possibility of using sheet joints with ridge installation, as a result of which the heat insulator will not have cold bridges.
The basic disadvantage of such an insulator is the significant flammability of polystyrene foam.
All modifications of such a heat insulator have a flammability class of G4/G3, and when smoldering, toxic compounds are released into the airspace. The disadvantage of this material is also its high cost . However, this is not critical, at least this is what many users think, assuring that thermal insulation made using this technology will very soon pay for all the costs incurred due to significant savings on the heating supply of the house.
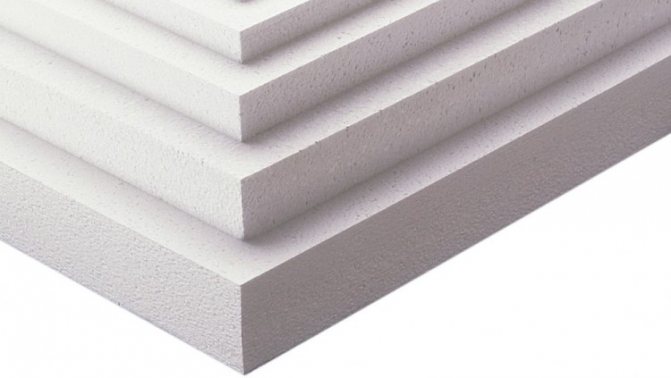
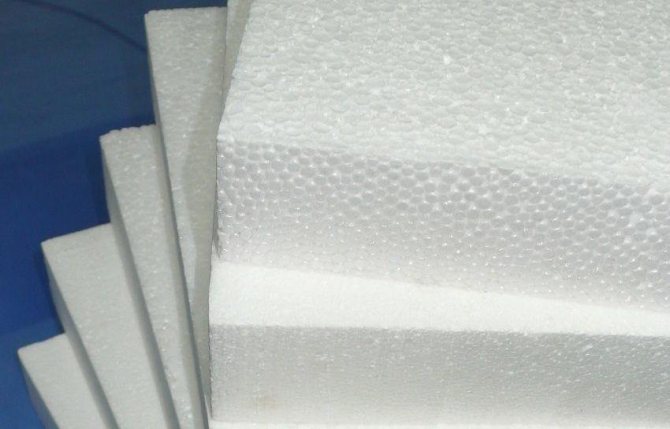
Styrofoam
This building material has been tested by time and is currently included in the TOP 5 most popular basement insulation technologies, primarily due to its low cost.
Nevertheless, a developer who has decided to thermally protect the base with foam plastic must take into account the following points:
- ordinary polystyrene foam can burn and emit harmful substances; to work, it will require modification with special additives that prevent the combustion process;
- the material is damaged by mice, so you need to take care of the reliable lining of the base;
- inexpensive, loose material with a huge number of pores is capable of allowing steam to pass through and absorb moisture, so its heat-protective characteristics decrease.
For this reason, it is recommended to purchase foam boards with a density of at least 38 kg/m3. For these types of work, grades PSB-S 25 or 35 are suitable. These modifications have the highest level of density, and, therefore, will be able to withstand mechanical loads better.
The thickness of the tiles can be selected from 2 to 10 cm. In this case, the material can withstand temperature changes from -60 to +80 C, with unchanged performance properties. The average service life of this type of insulation exceeds 25 years, and if the thermal insulation “pie” is made in accordance with all directives, it can work longer.
Polystyrene foam also has its disadvantages, among which the most pronounced are low bending strength characteristics and high fragility . In addition, if the technology for laying the slabs is violated and the waterproofing is improper, moisture can penetrate into the upper layers of the insulation, where it will freeze, thereby triggering the process of its grinding.
Mineral wool
This type refers to fiber insulation, which is made from quartz sand and glass waste. Long fibers are produced from molten magma, forming protective material in rolls with the following characteristics:
- Low thermal conductivity coefficient.
- Chemical inertness, mineral wool is passive and resistant to the influence of aggressive substances.
- Stability, not subject to rotting and deformation from rodents.
- Environmental Safety.
- Fire resistance.
Also, the advantages of mineral wool include the budget price and the relatively low weight of the building material. However, the material has its drawbacks: the installation process is carried out in compliance with safety rules; the performer must have protective equipment to prevent the smallest fibers from getting under the skin and into the respiratory organs.
The fibrous material also needs to be protected from dampness; it is recommended that the structure be treated with bitumen on the plinth side, and a waterproof membrane and appropriate building material for cladding are used on the outside.
Additionally, you need to take into account that gradually during operation the glass wool compresses and settles, therefore, after 5 - 7 years, the heat insulator will need to be replaced.
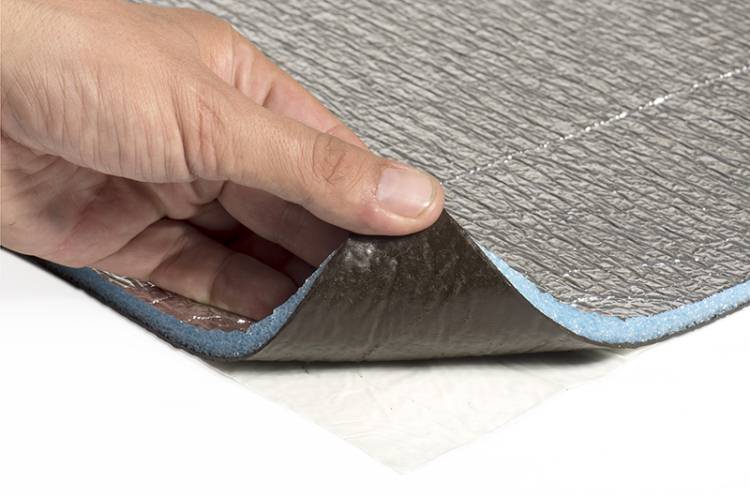
Penofol
This is a fairly thin polyethylene foam, usually produced in rolls , has a double-sided coating of aluminum foil and is today considered the most advanced thermal insulation material.
Its foam structure provides the highest thermal insulation properties, enhanced by a foil surface that reflects the cold and prevents the penetration of moisture and steam.
Penofol is mounted with glue, the joints are glued with metallized adhesive tape. It can be used as an independent heat insulator or in combination with polymer insulation. The main disadvantage of the material is its very high cost.
Options for insulating the basement
You can insulate the basement part in several different ways.
The main thing is to choose high-quality insulation and correctly calculate its thickness. It is worth noting that the thickness will depend on the type of material, as well as weather conditions and the type of construction.
Vertical thermal insulation
The vertical type of thermal insulation is used most often. In order to correctly calculate the thickness of the material in this situation, it is necessary to use a special formula. Today on the Internet you can also find quite a lot of special calculators that will help you quickly and correctly carry out the necessary calculations.
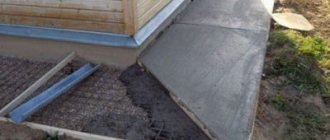
Horizontal insulation
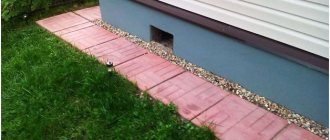
The horizontal type of insulation is usually used for those areas that are located directly under the blind areas. Due to this, it will be possible to avoid freezing of the soil under the foundation. Particular attention should be paid to those areas adjacent to the outer corners.
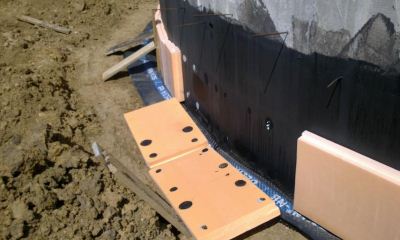
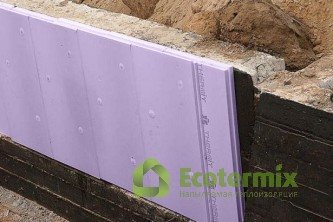
External insulation
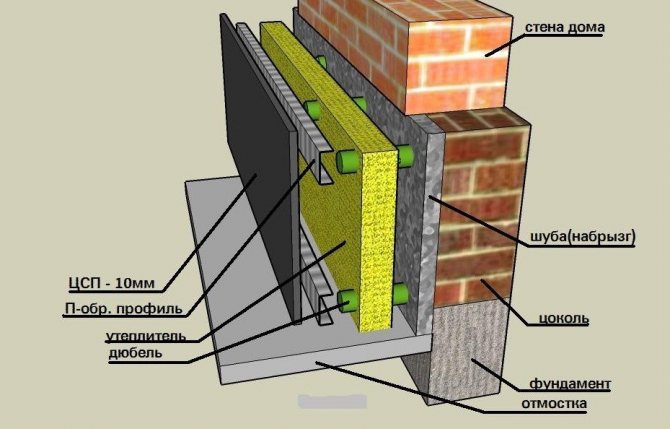
External insulation of the basement will allow you to retain a lot of heat in the house. You can do it either independently or using the services of specialists. Today there is a huge selection of materials for external insulation of a house, each of which has its own advantages and disadvantages. If finances allow, then preference should be given to more expensive insulation materials that will help obtain the desired result.
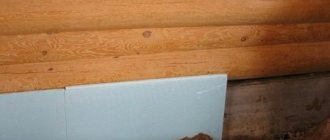
Internal insulation
Not many materials are used for internal insulation, but there is still plenty to choose from. The insulation layer for interior work will not be as large as for exterior work. Due to this, it will be possible to eliminate all those places, cracks, etc., through which heat can escape from the house.
Comparison of average prices in the Russian Federation for heat insulators
The market for base thermal insulators represents both domestic and foreign products . The latter has a higher cost and service life. Prices vary by region by 10-15%, the highest in Moscow.
Comparison of price indicators for base insulation based on material efficiency:
- Akterm Standard white 10 l, from - 60 to +150 C, thermal conductivity 0.0011 W/(m*K), 3,650 rub./bucket
- Sprayed insulation Polynor professional 1000 ml, from -45 to +90 C, thermal conductivity 0.024 W/(m*K), steam permeability 0.045 mg/(m•h•Pa), from 490 rub./piece.
- Penoplex Fastfix, sprayed, from -80 to +115 C, thermal conductivity 0.025 W/(m*K), from 500 rub./piece.
- Penofol A-10, polyethylene foam, 15.000x1.200x10 mm, from -40 to +100 C, heat capacity 1.95 J/kg*K, thermal conductivity 0.04 W/(m*C), vapor permeability 0, 0011 mg/m*h*Pa, from RUB 1,450/piece.
- Polyethylene foam Tepofol NPE 10 mm, from -60 to +80 C, thermal capacity 1.94 J/kg*K, K thermal conductivity 0.04 W/(m*C), steam permeability 0.001 mg/m*h*Pa, from RUB 1,115/piece
- Isover, quartz-based slab 1.170x610x100 mm, 7 slabs per package, from -50 to +110 C, thermal conductivity 0.04 W/(m*K), vapor permeability 0.7 mg/m*h*Pa, from 800 rub./pack
- Ursa GEO M-11 10.000x1.200x50 mm 2 pcs. in a bag, from -50 to +260C, thermal conductivity 0.038 W/(m*C), vapor permeability 0.64 mg/m*h*Pa, from RUB 1,450/pack.
- Ursa Heat Standard, extruded polystyrene foam, 1.230x610x50 mm 12 pieces per bag from -60 to +220 C, density 35 kg/m2, thermal conductivity coefficient 0.04 W/(m*K), from 475 RUR/pack, 4000 RUR ./m3.
Step-by-step instructions for carrying out work
How long the insulation will last and what thermal conditions it can provide will depend on the quality of heat protection work and the precise implementation of the technology.
The exact technology of work is described by the manufacturer of the material and indicated in the technical documentation for it. Before starting work, you need to prepare insulation and tools.
Tools and building materials
First of all, it is necessary to select a heat insulator, taking into account that the density of the building material must be high. Similarly, you will need plastic dowels, which are used to secure the heat insulator, and a reinforcement mesh for applying putty.
Materials you will also need:
- putty,
- dye,
- primer.
Required tool:
- sloping corner,
- construction hammer and knife,
- bar 1 m,
- serrated spatula,
- brushes and roller.
Calculation of the required amount of raw materials
The consumption of insulation depends on a number of indicators: the modification and area of the base, the weather conditions of the location of the object and the brand of heat insulator. Knowing the external parameters of the plinth using simple geometric formulas, it is easy to determine the perimeter and area of the walls being processed.
Based on the characteristics of the insulation, taken from the manufacturer’s passport data, the volume and cost are calculated. For example, for Ursa Heat Standard insulation, 5 cm thick.
Initial data:
- Base height, 220 cm.
- Insulation density, 35 kg/m3.
- Number of windows: 4, dimensions 50x100 cm.
- There is one door, dimensions 90x200 mm.
- Price for 1 cubic meter of insulation, 4053 rubles.
- Price for 1 dowel, 5 rubles.
The total length of the walls around the perimeter: 10+10+10+10=40 m. Accordingly, the working area of the cladding insulation, taking into account the openings, will be: 40x2.2 +2 -4x0.5x1.0-1x2.0x0.9 = m2.
Required amount of insulation: 84.20x0.05=4.21 m3. Insulation weight: 4.21 x 35 kg/m3 = 147.35 m3. Insulation price: 147.35 m3x4053 rubles = 17063.13 rubles. Required number of dowels, 505 pcs. Price of dowels: 505 pcs x 5 rub. = 2525.00 rub.
Preparing the base
Before insulating the base, you will need to prepare it and the main thing that needs to be done first is to dig out the foundation by digging a trench along the full contour of the structure and 1-1.5 m wide. It is necessary to dig to the entire depth of the foundation and base, which is related to the depth of soil freezing.
Detailed installation description
After this, using a stiff steel brush, clean the surface of the base and, if necessary, level it in order to ensure the durability of the protective material.
The surfaces must be leveled using elements of plaster, which is applied to the attached mesh and beacon slats. Upon completion of the work, take a break to allow the plaster to dry thoroughly.
Algorithm for thermal insulation of the base:
waterproof the surface with liquid rubber, spreading it in the form of a paste on the surface;- install the insulation, sheet configurations or mats are fixed with glue;
- protect the insulation from moisture, ultraviolet radiation, and wind;
- fix the reinforcing mesh for external decoration;
- fill the trench with expanded clay concrete;
- perform external finishing of the base.
A little theory
Thermal insulation of the underground part has several main goals.
Most residents of southern and central Russia build cottages on concrete foundations and are not particularly worried about this. They live for many years, quite happily and comfortably, without additional insulation of the buried part, although for most inhabitants of the northern lands this approach to business seems frivolous and wasteful. First, it’s worth understanding why people insulate their foundations.
Thermal insulation of the underground part has several main goals, the main of which is to reduce the depth of freezing and heaving of the soil adjacent to the building. This allows you to protect communications, arrange a cellar or living quarters in the basement. But the main function of thermal insulation is to protect structures during uneven heaving. The soil at one corner of the house may rise higher than at another. The foundation is deformed and cracked, which is already bad. That's why the foundation of the house is insulated. It's now much easier to talk about when not to do this. Read about why you should not insulate the foundation from the inside on the page /pochemu-ne-stoit-delat-uteplenie-fundamenta-iznutri/.
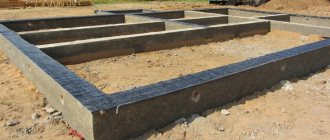
Differences in the technology of insulating the base on a strip foundation
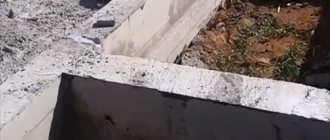
Before you begin insulating the strip foundation, it is also thoroughly cleaned of cement mortar residues. If defects in the form of cracks are found on the base, they are covered with cement mortar and allowed to dry thoroughly.
The tape base usually has a height of up to 30 cm, and polystyrene foam is made with large dimensions, so the master must adjust the sheets to the size of the base, cutting them with a hacksaw.
After this, you will need to dilute the mounting solution according to the manufacturer’s instructions and apply it evenly to the surface of the sheet with a notched spatula. A mesh is placed between the slab and the base, and the insulation is pressed tightly to the surface.
The tiles are also joined tightly, so that there are no gaps at the joints .
After the glue has dried, the heat insulation tiles are fixed to the base using umbrella-shaped dowels, and the gaps at the sheet joints are sealed with polyurethane foam. The excess mesh is removed with scissors, after which a primer is applied to the polystyrene foam plane and the material is covered with putty.
Possible mistakes
A novice workman must know all the difficulties of working with heat-insulating material. Having assessed all the possible risks of incorrect installation, he must decide for himself whether to do the thermal insulation of the base with his own hands or invite specialists.
The main mistakes made when insulating the base:
- Use of cheap material installed with low pressure.
- Failure to comply with the temperature regime: below 5 or above 25 C.

The work was carried out during rain or high atmospheric humidity.- Violation of technology and preparation of the working surface.
- The starting bar is not set.
- The installation of the tiles was not carried out in a checkerboard pattern.
- Incomplete fastening of thermal insulation to the surface of the base. The dowel was sunk into the thermal insulation with excessive indentation, which resulted in the formation of cold bridges.
- Exposing thermal insulation for a long time without a protective coating outdoors in bad weather.
- No primer was used before decorative plaster.
How to eliminate them?
Most mistakes in the process of insulating the base cannot be corrected; you will need to start the work completely from the beginning. Correction can only be done if the plinth lath is poorly secured, for example, only at the ends, or it was in vain covered with plaster from the plinth side. This has led to the fact that the plaster easily falls off due to its low adhesion to the metal.
To correct the error, it is necessary to increase the number of base rail connectors . For this purpose, the lower border of the sheets is cut off to open access to the rail. Then knock down 10 cm of plaster above the removed part.
After which it will be possible to determine the place where there are not enough screws and install them. Next, fix the insulation, lay the new mesh overlapping 10 cm with the old one.
The main enemy of the basement is water
In some cases, building a house with a basement with your own hands is impossible without additional measures that will protect the foundation from ground moisture.
Before starting the construction of a house, you need to do detailed geological studies with the involvement of specialists. They will allow us to identify the exact level of groundwater location, the likelihood and frequency of its rise. If the groundwater level (GWL) is located far from the surface of the earth, it is enough to provide the following types of protection from moisture:
- vertical (coating, lining with damage protection);
- horizontal at the level of the basement floor (closed with the vertical);
- horizontal along the edge of the foundation.
To protect the supporting part of the building from moisture at high groundwater levels, the following measures are provided:
- Gravity drainage is suitable for eliminating perched water in elevated areas. It is laid at the level of the sole or below and taken to the nearest body of water or to an open area.
- Forced drainage is used if it is necessary to lower water levels for flat or low-lying areas. In this case, the system is equipped with a well with two pumps (one main and one backup in case of emergencies). A device of this type of water reduction requires constant additional costs during the operation of the house.
- External insulation with pressure wall. It is a system of a vertical layer and a horizontal layer located in the structure of the basement or ground floor floor. The technology requires that the system be closed, that is, horizontal waterproofing is connected to vertical.
Important! The installation of drains of any type makes sense if the water rises during periods of heavy rain or flood. If the moisture level is constantly increased, the drainage system will not cope with the load.