December 28, 2020 Stroyexpert Home page » Foundation » Installation
Floor slabs
One of the stages of building a house is laying floor slabs on the foundation. Most often, work of this kind begins after the concrete that was poured into the base box has completely matured. Floor slabs can simultaneously act as the ceiling of the basement and the floor of the main building. For those who are far from the topic of construction, it may seem that the process is not particularly difficult. However, experienced experts say that each construction process has its own subtleties and nuances that you should know about. This will help you install the slabs correctly and efficiently and avoid basic mistakes that can cause serious problems during the operation of your home.
Rules for laying floor slabs
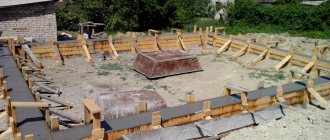
Laying floor slabs on the foundation is a fairly important step that requires precision and attention. Therefore, it is necessary to know and follow the basic rules of this process:
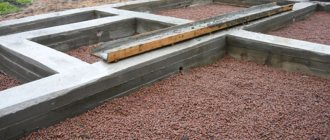
- It is recommended to lay reinforced concrete slabs on pre-leveled upper parts of the foundation. Minor differences are compensated by concrete screed; deviations of more than 5 cm require leveling with brickwork or a reinforcing belt poured into the formwork.
- If the slabs are laid on a reinforced concrete base, then the overlap should be at least 6 cm. If brickwork acts as a support, then the slabs should rest by 12.5 cm.
- Immediately before laying, it is necessary to seal the voids in the end parts of the slab. For this purpose, you can use pieces of insulation and cover the surface with cement mortar. Performing such actions increases the strength of the structure.
- It is very important to correctly determine the upper and lower parts of the slab, since the strength and reliability of the floor depends on this. The fact is that the lower surface of the slab is subject to greater tension, so during the manufacturing process this part is reinforced more strongly. The upper part, on the contrary, is compressed, therefore, it does not require reinforced reinforcement. You can tell the top of a slab from its bottom by its appearance. The bottom surface is smooth, since molds with smooth walls are used for production. The top of the slab is rougher due to the contact of concrete with air.
- The outer slabs are laid with support on two opposite sides, the side part is sealed later using different methods.
- It is recommended to coat the foundation under the slabs with a layer of concrete mortar of about 2 cm. Reinforcement bars laid centrally along the concrete strip will help prevent its squeezing out.
- It is recommended to level the position of the slab during installation using a metal scrap. It is best if the work is performed by several people.
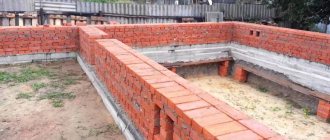
Proper laying of bricks on the foundation
Brick laying on the foundation is used for the construction of walls, partitions, columns, and plinths. The work is regulated by a set of rules dated 2012 under the number SP 15.13330, which specifies terminology, scope of use, recommendations on materials and diagrams.
Purpose of masonry on the foundation
Depending on construction technologies, operating conditions, and the results of geological surveys, the foundation for brick walls can be grillage (on pillars, piles), strip, or slab.
The base is present only in strip, grillage (ground or underground) bases. Moreover, this structural element of the building can be made of a foundation or masonry on its surface.
In houses on slabs or hanging grillages along the foundation, brick wall laying begins immediately.
Foundation masonry technology
The following materials are prohibited for foundations and plinths by SP standards:
- hollow, slotted stones
- semi-dry pressed ceramics
- sand-lime brick
There are no such restrictions for walls, provided that the masonry is necessarily cut off from the premises being used with a vapor barrier film or membrane (installed under the cladding of internal walls).
Regardless of the purpose of the structure (wall, column, plinth), the foundation is separated by rolled material. Brick laying begins along the waterproofing layer.
Materials
Masonry stones are classified according to strength, material, configuration, and size. For example, there are high-strength (M1000 - M250) clinker, brick, medium-strength (M200 - M100) ceramic bricks made by semi-dry pressing, low-strength (M75 - M7) silicate, concrete stone, ceramics.
Brick laying is carried out using cement-sand mortars, the frost resistance of which must correspond to the brand of brick. It is not allowed to use sand with a large amount of clay. Such seams are subject to heaving forces, leading to the destruction of walls and the formation of cracks.
Masonry schemes
Before work begins, the foundation is cleared of dirt; ice and puddles are not allowed on its surface. Brick laying occurs according to the classical scheme:
- a portion of mortar for 4 - 3 bricks is laid out on the waterproofed foundation with a trowel
- the pastel is smoothed with the same tool
- corner stone is placed
- the following bricks are joined to it on both sides with simultaneous application of mortar to the end parts for vertical seams
- The upper surface is leveled horizontally with a pick
- the vertical of the outer corner is controlled by a plumb line
- the operation is repeated for three vertical rows
- row marking - moorings are buried in fresh horizontal seams, along which a cord is pulled for each wall
- bricklaying - stones are laid according to the order (different for walls 51 - 25 cm)
Sequence of installation work
In addition to following the rules for laying floor slabs, it is necessary to follow a certain sequence in work:
Installation work
- First, it is necessary to fill the voids of the reinforced concrete slabs in those places that will rest on the foundation.
- Next, concrete mortar of a grade not lower than M100 is applied to the areas of the foundation that will come into contact with the floor slabs.
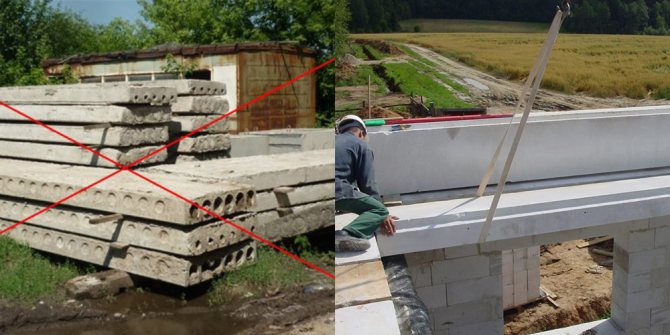
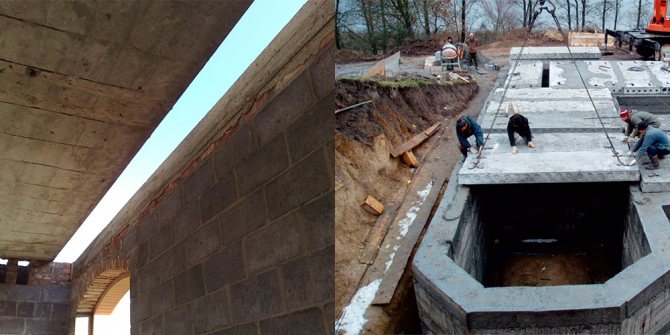
- Now you can begin directly laying the floor slabs on the foundation. It is important not to turn the slabs over to prevent elements from breaking due to improper installation.
- Installation work should be performed by 3-4 people. One worker, using a special sling consisting of four branches, secures the slab to the hook of a construction crane. For convenience, the plates have special mounting loops. Two more workers regulate the work process, laying the slab in the designed position. They also perform the detachment of the sling. If there is no eye contact between the crane operator and the workers, an additional person is hired to give commands to the crane operator. During the installation process, it is necessary to ensure that the slabs fit tightly to each other.
Types of piles
Reinforced concrete piles vary in shape, type of construction, volume and scope of practical application. They are classified according to design features:
- hollow piles - products with a void inside and a shell in the form of a reinforced concrete frame;
- monolithic piles - solid products without voids, allowing impact loads;
- cast-in-place piles are products that are produced on a construction site with immersion in a finished pit.
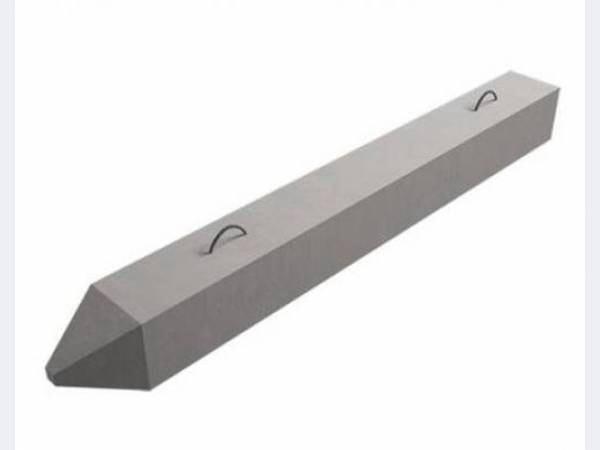
At the same time, monolithic reinforced concrete piles can have various features, being round, square and rectangular products. Moreover, their shape is represented by a bottle-shaped, cone-shaped or blunt-pointed design. In civil engineering, all types of piles are used, the choice of design features of which depends on the type of soil and the load determined by the number of storeys of the building.
Driven piles are divided into thickened and solid, which do not have seams or joints on the surface.
The marking of piles indicates their design features, implying the following types:
- SP - solid square piles, as well as square ones with a round cavity;
- CO - shell products of composite and solid construction with a diameter from 10 to 30 cm;
- SK - round piles with a diameter of 40 to 80 cm, solid, hollow and composite;
- C - piles with transverse reinforcement, composite, as well as solid square-shaped;
- 1SD - column-type piles, double-cantilever (for the outer axes), solid;
- 2SD - similar for the middle axes of buildings;
- SC - solid, solid square piles, without transverse reinforcement.
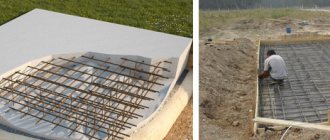
Tying slabs with reinforcement
To give greater rigidity to the resulting structure, you should use an effective method of strengthening.
To work at this stage you will need the following materials:
- Steel wire with a cross section of 3-5 mm.
- Smooth reinforcement with a diameter of 10 mm.
- L-shaped anchor with a bend of 30-40 cm.
The reinforcement is threaded through the mounting loops into which the sling is hooked, and the tie points are secured by welding.
Reinforcement of floor slabs is carried out according to the following scheme:
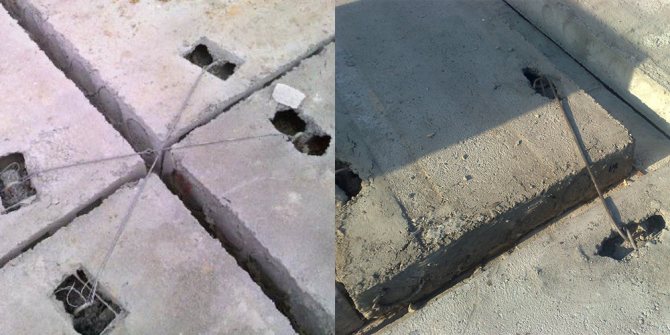
Tying slabs with reinforcement
- The outer slabs are connected diagonally using wire.
- Adjacent panels are made of smooth reinforcement.
- The connection between the slab and the wall is reinforced with L-shaped anchors, which are placed in increments of 2-3 meters along the wall.
- The joints of the slabs resting on the internal partition are reinforced with smooth reinforcement.
Pile parameters
The strength characteristics, as well as the values of resistance to external factors of piles (frost resistance, water resistance and corrosion resistance), as reinforced concrete products, depend on the brand of concrete used for the manufacture. The industrial production of reinforced concrete piles is regulated by the rules of GOST 19804 - 2012. The standard allows the use of heavy and fine-grained concrete for the production of piles. Brands B6.5 and higher are often used. To increase the strength of piles, non-prestressed and prestressed longitudinal reinforcement A300 (A-II), also A400 (A-III) in accordance with GOST 5781 and A600 (A-IV), as well as A800 (AV) in accordance with GOST 5781 are used as reinforcement elements and 10884. For structural reinforcement in the factory, cold-drawn low-carbon wire, as well as hot-rolled rod of classes B500 and A240, are used to form spirals, clamps or mesh, respectively.

The quality of products is determined by the size of the shells on the concrete surface and the crack resistance of the products.
Adjusting the dimensions of the floor slab
A decrease in the length or width of a reinforced concrete slab cannot be called a rare occurrence, since it is almost impossible to accurately select the material. To change the size of the slab, you need to cut it lengthwise or crosswise.
Cross section
The cross section makes the reinforced concrete slab shorter by a certain amount. To do this you need to do the following:
Cross cutting of slab
- Mark the cutting line with chalk or marker.
- Lay the slab on pads on the ground, and the pad should exactly coincide with the cutting line. This is necessary for more convenient cutting of material.
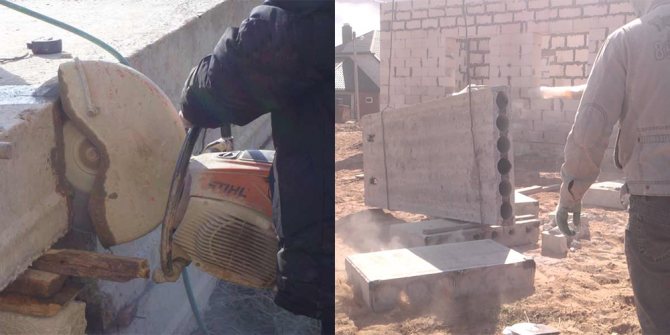
- Make a cut on the top of the slab using a grinder or concrete disc.
- Next, you need to make several blows with a sledgehammer or fist at the location of the voids. You should focus on the blows so that they land into the void and not into the rib. In this case, 3-4 hits will be enough. In a similar way, all voids in the slab are broken through.
- After this, you need to knock down the ribs, for which you hit them with a fist from the side.
- Having punched through the voids and knocked down the ribs, they begin to punch through the lower part and free the reinforcement bars.
- The cleaned rods are cut using a grinder.
Lengthwise cut
To reduce the width of the floor slab, it is necessary to cut the product lengthwise. This process is a little easier, but may require much more time. This is explained as follows: the length of the slab is most often 6 meters, and the width is no more than 1.5 meters.
In principle, similar work is performed. A grinder is used to cut through the upper part, and then using a cam, the slabs are punched over the voids. Next, a crowbar is used to pierce the bottom of the slab through its entire length. If reinforcement bars get in the way, make a cut with a grinder.
Carrying out preparatory work
Preliminary measures are intended to create conditions for further productive work and adherence to technology. The process begins with preparing the slabs and base surface.
The panels are first inspected for chips, protrusions, and compliance with geometric parameters. Detected defects are eliminated before installation work begins.
Then the ends are processed. Existing holes are closed in two ways:
- by laying bricks followed by filling with cement;
- filled with insulation, covering it with plaster.
Filling holes with bricks and cement mortar
The foundation is prepared as follows:
- using a level, determine the curvature of the base surface;
- Based on the magnitude of the differences, select the appropriate alignment option;
- when the discrepancies do not exceed 5 cm, then use a cement screed laid on a reinforcing mesh;
- for large differences, leveling is done using bricks.
The foundation assembled from blocks, before laying the slabs on it, is combined using a reinforced concrete belt.
The slabs are placed on a flat surface to minimize further costs of leveling the floor of the structure and to facilitate further construction work.
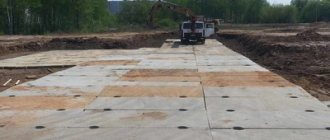
Methods for covering large openings without slabs
Very often, in the process of laying floor slabs on the foundation, you may encounter a situation where a large space remains uncovered, and there is no desire or opportunity to cut the slab. In this case, you can use two methods.
The first method is considered simpler and involves performing the following steps:
- Determine the approximate distance that will remain without overlap and divide it in half.
- When laying the first slab, retreat the resulting value from the edge.
- Lay the remaining slabs. Upon completion of the work, you can see that the last slab also does not reach the same distance.
- Next, the space between the slabs and the walls is filled with cinder blocks, placing them with the end part facing the floor slab. During the installation process, you need to ensure that the holes in the blocks point to the side.
Covering large openings
The second method requires concentration and a lot of labor. The process involves uniform distribution of slabs over the entire covered area. For this purpose, you should also determine the distance that will remain uncovered and divide it by the number of expected gaps between the slabs.
I close such gaps as follows:
- A board is tied between the slabs, which will act as formwork.
- Reinforcement bars are installed between the slabs.
- Fill the space with concrete mortar.
We build our own brick plinth on a strip foundation
The base occupies an intermediate position between the foundation and the walls. It must protect them from moisture and withstand the load of the entire structure, furniture and equipment installed in the building. Last year, my friend and I did the necessary excavation work and laid the foundation for the future house. Now, in his free time, he lays a brick plinth on the foundation.
Bricks for masonry of the second row
Vadik, the owner of the future cottage, is an economist. He is interested in all the ways to reduce costs. When purchasing a plot and designing it, he decided to test his professional knowledge in practice. Having heard that it was cheaper to do it yourself, I decided to master the profession of a laborer and replace training in the gym with useful physical labor.
Common mistakes when pouring a foundation: Be careful!
By the way, this is practiced here too. Or these devils, instead of 12mm, hit 2 by 6 and are wildly surprised that it sagged. But nothing, it’s worth it!
So from my experience, don't be afraid and don't waste your money. As a last resort, install a suspended ceiling in the garage. If you have any more questions about water supply systems, materials, etc. that are new to Russia, write. I'm a practitioner. I’m building it myself and a lot of new material has passed through my hands. Dear guy is not building a high-rise building. Leveled up, keep building and don’t doubt it. Be careful with your smaller brothers.
It depends on what period we are talking about.
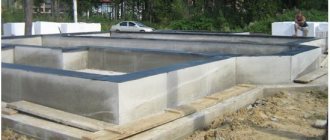
Advantages of slab foundations
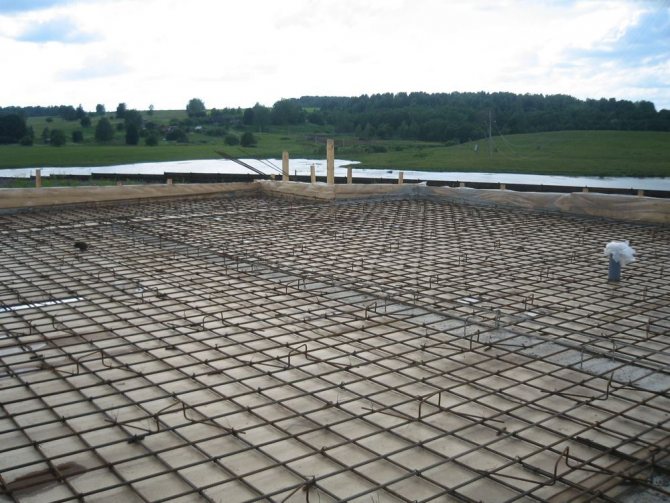
Monolithic slab
Among the advantages of using a monolithic structure, experts note the following:
- Thanks to the large surface tension plane of the house's base, the building does not shrink. This allows the use of high-speed construction methods. In this case, the building can be quite large (its dimensions depend on the thickness of the slab). The weight of the entire building is evenly distributed over the entire ground plane under the building.
- Does not move as a result of seismic activity. The construction of a monolithic slab ensures the stability of the building.
- This design allows you to build a basement that will be protected from groundwater rising during a flood.
In addition to the listed advantages, a foundation made of floor slabs is quite quick and easy to install. This type of foundation for a house is applicable in any climatic zone of the country.