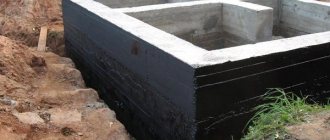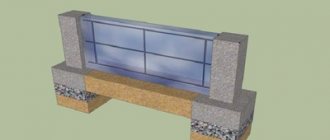
Waterproofing between the foundation and the plinth is a necessary measure of protection against the negative effects of precipitation and condensation. It prevents contact of supporting structures with groundwater and atmospheric moisture. Work on laying horizontal waterproofing is carried out during the construction stage of buildings. A competent choice of materials and adherence to installation technology can reduce the influence of destructive factors.
Objectives of horizontal waterproofing
Installing waterproofing is considered a troublesome undertaking, but not a single house will last long without it, even if it is built on a mountain and the groundwater lies at great depths. There will always be reasons for condensation and moisture penetration into structural elements. Indeed, in addition to groundwater, there is also rain and melt water, which have an equally destructive effect on the foundation and walls of the building.
The main task of waterproofing is to prevent contact of the structural elements of a building with a damp environment, and if the foundation gets wet, to create a reliable barrier to the rise of capillary moisture in the load-bearing walls.
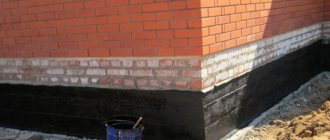
Horizontal waterproofing is installed between the brickwork and the foundation during the construction stage. Of course, there are ways to do this after the walls have been built, but they are either too labor-intensive or too expensive. A decision to save on materials or simple forgetfulness of the “masters” can lead to significant problems and difficulties in the future, so the importance of a moisture-proof layer should not be ignored.
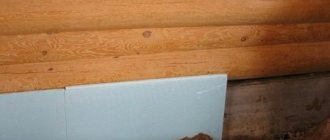
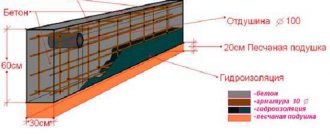
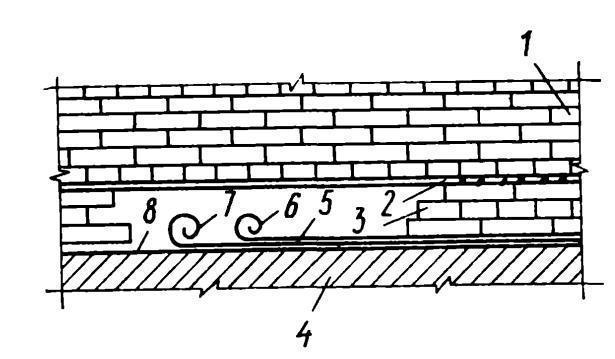
The lower horizontal waterproofing is laid at the level of the base of the foundation, but this article is not about it, but about the upper insulating layer. When constructing it, roll materials are used, such as roofing felt, roofing felt, glass insulation, waterproofing, rubemast, etc. To create a waterproof carpet between the foundation and the brick or block masonry, you must:
- level the upper surface of the foundation with mortar;
- lay the waterproofing material in two layers.
For reliability, roofing felt can be fixed with hot bitumen. In this case, it is recommended to apply the mastic directly onto the prepared canvases, and after laying, press it with a semi-rigid roller. If there are crumbs on the rolls, the surface should be cleaned first, otherwise the joining will be of poor quality.
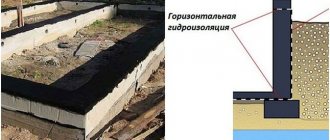
In the absence of a basement, double horizontal waterproofing of the walls is performed:
- the first layer is between the foundation part and the masonry of the base;
- the second layer is in a brick or block wall, not reaching the lower level of the first floor ceiling or joist about 10-15cm.
Strips of roofing felt or other rolled material are laid flush with the masonry, but they may protrude somewhat beyond the walls. To achieve a neat appearance, it is recommended that the straight edges of the canvases cut lengthwise be oriented outward, and the “torn” side should be oriented toward the inside of the house. In addition, it should be taken into account that the material must be overlapped along its length.
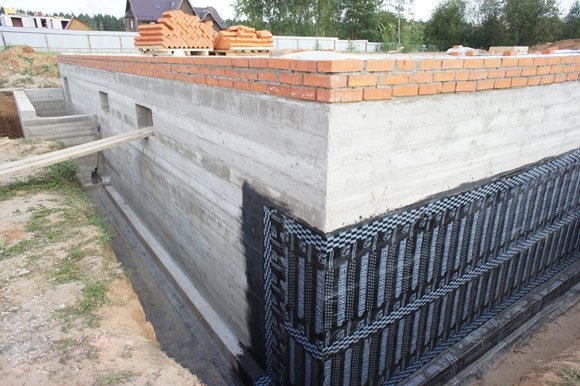
A successful combination of vertical and horizontal waterproofing of a house ensures maximum tightness of structures. And the absence of moisture in them can guarantee a long life of the house and the impossibility of the appearance of dampness and fungus in the interior of the building.
Selecting materials for work
TechnoNIKOL mastic No. 24 is a completely ready-to-use composition made from petroleum bitumen. TechnoNIKOL No. 24 for foundation contains various mineral fillers, technological additives and solvent. Mastic does not contain polymer, therefore it is not so elastic (relates to rigid membranes). TechnoNIKOL No. 24 is intended for waterproofing concrete structures.
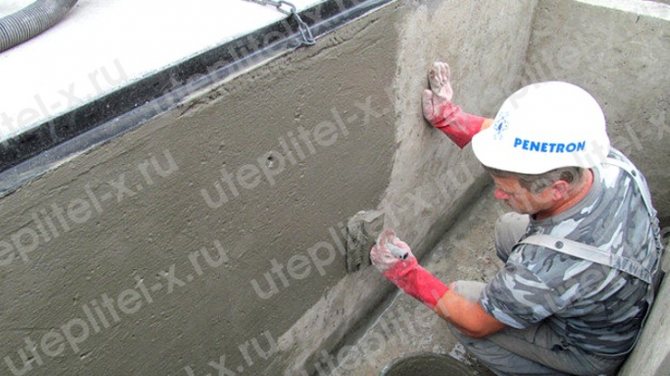
Foundation waterproofing with Penetron composition
Penetron is used as an independent waterproofing material or in combination with rolled materials. Thanks to the use of the composition, capillary suction disappears and small cracks are sealed. The chemical components of the mixture, penetrating into the concrete, react with compounds of aluminum, salts and metal oxides that are part of the concrete mixture. Penetron forms crystals that do not dissolve.
Roofing felt is made from cardboard impregnated with bitumen and coated with refractory crumbs, for example, talc. This seemingly simple technology makes it possible to obtain a cheap, moisture-proof material that is at the same time very convenient and easy to install. Thanks to various additives (lime, clay, chalk), heat resistance is significantly increased. The price of waterproofing material is affordable for everyone.
Why do you need waterproofing between the masonry and the foundation?
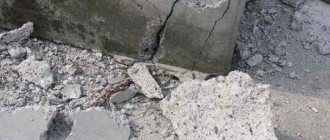
Joining a brick to a concrete surface involves some special features. They consist in the fact that the monolith under the influence of moisture can become stronger, and the masonry wetted with water gradually collapses. Moisture frozen at sub-zero temperatures can break off pieces even from surface-impregnated bricks, as a result of which the walls begin to gradually crumble. And this is not to mention the fact that dampness, an unpleasant odor and mold appear in the house, which is difficult to remove.
The porous structure of the brick promotes the rapid rise of capillary moisture up the walls.
Laying built-up roofing felt
There is a film on the fused roofing felt on the heated side; when the heat is sufficient for gluing, it turns white and burns. The sheets cannot be overheated; they easily melt through.
The preparation of the base is the same.
Step-by-step instructions for laying built-up roofing felt
A roll of roofing felt is placed in front of you so that you can roll it forward and gluing it while walking along it. They hold a burner in their hands, heating part of the surface of the roll and the mastic in front of it for 20-30 cm. Then the heated sheet of roofing material with the burnt film (the adhesive base “boils”) is rolled out about half a turn and glued, trampled down, while all the folds must be straightened and bloating. It is better if the glued roofing material is rolled with a heavy roller. Then the next section warms up. So gradually, warming up and rolling out, glue the entire roll
It is important to roll and press the glued roofing material. The second sheet is glued with an overlap (by 5 cm) after it has completely cooled and the first one has been glued.
Troubleshooting
Many home owners who missed the chance to timely install waterproofing between the masonry and the foundation turn to specialists for help. The difficulty is that the protective layer must be located along the entire perimeter of the box in its lower part. That is, in order to lay insulating materials, the building, in theory, needs to be dismantled or raised in some way. But such options are simply impossible and are not being considered.
In fact, there are a couple of ways to correct the situation. One of them does not require large financial investments, but it will take quite a long time to complete. The second option is somewhat simpler, but much more expensive. What to choose? We will leave the solution to this issue to the owner.
The first method involves partial, step-by-step dismantling of the brick at the level of the junction of the wall and the foundation. First, a small fragment of the masonry is removed, then waterproofing is laid from fiberglass or other modern material, after which the openings are again filled with the removed bricks, and the seams are caulked. After 3-4 weeks they begin work on the next site. Long, but cheap.
The second method involves injecting the foundation-masonry section with a special compound. It penetrates into voids, pores and microcracks, creating a waterproof barrier. Inclined holes (holes) are drilled to a depth of no more than 2/3 of the wall thickness and sealing gel or polymer-cement mixtures are introduced into them under pressure.

Another technology is based on installing injectors in masonry and concrete monolith for a period of at least two weeks. In this case, the holes are gradually filled with waterproofing compounds. Injection work should be entrusted to professionals with experience in such work.
Internal wall insulation
Might be interesting
Waterproofing
Foundation waterproofing: optimal choice of technology
Waterproofing
Clean water is the key to health, waterproofing concrete…
Waterproofing
Instructions for waterproofing a swimming pool
Waterproofing
Selection of materials, methods of waterproofing work...
Waterproofing a brick wall from the inside against water ingress is used if the room still needs to be insulated, since in this case all materials are applied not to the working surface itself, but on top of it. This is done as follows:
- For these purposes, it is best to use specialized impregnations, as well as plasters and coatings with the addition of water-repellent components. Also, recently quite often they began to use liquid impregnation, for example, liquid wallpaper is applied to the wall, which themselves imply the absorption of moisture. True, such a means of protection will have to be changed from time to time.
- Also, a homeowner or worker can use dry coating materials with the addition of acrylic components and construction mastic. Such waterproofing will be much more difficult to do, but it will last, as you probably already understood, several times longer. Its next replacement will only occur in 15-20 years (liquid wallpaper will have to be re-glued after 7 years, since the absorbent components will no longer perform their duties).
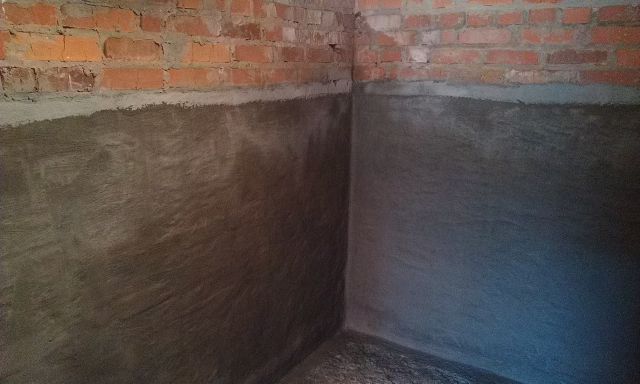
Protecting walls from moisture inside the building
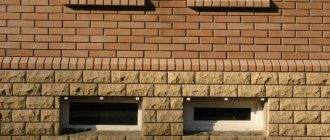
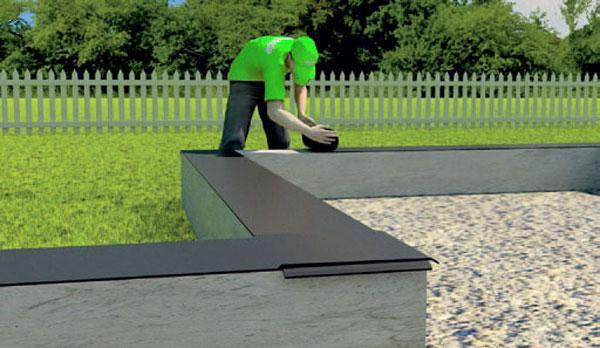
Installation of protective ebb
The main purpose of low tide is to prevent moisture from appearing at the junction of the wall and the part of the foundation protruding outwards. They are made of metal or plastic.
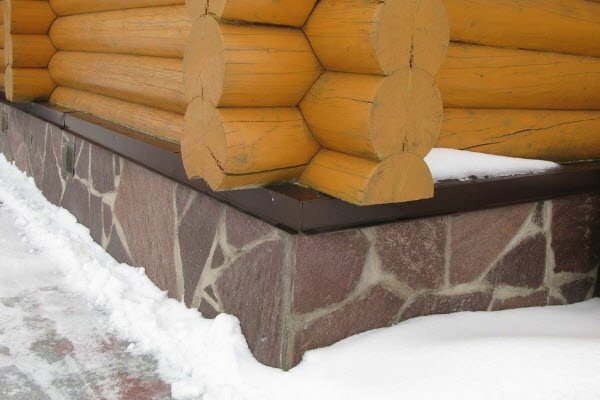
Plastic castings are lighter and are not afraid of corrosion, but they are easily damaged during operation. Metal ones require monitoring of the condition of the protective paint, but in the case of complex foundation geometry, it is easier for them to give the required shape.
When installing basement flashings, a number of points need to be taken into account.
- Installation must be done before cladding the external walls.
- The presence of slopes helps maintain tightness. They are created from a cement mixture. The optimal slope of the slope surface is 15 degrees.
- The sills can be attached to the wall and to guides made of galvanized profiles or bars. They are nailed to the wooden base with ordinary nails, and the material is fixed to the profile with self-tapping screws.
To ensure tightness, the ebbs should be overlapped. Internal and external corners can be made from scraps of the ebbs themselves.
Consequences of water penetration into buildings
Water has a destructive effect on brick buildings, since this material has a capillary-porous structure. Groundwater that penetrates from below the structure contains various salt impurities. They, in turn, settle in the pores of the brick and crystallize there, increasing in volume. Thus, the material of the load-bearing elements begins to deteriorate, paint and plaster peel off, and finishing coatings become deformed.
Groundwater, moving through the capillaries of the walls, begins to wash away water-soluble salts from the materials, and this leads to the destruction of the brick mass and masonry mortar. Structural destruction occurs due to a chain nature.
The basement is a special risk area. It is this area that is most susceptible to inundation of melt and groundwater. As a result, mold, soil salts, and fungi appear.
Water can penetrate the foundation and walls from above in the form of rain and snow. Such exposure has chemical consequences, in addition to the mechanical destruction that is associated with the process of freezing and thawing. Rainwater is a kind of acidic solution, which consists of rain flows and industrial emissions captured from the atmosphere, which have a destructive effect on materials: sand-lime brick, concrete, marble. The number of capillaries, pores, and microcracks increases, thereby destroying the material faster.
Installation technology
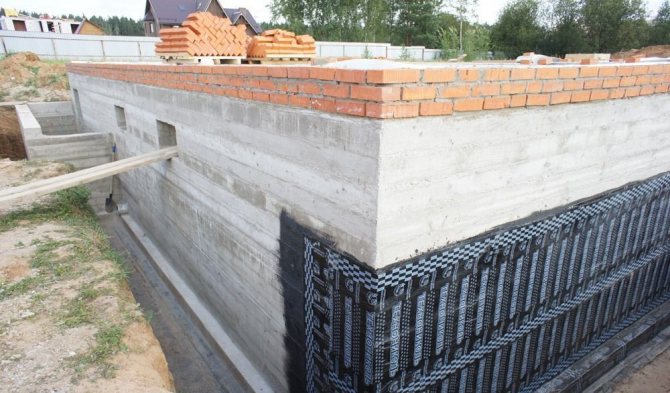
If waterproofing is carried out in a house that is already in use, at the first stage the outer wall of the foundation is dug out to its full height, cleaned of soil and dirt, the cracks are sealed and the surface is leveled. The next sequence of actions is as follows:
1. Prime the concrete with bitumen primer.
2. Apply a layer of mastic. You can use cold applied bitumen mastic.
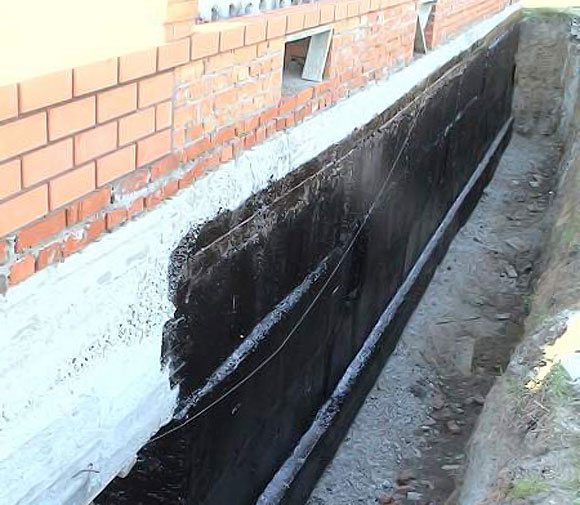
3. Glue a sheet of roofing material onto the mastic. It is recommended to heat the material with a gas burner. The overlap of adjacent strips is up to 15 cm.
4. Place the mastic and the second layer of roofing felt again, observing the spacing of the seams in relation to the first layer.
5. If insulation is not carried out simultaneously with waterproofing, the wall is covered with sheets of plywood. Otherwise, PPS slabs are glued on top of the roofing felt and secured with dowels.
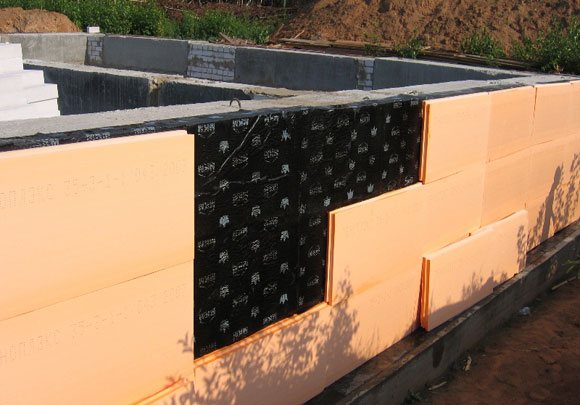
The insulation is protected from external mechanical factors by sheets of plywood, asbestos-cement or reinforced concrete slabs. For external treatment of the base, a durable facing material (for example, porcelain tiles) is suitable as a protective coating.
Horizontal waterproofing with roofing felt is done in the same way, only there can be more than two layers.