In this article we would like to offer you a short overview of frequently asked questions regarding the design features and technologies for arranging non-buried floating foundations. This information will be of interest to all owners of sites with difficult soil, as well as future homeowners who have decided to ask the price of progressive construction technologies.
In the construction industry, the term “floating slab” refers to a non-buried foundation structure, separated from the main soil by a sand cushion. This design “slides” over the ground, ignoring seasonal heaving deformations and increased soil moisture.
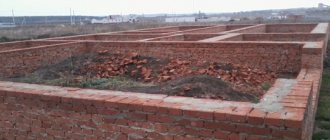
Description of floating soil and its features
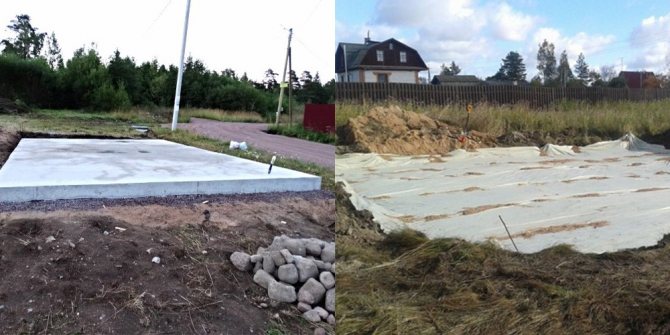
Floating soils
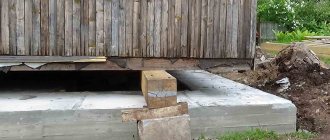
A floating foundation is made in the form of a strong solid base, which has a high load-bearing capacity. Most often, it is a monolithic concrete slab, 20-40 cm high and repeating the perimeter of the future structure. Such a foundation can protect the structure from the effects of heaving soils and groundwater. Unlike foundations, which compensate for loads with high resistance, a floating foundation moves along with the structure parallel to the ground. Residential buildings and outbuildings can be built on a floating foundation. Its main advantage is considered to be floating on the surface during seasonal ground movement.
How to make a floating foundation with your own hands
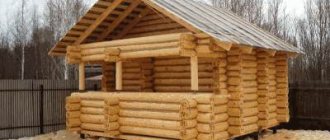
The small volume of excavation work and the possibility of self-production without the use of heavy construction equipment make floating foundations popular among individual developers when constructing various light buildings, such as low-rise buildings and outbuildings, auxiliary structures and technical facilities.
All work on the construction of the foundation can be divided into several stages: preparatory and the process of performing the work itself.
At the preparation stage, a drawing of the structure being constructed is drawn up and the need for the materials used is calculated, after which these materials are purchased and the necessary tools and equipment are prepared.
Important! In order to correctly fill the slab, ensuring the strength of the structure being constructed, the process of performing work (concreting) must be organized in a continuous cycle from its beginning to completion.
When the preparatory work has been completed, you can begin to carry it out in the following sequence:
Advantages
A floating structure has certain qualities that provide many advantages:
Advantages of a floating structure
- Preventing seasonal imbalances. Correct laying of the foundation in accordance with the technical manual prevents distortions of windows and doors during winter or spring ground movements.
- Reducing the cost of constructing the foundation and its use. The peculiar floating of the base slab makes additional measures to strengthen and equip it unnecessary.
- High strength indicators. This characteristic makes it possible to equip a floating foundation on any type of soil, including sandy soils.
- The monolithic slab follows the movement of the soil, preventing the formation of all kinds of defects.
- Quick foundation laying. Following all recommendations for the construction of a floating foundation, in which the smallest details are worked out, allows the work to be completed in a minimum amount of time.
- Durability. A properly constructed foundation can last up to 150 years.
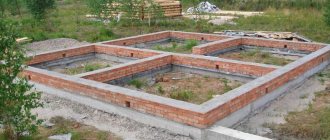
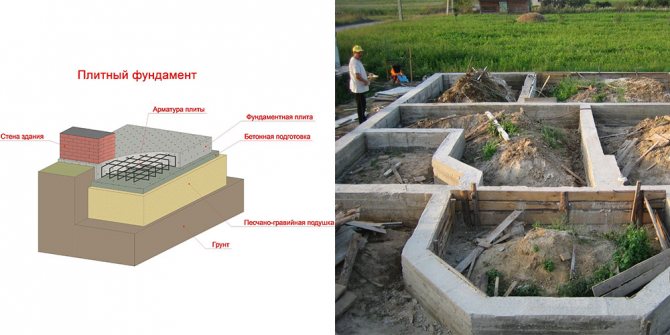
Foundation arrangements
To equip a floating foundation yourself, it is recommended to conduct a preliminary soil analysis and determine the groundwater level.
The construction of a foundation of this type involves the following points:
- Installation of a drainage system - ring and bottom - for effective drainage of heaving soil.
- Backfilling of the sand cushion with obligatory compaction with a vibrating plate.
- Using practical insulation – polystyrene foam boards.
- Arrangement of stiffeners to reduce the thickness of the floating slab.
- Timely installation of communications before pouring the slab.
- Installation of a reinforcing layer of rods (thickness – 10–14 mm, cell – 11 cm) to strengthen the monolithic concrete base.
Step-by-step work execution
Like all construction work, laying a floating foundation must be carried out in accordance with the step-by-step guide:
Soil development.
Work begins by marking the site, and it should be taken into account that the foundation pit should have dimensions slightly larger than the future foundation. A retreat of 1 meter is considered optimal. The axes of the future structure are tied to support points along which the boundaries of the pit are drawn.
You can remove soil from the hole manually using a shovel. If you have a sufficient construction budget, you can use the services of an excavator. A monolithic foundation does not require deep penetration into the ground; it is enough to dig a pit up to 0.7 meters deep. The bottom of the pit must be carefully leveled; this work is best done by hand, using a building level.
Arranging a pillow for a floating base.
To evenly distribute the load, it is necessary to backfill the sand cushion and install a drainage system. First, drainage is done. To do this, transverse trenches are dug along the bottom of the pit, geotextiles and pipes that drain water are laid.
After this, a layer of crushed stone is poured onto the bottom of the pit and compacted well. A sand cushion 20 cm high or more is laid on top of the crushed stone. The sand is compacted by pouring water. You can use a special vibrator to compact sand and crushed stone. This will improve the quality of the sand cushion several times. When arranging a sandy base, you should monitor the level. There should be no depressions or bumps on the surface.
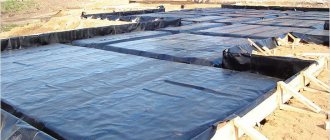
The sand cushion is covered with a layer of waterproofing, which can be used as ordinary polyethylene film. Waterproofing will prevent moisture from penetrating into the foundation and will also prevent concrete mortar from leaking out of the solution.
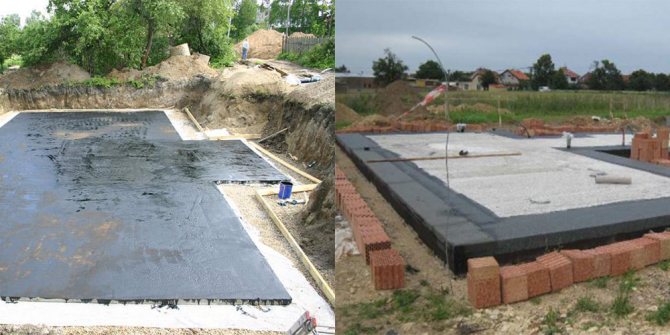
Concrete screed.
The waterproofing layer must be filled with concrete screed. It is made from liquid concrete mortar grade B-15 or its analogues. Place the screed on beacons slightly larger than the base slab. The thickness of the fill can vary from 5 to 15 cm.
Waterproofing of a floating foundation.
After waiting for the concrete screed to dry completely, proceed to the stage of waterproofing the base. It can be done in two ways:
Base waterproofing
- Coating waterproofing, which involves the use of liquid waterproofing materials, for example, bitumen-based compounds. Molten bitumen is easily applied to the surface and does not require special knowledge and skills to complete the work; it has good adhesion to the base without the formation of seams. However, it does not tolerate low temperatures well.
- Roll waterproofing is carried out according to the following scheme: the waterproofing material is rolled out along the entire length of the base and heated using a torch or blowtorch. As a result, the bitumen layer of the material melts and it sticks to the base. To properly protect the foundation from moisture, you need to use only special materials for waterproofing the foundation. It should also be remembered that low heating of the material does not ensure a tight fit to the base. And as a result of strong heating, bubbles may appear, which also negatively affects the result of the work.
Protection of the waterproofing layer.
After the waterproofing has completely dried, an additional protective screed up to 15 cm thick is required. This will prevent damage to the waterproofing layer when reinforcing the foundation and when backfilling the foundation.
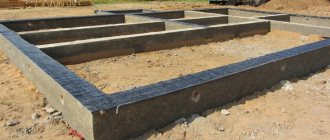
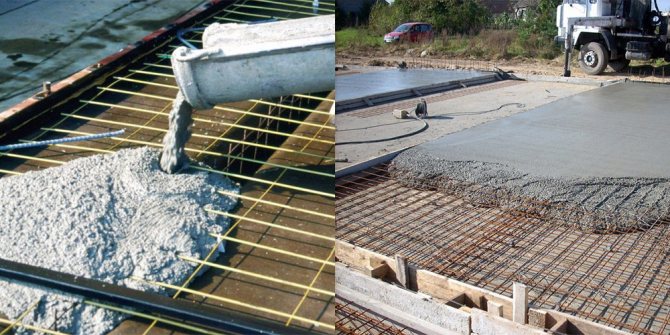
Creation of a reinforcing frame.
Reinforcement of a floating foundation is the beginning of the main construction of the foundation. To create a reinforcing frame, you need to use ribbed reinforcement to achieve maximum adhesion between steel and concrete. Neglecting this rule can lead to deformation of the slab during seasonal ground movement. The ribbed surface of the material reduces the effect of stretching the monolithic base. You can tie the reinforcement cage with your own hands. It is a regular cage of rods, the distance between which is 30 cm. Increasing this parameter may reduce the strength of the base. The reinforcement is tied with soft steel wire using pliers. It would be preferable to make two tiers of the frame corresponding to the size of the foundation.
Formwork for floating foundation.
The formwork for the monolith is arranged along the outer perimeter of the reinforcing frame. For its construction, you can use edged boards, fastening them with nails. However, laminated plywood has more advantages. Firstly, the formwork will be much stronger. Secondly, it will take significantly less time to complete the work. Thirdly, the material is fastened using self-tapping screws, which also affects the speed of dismantling the formwork.
Pouring concrete solution.
A floating foundation should be concreted only with high-quality concrete. Concrete solutions of grades B-25 and B-35 have excellent strength characteristics. To pour a floating monolithic foundation, a large amount of concrete mixture is required, so it is recommended to order ready-made concrete. Making the solution yourself will take a lot of time and effort.
Pouring concrete base
The foundation must be poured with concrete at the same time to create a single monolith. If complete concreting is not possible at one time, the base can be concreted in horizontal layers. In this case, vertical concrete connections should not be allowed. This can lead to cracking of the foundation and subsequent destruction of the entire structure.
When concreting the base, it is recommended to use an internal vibrator. It will help the concrete to settle thoroughly, which will greatly increase the strength of the base. The poured foundation is leveled and left until completely dry.
Marking and arrangement of the pit
To mark the foundation the following are used:
- cord;
- pegs;
- construction level;
- roulette;
- triangle.
At the construction site, one corner is marked along the perimeter of the future foundation. A peg is driven in. A triangle is placed on it, and along one side the length of the building is marked, and along the other - the width. Pegs are driven in at the resulting points.
Next, the axis lines are determined and the 4th peg is driven in. Correctness is checked using a triangle - the resulting diagonals are compared. If the stakes are installed correctly, the difference between the diagonals will not exceed 2.5 cm. If the sizes do not match, it is necessary to make an adjustment by moving the corners.
A cord is stretched between the driven pegs to obtain visual contours for the foundation.
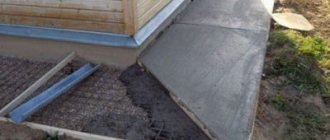
After preparing the markings, you can begin arranging the pit. The size of the finished pit should exceed the size of the slab by 110 cm around the entire perimeter. This is required for arranging an insulated blind area and drainage of the base.
Important! When digging a pit, it is necessary to take into account the soil loosening coefficient. Rocky soil doubles in volume, sand triples, crushed stone and gravel quadruples.
When constructing a pit, a slight slope of the walls should be observed in a ratio of 1 to 0.25 to prevent possible soil shift.
The laying of utilities is carried out at the initial stage. In this case, water pipes are installed with a depth of 150 cm, sewerage is buried 80–100 cm below the soil freezing level.
To protect a floating foundation from soil heaving, the following methods are used:
- arrangement of drainage wells;
- waterproofing sand or gravel cushion 55 cm high;
- an insulating layer of polystyrene foam boards 15 cm thick;
- waterproofing layer made of polyethylene film.
Mistakes made when arranging a floating foundation
When performing work to create a floating monolithic slab, some mistakes may be made that have a detrimental effect on the construction process and the further operation of the house.
- Carrying out work on frozen soil also entails a lot of troubles that begin when the soil thaws.
- Neglecting waterproofing will result in water penetrating into the foundation. When seasonal freezing of moisture occurs, the concrete monolithic slab will collapse.
A monolithic floating foundation will protect the structure from destruction due to the adverse effects of seasonal movements of soil and groundwater. At the same time, all work on arranging the foundation can be done with your own hands.
Concreting the formwork for the base
The final stage is concreting the foundation formwork. The concrete mixture is poured in several layers, and the thickness of each layer should not exceed 15 cm.
Each layer is carefully leveled and compacted using the bayonet method. The finished concrete mixture is poured in one go, so it is better to use concrete mixers or concrete pumps to complete the work.
The concrete is compacted until a wet sheen forms on the finished surface. To level the top layer, you can use special wooden slats.
On the first day of pouring, it is recommended to wet the base with water every 5 hours, then cover with polyethylene. This will prevent cracks from appearing when the concrete dries quickly. In subsequent days, the foundation base is wetted only 2-3 times a day. Dismantling of the formwork is carried out after the concrete has completely dried.
Now every individual developer knows what floating foundations are and on what types of soil they can be built. Due to their practicality and durability, such foundations are becoming increasingly popular and in demand in private residential construction.