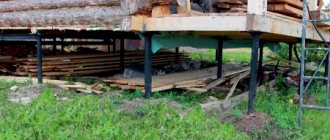
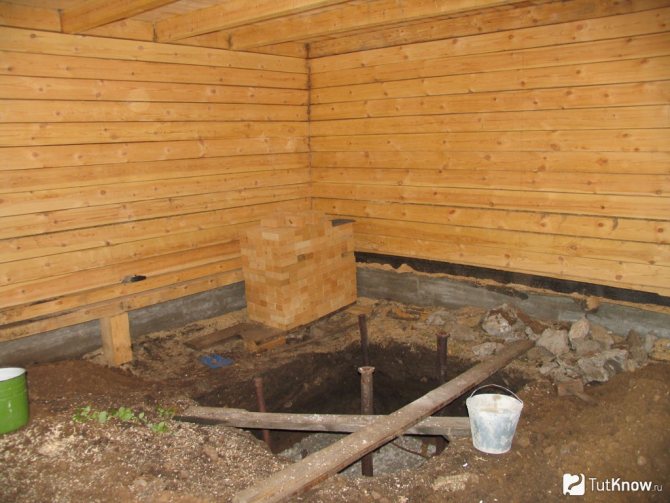
Laying the foundation for the stove is not very difficult, but some points must be taken into account. If a slab foundation is used during the construction of a bathhouse, then it is not necessary to make a separate foundation for the stove. If the bathhouse is built on a strip foundation, then an individual foundation must be made for the stove.
Another criterion for determining the need for a foundation for a furnace is the mass of the furnace. Decision making depends on this indicator. There are furnaces (metal), the mass of which does not exceed 200-250 kg; a separate foundation is not installed. It is enough to strengthen the floor.
A brick kiln has a large weight, which can reach 8-10 tons. Under such weight, a foundation is simply necessary.
A separate foundation is built for a brick oven, the weight of which starts at 750 kg, otherwise the soil will not withstand the weight of the structure and will collapse.
Choosing the type of foundation for a sauna stove
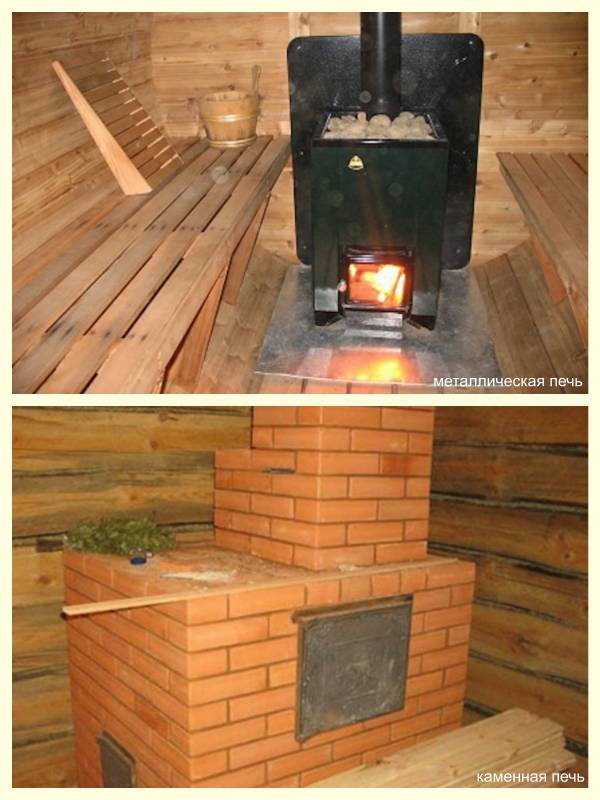
The type of foundation for a stove in a bathhouse depends on the weight of the building and the properties of the soil, so study the following information:
- For purchased metal stoves that weigh around 250 kg, a solid base or shallow foundation is sufficient.
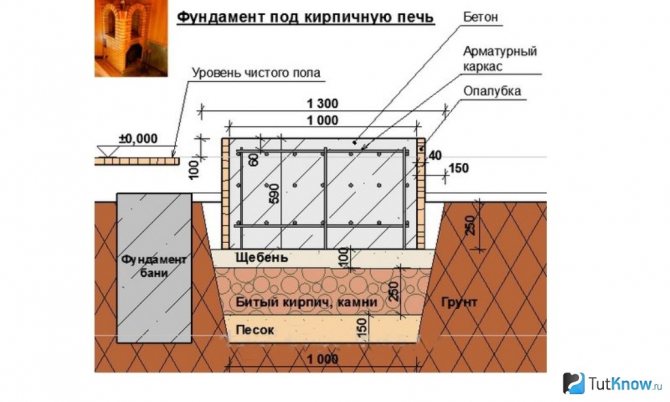
- Brick ovens are more massive, weighing at least 700 kg, and a reinforced concrete foundation is required. The weight of a brick kiln can be determined based on the approximate mass of a square meter of masonry - 1350 kg (about 200 bricks plus mortar).
- For furnaces weighing over 2000 kg, a reliable reinforced concrete foundation 1.5 m deep is built.
- The height of the furnace foundation is made in three ways: up to the floor level, at the level or slightly higher. The foundation is made below floor level so that air enters the furnace from below, from under the floor. Advantages: floors warm up faster, and combustion air does not come from the steam room.
- On slurry soils for medium-sized brick kilns, a pit with a depth of 60-70 cm is prepared.
- If the site has loam or clay, find out the freezing depth of the ground for your area. Dig a pit below the freezing point. If there is no data, go deeper one and a half meters.
- Make sure the groundwater is far from the surface. The foundation is minimal if water is close, but the area of the structure is increased to ensure stability.
- If the soil contains sulfates, use sulfate-resistant cement of the SSPTs brand in construction.
- It is advisable to make the foundation of the stove and bathhouse at the same time. In this case, the pits are made of the same depth.
- The size of the foundation for the stove in the bathhouse should exceed the size of the stove by 100-150 mm in the horizontal plane.
- Formwork is necessary if the edges of the foundation pit are loose and crumbling.
Reinforced concrete columns of industrial buildings.
In buildings without overhead cranes, columns without consoles are installed, and in buildings with overhead cranes, columns with consoles are installed on which the crane beams are supported.
Based on their location in the plan, the columns of the outer and middle rows are distinguished: the former are also installed in the rows adjacent to the longitudinal expansion joints. Reinforced concrete columns can have a rectangular and I-beam section, and can also be two-legged. Compared to rectangular columns, two-branch columns have increased rigidity, but they are more labor-intensive to manufacture. They are used in buildings with a height of more than 10.8 m.
In buildings equipped with more than two overhead cranes in a span, for the safety of operating personnel, through passage galleries are provided along the crane tracks. In these cases, two-branch columns with manholes located at the level of the top of the crane beams are used.
The branches of the through-section columns are connected by spacers every 1.5-3.0 m in height.
Reinforced concrete columns contain steel embedded elements, with the help of which truss structures, crane beams, wall panels (in the columns of the outer rows) and vertical connections are secured. In U1ests, steel sheets are laid to support rafter structures and crane beams: they are secured with anchor bolts. At
In the case of non-anchor fastening of rafter structures to columns, steel plates are embedded in their heads.
To increase the stability of buildings in the longitudinal direction, a system of vertical connections is provided between columns and in coverings. In buildings without overhead cranes and with overhead transport, intercolumn connections are installed only when the height of the premises is more than 9.6 m. In order to reduce the forces in the frame elements from temperature and other influences, vertical connections are located in the middle of the temperature blocks in each row of columns.
Ordinary columns are connected to braced columns by spacers placed along the top of the columns, and in buildings with overhead cranes - by crane beams. The connections are made from angles or channels and attached to the columns using gussets for welding.
Foundation for iron and light sauna stoves
Despite the light weight of metal products, the foundation for an iron stove should not be connected to the foundation of the room.
When marking the pit, plan so that after construction there is a guaranteed gap of 5 mm between the foundations of the stove and bathhouse. The foundation for a metal furnace is made as follows:
- Mark the pit on the surface of the earth. The horizontal dimensions of the pit must exceed the dimensions of the lower base of the oven by at least 10 cm.
- If you want to subsequently sheathe the slab with brick, consider the indentation from the front side of the proposed wall.
- Dig a pit 50-60 cm inside the marking if the soil is not heaving. For heaving ones, increase the depth to 1 m.
- Pour crushed stone into the pit and compact it. The thickness of the backfill is 30 cm.
- Prepare a cement-sand mortar using a 1:4 ratio. Use cement grade M200. The solution should flow freely.
- Fill the crushed stone with the solution and leave to dry for 2-3 days.
- Waterproof the cement pad with roofing felt and hot bitumen.
- Make formwork from thick boards according to the design dimensions and install it in the pit.
- Prepare concrete using the following proportions: 1 part cement, 2.5 parts sand and 4 parts fine gravel. It is allowed to replace gravel with expanded clay, which has heat-insulating properties.
- Pour concrete into the hole and level the surface to the horizon.
- The foundation should dry for about a month. To prevent cracks from appearing, moisten it with water often - just spray it generously.
- Instead of concrete, brickwork is often placed on a cement pad.
- The concrete foundation has an unsightly appearance. To improve it, it is often covered with brick or thick ceramic tiles. The latter option is preferable due to the light weight of the tiles.
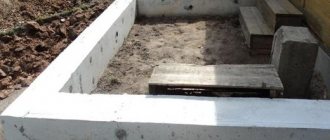
Making a shallow foundation for a stove in a bathhouse
The most popular type of foundation, because most brick kilns weigh 1000-1250 kg.
Used if groundwater is deep underground. To make a high-quality foundation for a stove in a bathhouse with your own hands, perform the work in this order:
- Dig a hole 70 cm deep, its dimensions should exceed the dimensions of the stove base by 20 cm. Measure the distance between the foundations of the stove and the bathhouse, the permissible size is 50 mm or more.
- Expand the bottom of the pit by 10 cm in all directions. The “heel” will allow the foundation to resist soil movement.
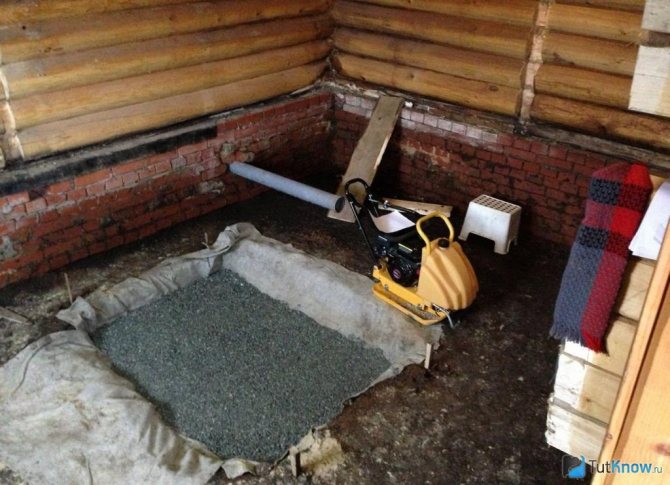
- Cover the bottom with sand (15 cm layer). Tamp it down, pour water on it, make sure the water is completely gone.
- Pour broken brick, stone, and crushed stone into the hole in a 20 cm thick layer and compact it.
- Pour sand again, level it with a shovel and pour water. Repeat the operation until all the voids are filled with sand.
- Pour crushed stone into the hole, level it and compact it. The final thickness of crushed stone is 10 cm.
- Build formwork around the perimeter of the pit. Provide a gap of 10 cm between the wooden wall and the edges of the pit, or more if possible.
- Make a reinforcing frame from an 8 mm rod and install it in the hole.
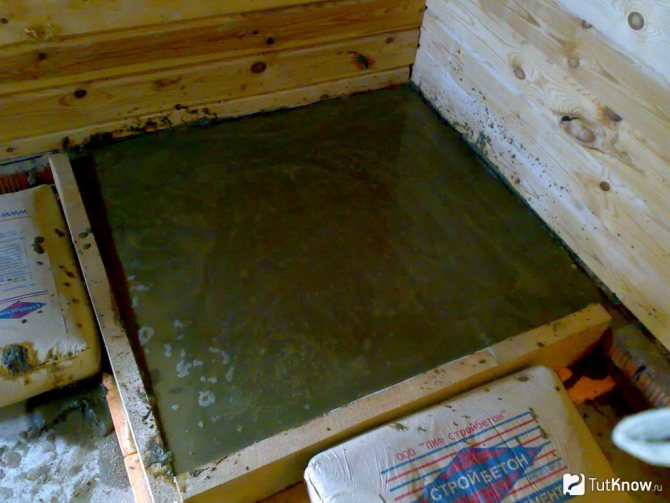
- Fill the hole with concrete and level the surface horizontally.
- Cover the foundation with film for better hardening (2-3 weeks).
- Moisten the foundation as described above.
- After a month, remove the formwork. Cover the side walls and the top surface with waterproofing in several layers.
- Fill the remaining cracks near the foundation with sand.
Design Features
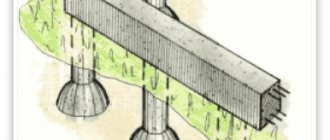
A conventional columnar foundation is a structure in the form of individual pillars, usually rectangular in shape, which are installed under load-bearing elements of the building such as columns or racks. The traditional strip foundation is arranged in the form of an extended strip on which load-bearing walls rest. If you combine these two types of foundations, you get a structure similar to a pile foundation with a grillage connecting the piles. However, a columnar strip foundation has fundamental differences from a pile foundation, which are as follows:
- Pile foundations are used primarily in soil conditions with weak soils that have low bearing capacity. The function of a pile is that it must pass through a layer of weak soil and find support in a layer with a high bearing capacity. To find this layer, geological research is done. Therefore, the length of the piles can reach 10 meters or more. Pillar-strip foundations are used in soil conditions with normal bearing capacity of the base, while the depth of the pillars into the ground should be a value that is only 200-250 mm greater than the depth of seasonal freezing of the soil, that is, within 1.5 - 2.0 meters .
- Piles transfer the load from the building through the bottom and side surfaces. Unlike piles, columns in a columnar strip foundation transfer the load only through the base.
- The cross-section of piles is in most cases much smaller than the cross-section of the base of the pillars.
- Pile foundations can be used for almost any building and structure, strip-column foundations are used mainly for light buildings - one and two-story residential buildings - frame and frame-panel, wooden from timber or logs, from SIP panels, for houses made of aerated concrete, aerated concrete and foam concrete blocks, bathhouses, garages, fences, etc.
The only thing these two types of foundations have in common is a grillage or tape that connects the individual supporting elements of the structure. At the same time, in a strip-column foundation, the strip performs the same functions as the grillage in a pile foundation - it plays the role of a multi-span beam on supports, transferring the load from the walls of the building to the pillars, which in turn transfer the load to the ground. This is where one common misconception lies: the strip in a strip-column foundation is considered an element that transfers part of the load to the ground along with the pillars.
The fact that the strip in a columnar-strip foundation plays the role of a hanging grillage is also related to the nature of its reinforcement. The tape is reinforced with a spatial frame, in which both the upper and lower reinforcing bars are working.
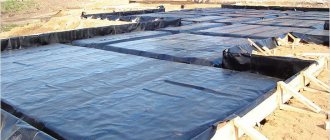
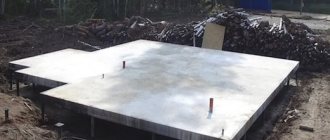
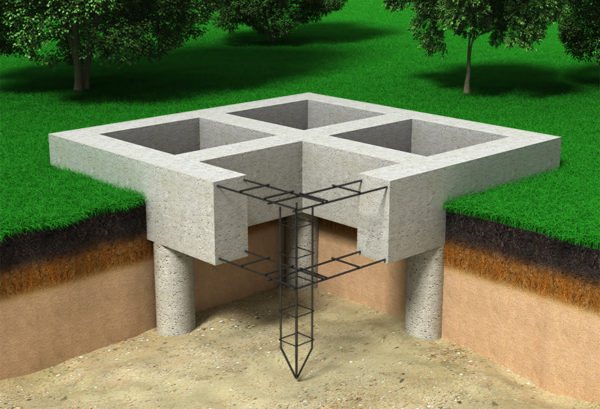
Slab foundation on a columnar support for a sauna stove
It is used on heavily heaving and clayey soils or in cases of significant soil freezing depth.
You can also build on dry soils to save building materials. Follow the following operating procedure:
- Remove the soil inside the marking by 150 mm.
- In the corners, drill cylindrical holes with a diameter of 20 cm (4 pcs.), the depth of which is 30-50 cm below the freezing level. The wells should not extend beyond the markings.
- Pour crushed stone into the wells in a layer of 10 cm and compact it.
- Install roofing material rolled into a cylinder into the holes, which will serve as formwork and waterproofing of the pillars.
- Make a frame for the wells and pit from a rod, install them in their regular places. For the frame, reinforcement or wire with a diameter of 8 mm is suitable.
- Prepare a concrete solution (see proportions above) and fill the pit. First, fill the wells with concrete and compact it with a vibrator, then the foundation pit. Fill everything without interruptions so that the pillars and slab form a monolith.
- After the concrete has hardened, about a month later, waterproof the foundation in any way. To achieve durable concrete, moisten it daily.
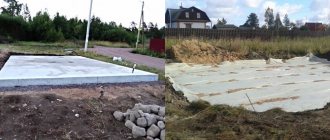
Pile foundation for a stove in a bathhouse
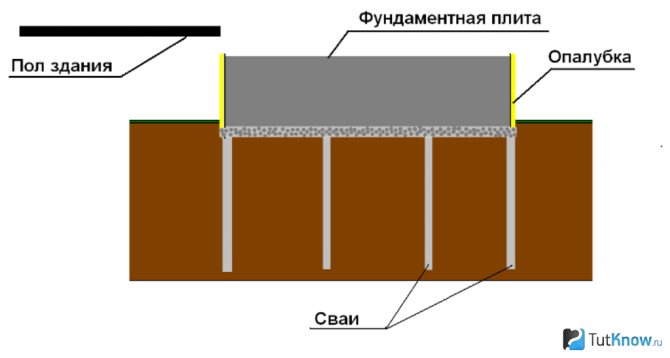
A simplified version of the previous foundation.
Withstands the heaviest ovens. It consists of piles of various designs and a reinforced concrete slab 15 cm thick. A simple but expensive option involves the use of metal purchased piles. Thanks to special blades, they are screwed into the soil, simultaneously compacting it. Screw the products 30-50 cm below the soil freezing level. Install a monolithic reinforced concrete slab on top of the piles, leaving a few millimeters of gap between the base of the slab and the soil for shrinkage. Attach the slab to the piles. Waterproof the surface with two layers of roofing felt and hot bitumen impregnation.
Instead of metal piles, concrete piles can be made, as in the case of a slab foundation on a concrete support. The stove should be larger in size than the oven. Instead, it is allowed to use a welded metal frame.
Initial conditions
The dimensions of the sole for the standing support are chosen so that the load on the plane of contact with the ground does not exceed its load-bearing capacity. Typical indicators for shrinkage of each individual loaded element in the foundation did not exceed the permissible values specified in the standards.
The column can stand on a separate foundation or be located in a group for which there is a single base (strip or slab type).
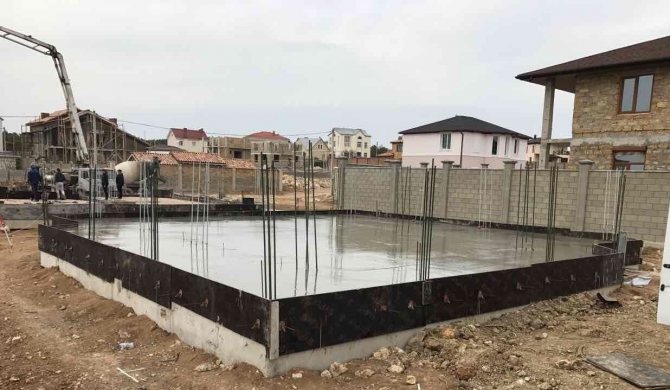
Group of columns on a single base
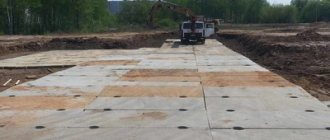
Releases of reinforcement for future columns in a monolithic concrete slab.
When calculating a columnar foundation for a column, the area of the base of 1 column is taken as the starting value. The required number of such supports must be taken with a margin of at least 50% in strength for each element being installed.
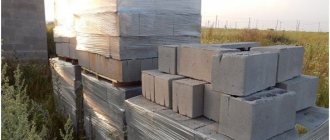
The materials for the manufacture of single foundations are:
- reinforced concrete products;
- rubble stone;
- brick;
- poured concrete.
Rigid types of foundations include structures made of monolithic branded concrete and made of brickwork.
Columns installed on a prepared foundation differ in the type of material they are made of: metal, reinforced concrete products. Each variety has its own method of attachment at the lowest point. Column supports for them are manufactured in the factory (standard type) or directly at the construction site at the installation site (design calculation).
The monolithic self-fabrication method has the advantage that it is universal, regardless of whether the steel or reinforced concrete product will be mounted on top of the base.
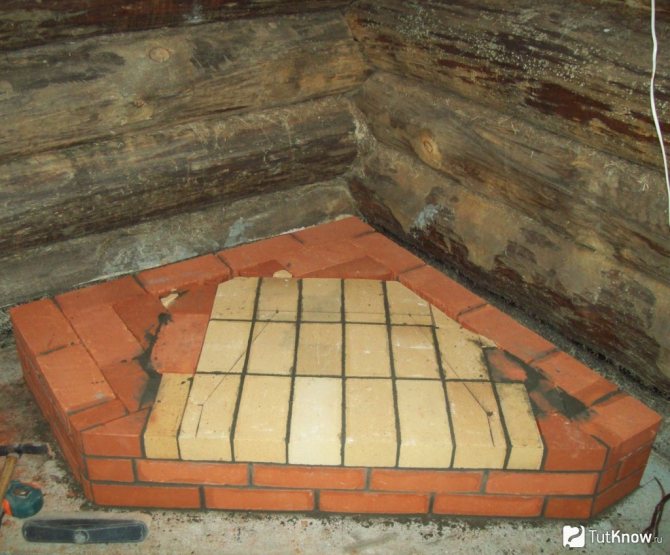
Rubble concrete foundation for a sauna stove
It is used when there is a large amount of construction waste made of stone, brick, crushed stone, it is popular due to the low cost of building materials.
Suitable for furnaces up to 2 tons, but can be used instead of buried foundations. It is made as follows:
- Dig a pit 1-1.2 m deep for heavy stoves or 0.6-0.8 m for stoves up to 2 tons. The horizontal dimensions should exceed the dimensions of the stove by 20 cm.
- Compact the soil at the bottom of the hole, add 15 cm of crushed stone to the bottom and compact it again.
- Make formwork according to the dimensions of the foundation and lower it into the hole. Waterproof the formwork from the inside.
- Place large stones up to 15 cm in size at the bottom of the pit in a layer of 30 cm. Pour crushed stone into the pit and fill the voids between the stones.
- Prepare a cement-sand mortar at a ratio of 1:3, dilute it with water to the consistency of liquid sour cream and pour the stones in the pit. Check that there are no gaps between the stones.
- If after the first laying half of the pit is filled, repeat the operation with stone, crushed stone and mortar and finish the job in one day. If the pit is deep, continue working the next day. The last layer of stones is laid at a distance of 7 cm to the floor level.
- Ensure that the top plane is horizontal with cement mortar.
- How to care for concrete during hardening is described above.
- After the foundation has hardened, waterproof all surfaces.
Features of the foundation for reinforced concrete columns
The bases for reinforced concrete pillars are selected based on the positive and negative characteristics of each type separately. In this case, the most optimal would be to use a glass base that has the following positive characteristics:
- They are reliable;
- They have increased strength.
There are two types of foundations used in construction:
- Monolithic;
- Made.
Construction stages
Compliance with the rules when constructing a foundation for reinforced concrete columns helps to increase the service life of the structure and quality.
- The pillars are installed in the ground to a depth of at least 70 centimeters;
- At the construction site, the soil should not be mobile or subject to temperature heaving;
- Groundwater must lie at least 1.5 meters deep;
- It is recommended to level the site so that it does not have sharp slopes and turns;
- To ensure the strength of the foundation, the grillage must be mounted from reinforced concrete. Of course, installing a grillage will require financial costs, but this will make the frame more durable;
- For walls, it is recommended to use lightweight building materials: foam blocks, timber, panels, logs.
Preliminary design allows you to make the foundation strong, but the following standards must be observed:
- The cross-section of the columns is 20x20 cm. Practice shows the use of pillars with a cross-section of 25x25 cm;
- It is recommended to make a shoe for each column. This means widening the bottom of the well for the pile. As a result, the load from the building is distributed and reduced;
- Columns should be placed at a distance of 1 to 2 meters. In this case, the pillars should be located in the corners of the building, at the junction of walls, under ledges: fireplace, stove.
To increase strength, the pillars are reinforced with rods with a cross-section from 12 to 16 mm. Depending on the material for the grillage, the height of the reinforcement is adjusted:
- For a wooden bundle, the rods should not reach the top 1-2 cm;
- When a reinforced concrete grillage is planned, the reinforcement should protrude by 40 cm.
You should work with reinforcement only after the concrete has gained the required strength.
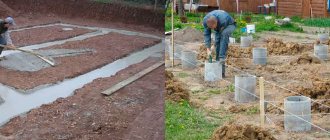
Shoe installation
As already mentioned, in wells it is recommended to enlarge the lower part to create a shoe. Plywood formwork is installed on a sand-crushed stone bed. Height 20-30 cm. The diameter of the prepared formwork should be 1.5 times larger than the diameter of the future pillars. Now the solution is poured into the prepared container. The concrete hardens within 10 days, provided the weather is warm, dry.
Installation of columns
The next step is the installation of the formwork directly under the pillars. Wooden boards of the required length are fastened with clamps. It is recommended to cover the internal walls with roofing felt. As a result of the measures taken, the walls of the columns are smooth, and most importantly, there is no damage when removing the formwork.
Now install the reinforcement and you can pour the 200M concrete solution. If construction takes place in winter, it is better to add plasticizing additives that improve the hardening of the solution. Experts recommend carrying out such work when the air temperature is above 15 degrees Celsius. Using a metal pin, air is removed from the liquid concrete. At an outside air temperature of 20 degrees and dry weather, the solution hardens within 7 days.
It is necessary to wait until it dries completely and only then remove the formwork. Now waterproofing is applied along the entire height of the columns and shoes.
Grillage
Monolithic construction is considered the most reliable. But there are other options for connecting the foundation and the building:
- Fastening using a channel or I-beam. In this case, the element is laid with the shelf down and secured with bolts. Such a connection is not afraid of heavy loads;
- Reinforced concrete or monolithic grillage. Its construction will require formwork and installation of a reinforcing structure. As a rule, a monolithic grillage is used for a panel house, frame construction, wooden frame;0
- Wooden grillage. Using timber is considered the cheapest option for connecting a columnar foundation.
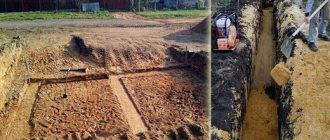
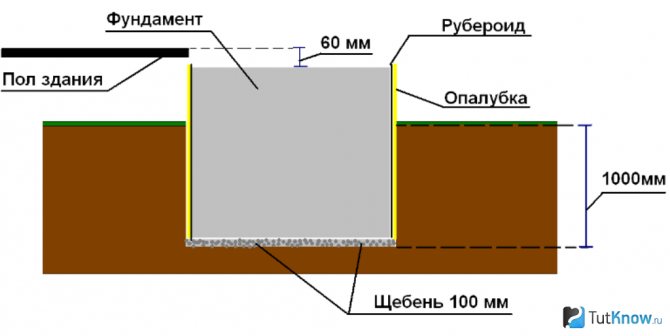
Recessed foundation for a stove in a bathhouse
To decide how to make a foundation for a bathhouse stove in your area, find out the composition of the soil.
On clay or loess soil and for furnaces weighing more than 2000 kg, a buried foundation is built. The reason is in the properties of the soil: porous clay expands in frost, and loess soil turns into liquid mud in rain. The foundation for heavy furnaces differs from a shallow foundation in the depth of the pit and reinforcement. For dry soil, the pit should be deeper than 80 cm. Often, in order not to find out the type of soil, the pit is dug 1.5 m deep. The distance between the foundations of the stove and bathhouse is at least 50 cm. The sequence of work is the same as when making a shallow foundation . To make reinforcing mesh, use a rod with a diameter of 12 mm.
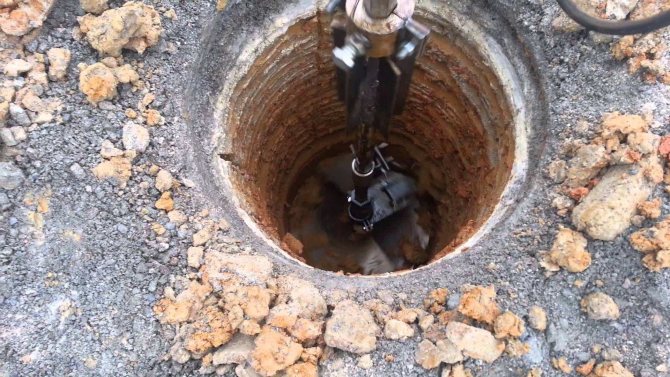
To get acquainted, we suggest watching a video about arranging a foundation for a stove:
A well-made foundation guarantees the longevity of the stove. Therefore, coordinate the choice of the type of foundation with an experienced stove maker, who will also advise how to pour the foundation for a stove in a bathhouse. Neglecting construction technologies can lead to a tilted chimney and roof failure.
Columnar foundation made of metal pipes
To construct a columnar foundation, different types of pipes are used. The biggest expense will be on the base with metal posts. But in the end, we will get the most reliable columnar foundation made of pipes, which is quite quick and easy to equip.
Although difficulties may arise when leveling metal pipes in relation to each other. If in the case of asbestos or plastic pipes they are easy to cut down, then a little effort is required.
Metal pipes for the foundation must be treated with anti-corrosion substances. This is necessary to extend their service life.
Let us pay attention to the process of strengthening supports by pouring concrete. Let's look at how to do this process, and give several examples as an example. To see what can happen to a columnar foundation in 10 years, watch this video:
- First way. A metal stand or several metal pipes of smaller diameter are driven into the well in such a way that they are immersed in the soil by 0.5 m. If several elements are driven in, then they must be placed at a distance of about 50 cm from each other. Then the well and the inner part are filled together pipe parts. When arranging the base in this way, it is better to make a grillage made of metal, which is welded to the protruding parts of the support pipes.
It will take a lot of money to build such a foundation, but in the end we will get a fairly strong foundation.
- Second way. After preparing the well, a sand cushion is poured onto the bottom and a metal stand is placed. The diametral section is from 15 to 30 cm. Please note that the pipe must fit into the well very tightly. This factor can prevent the expansion of metal during the hot season. Otherwise, the deformation may lead to the destruction of the structure. After installing the pipes in the wells, it is necessary to fill their interior with concrete.
After all the supports are prepared, they are left to harden for a week. Next they plan to arrange the grillage.
It can be made of wood, but this option is only suitable for light buildings. For more significant loads, it is necessary to make a grillage made of metal.