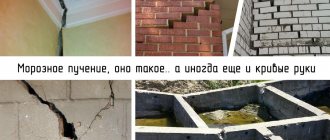
A garden plot is exactly the place where it should be cozy. Unfortunately, it is very difficult to create something impressive and harmonious in terms of design from available means. In such cases, the use of modern building materials is implied, as well as various tricks, with the help of which the construction process can become much easier.
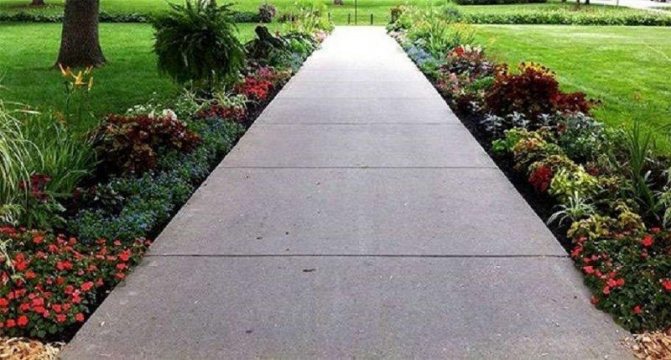
If we are talking about construction on the territory of a garden plot, then it all starts with the creation of paths. This is the most important element of the territory, which people visiting the garden immediately notice. To create an attractive garden path, you just need to study the technology, as well as use some additional tools in the creation process, without which it will not be possible to achieve a high quality structure.
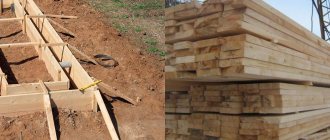
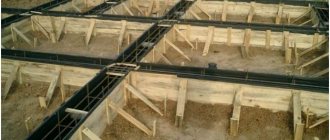
Straight wooden formwork
This is the simplest option, so it is best suited for beginners to create a straight cement path in the garden. For the manufacture of formwork, it is best to use boards made of coniferous wood; you can also use laminated plywood, this inexpensive, common material. Pros and cons The advantages of such formwork, in addition to ease of manufacture, include low weight of the structure, high strength, and low cost of the materials used. Disadvantages: the simplicity of the form provides little room for flight of fancy.
Formwork installation process: first step
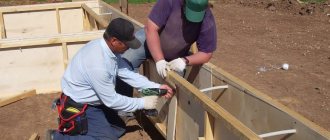
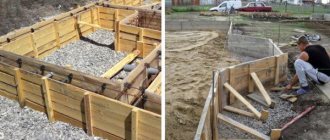
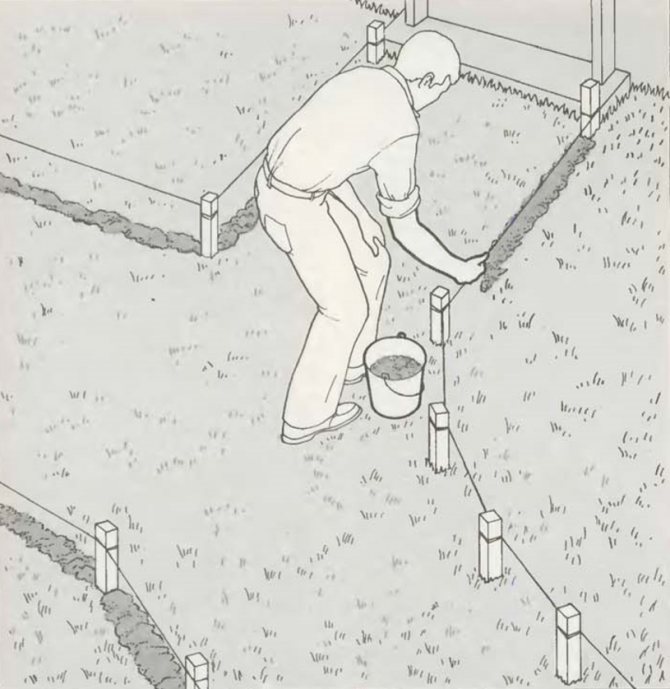
At the first stage, the area on which the path itself will be placed should be cleared of grass and large stones, using a level, check the height of the surface. If the surface is uneven, then removing the top soil in elevated areas will help correct this. If, on the contrary, the place for the future path has lowlands, then it is best to fill them with sand. Next, using pegs, you should mark a line, which will later become the formwork, and then the path. To do this, pegs are driven into the ground, and a thread (rope, rope) is stretched between them, simulating a path. This thread will make work easier when installing the edges of the formwork itself and will help prevent mistakes and unevenness.
Preparation of solution and pouring
Having the formwork ready, you can begin making tiles for the garden path. To do this, a concrete solution prepared from cement grade M300 and higher is poured into the formwork. The best option is cement grade M400.
Advice! When purchasing, pay attention to the date of manufacture of the cement. It is not recommended to use cement produced more than three months ago to make paths.
Proportions for making the solution:
- 1 part cement;
- 3 parts sand, we use washed river or quarry sand;
- 3 parts of crushed stone, a fraction of 5-10 mm is suitable.
In addition, it is necessary to add special additives that increase the resistance of concrete to temperature changes, moisture and mechanical loads, since the paths are used in difficult conditions. If it is not possible to use special additives, then you can add to the solution:
- silicate glue to increase moisture resistance;
- fiber fiber, which acts as reinforcement, giving the tiles special strength.
But it is still better to use specially developed additives; they are added to the solution according to the instructions during the mixing process. Having prepared the solution, you can begin pouring concrete mixtures. This operation is performed in three stages:
- preparing the base;
- pour and level the solution;
- let the solution dry and remove the mold. Final drying is carried out outside the molds.
Making the base
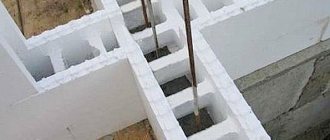
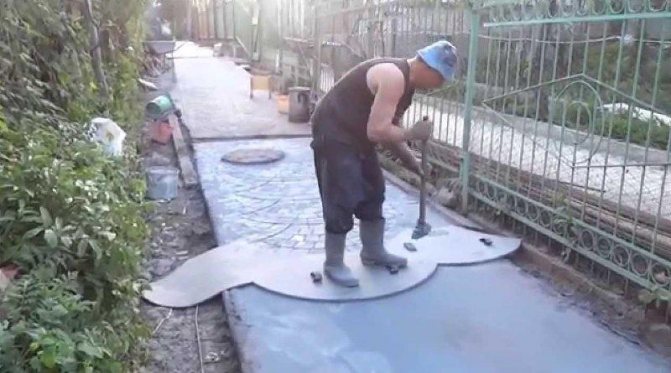
Then the base of the finished structure is covered with a special material, which is carefully attached both to the ground and to the boards using small nails. Thick polyethylene can be used as a material. Particular care is required when working on bends and corners. If the planned path has flaps to the side, then the material is carefully trimmed with scissors so that you can proceed to work on the flap. After placing the base material, the resulting workpiece is divided into equal fragments, for which plastic strips are perfect. Thus, all the conditions have been created to carefully fill the resulting model with concrete and get a beautiful, elegant garden path.
Ladder
If the garden plot is uneven and has a mountainous shape, then to give it a neat and well-groomed appearance, the garden path can be made in the form of a staircase. The work in this case also begins with the manufacture of formwork. After measurements and markings (as discussed above), install the boards and secure them with stakes. You should plan in advance where each step will be located. Next, the polyethylene is laid in small fragments, securely attached to the surface and edges of the formwork, and after completion of this work, concrete is poured. Step three: correcting mistakes As you know, accuracy and accuracy are important conditions for making the resulting garden path look stylish and beautiful. However, not all beginners will be able to achieve ideal shape right away. For example, after installing the outer contour, when measuring the width of the resulting formwork, you may find that one edge is several centimeters wider than the other. You can correct the mistake with the help of careful blows with a sledgehammer: they will help the board, which is the formwork shield, to fall into place. Also, in order to check whether the structure is level, you should use a level: ideally a water level, but if one is not available, a pipe level will help. The leveling process is an important part when creating formwork with your own hands; you should not neglect it: after all, a flat surface is the key to the beauty and neatness of the future path. Step four: strength is a focus When pouring concrete, fragile formwork may be damaged, so the structure must first be strengthened. The easiest way to strengthen it is to attach inclined bars to the vertical pegs that support the shields: one of which is laid horizontally on the ground, and the second is installed at an angle of approximately 45 degrees, creating a structure in the form of a triangle. The connection takes place using screws. At the edge of the resulting triangle, another peg is driven into the ground, which makes it possible to further strengthen the formwork. To achieve the best result, such fasteners should be placed 1-1.5 meters apart. This will help avoid the consequences of concrete pressure: the reinforcements will not allow the shields to break, and the resulting path will become smooth and symmetrical.
Types of concrete for creating paths
It would seem that it would be easier to fill the path with cement, but in fact the scope for imagination is unlimited here. Moreover, if you do the work yourself, the price range is not that great. Each of these methods can make paths at low cost. The question is more about how much you want to get involved and create something like this. Artistic tweaks may take longer.
How to make washed concrete with your own hands
Finished tiles
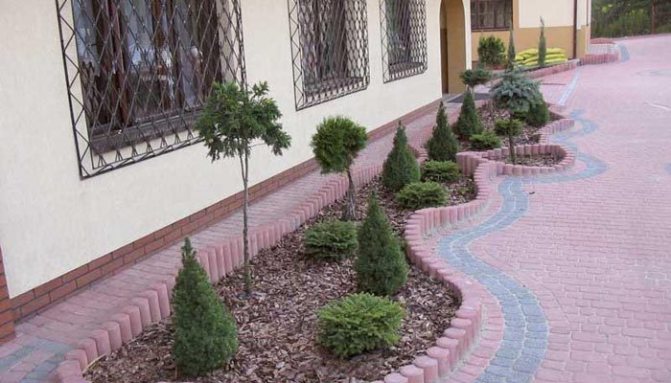
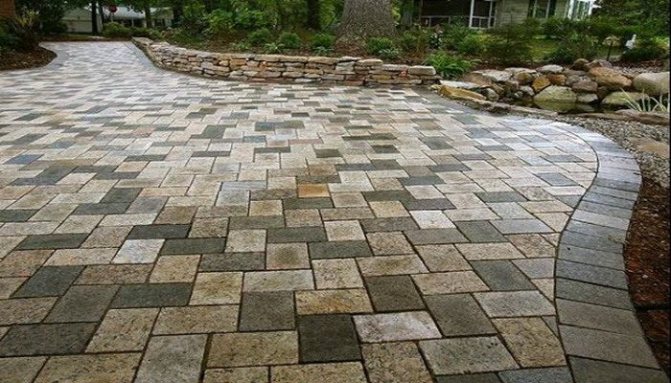
In fact, this is also a concrete path, since paving slabs are made from a mixture of cement, sand and crushed stone. They come in the form:
- straight (rectangular, square);
- curly;
- in the form of paving stones.
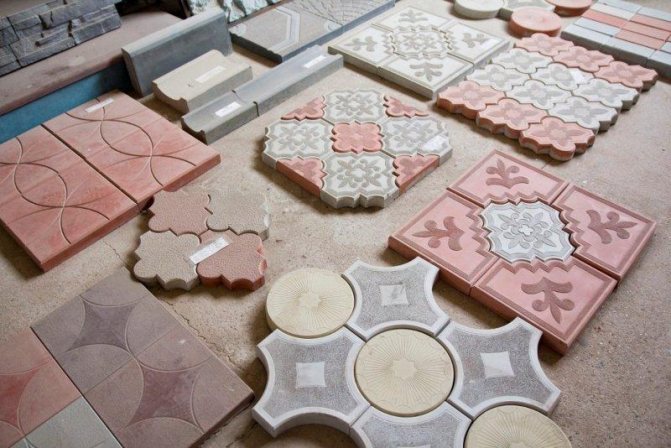
The surface of the concrete tiles is also different:
- smooth;
- textured - with a pattern;
- with imitation wood or natural stone.
Paving slabs are made using vibration pressing or vibration casting. Its most important parameter is thickness. For sidewalks, 25-30 mm is enough; for driveways, 40 mm tiles are usually used.
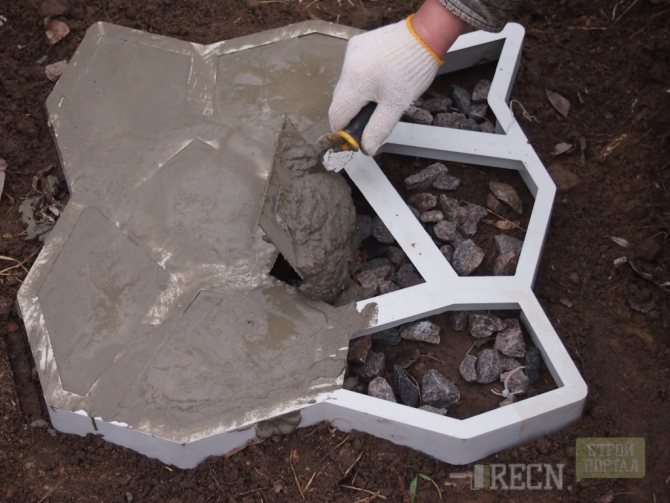
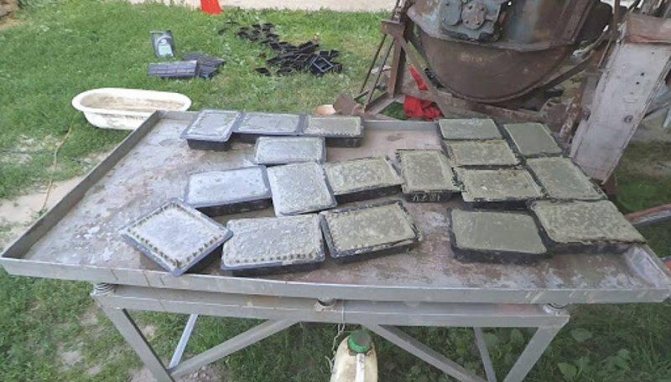
Pouring into molds
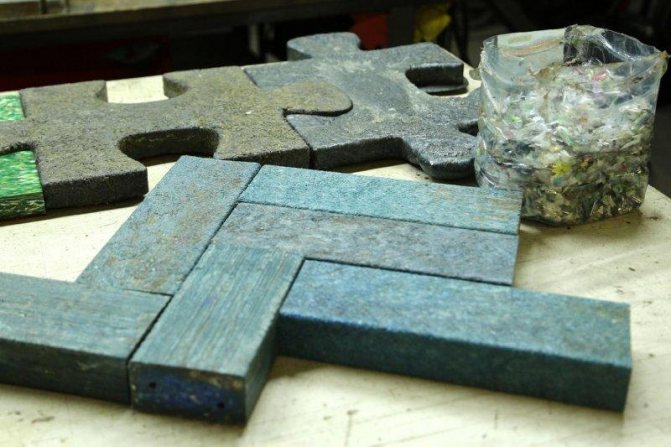
Having shapes, similar tiles can be made independently. There is less fuss with the previous option, but this one will cost significantly (10 times) less. The result is the same - an interesting tile pattern instead of a continuous coating.
You can make a simple form yourself - assemble it from slats in the same way as formwork for paths is made. It will be exactly the size you need. And plastic molds are available at any hardware store.
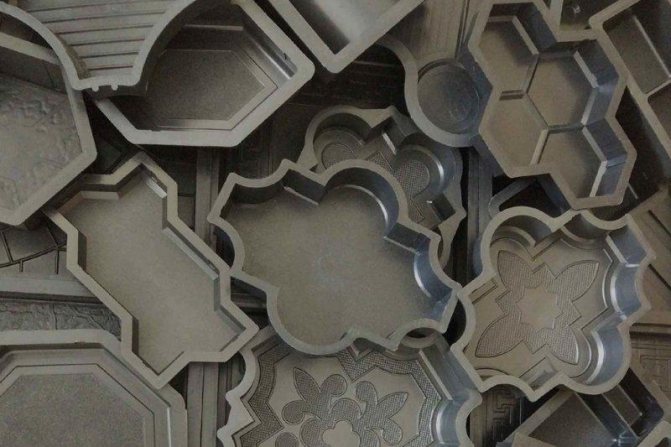
Nowadays, forms that are immediately filled “on site” are popular. With them, work goes 2-4 times faster, but the variety of shapes they have is not so great - basically, you will find in the store rectangular shapes or asymmetrical ones, as in the photo:
Conventional forms have the advantage that water does not flow down from the hardening concrete. While the tile, covered with a film on top, dries in the mold, the bottom of this very mold holds the moisture from below.
Here everything is the same as when pouring a solid path - part of the moisture is lost through the bottom. Moreover, in addition, it is difficult to maintain the required ratio of water and cement: the mixture must be both plastic enough (so that it settles into the mold) and not too liquid (so that it does not crack when the water evaporates). Considering also that the concrete in the tiles is not reinforced, when it dries out it cracks quite quickly.
You can pave paths even with the same type of tile in different ways. For example, someone leaves wide gaps between the tiles, fills them with gravel, or lets the lawn grow through the seams. This gives the landscape a “wild” touch, and the artificial stone, being a little lost among the vegetation, looks more natural. This helps smooth out lines that are too straight.
Monolithic path
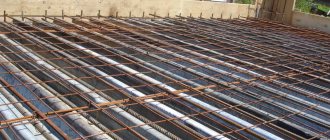
Strictly speaking, it is not entirely monolithic; expansion joints are still made in such paths. Due to its integrity, concrete, compared to tiles, is less susceptible to fracture. Therefore, it must be reinforced.
The thickness of the layer above and below the grate must be at least 30 mm, which means the total minimum thickness of the track (without the “cushion”) is greater – 70 mm. A cushion of sand and gravel underneath, by the way, is a must, and it needs to be well moistened before pouring. But in severe winters, even these measures will not give a 100% guarantee that the concrete will not crack.
Stamped concrete
This is a way to cheat: don’t complicate your life with laying out the tiles, but make a monolithic base that looks indistinguishable from tiles. To do this, a special impression form is applied to the raw solution. The edges of such “tiles” and the noble “stone-like” texture are imprinted on the surface, and the design then hardens along with the concrete.

To make such a sidewalk with your own hands from concrete, you need a mold (stamp) made of polyurethane. It costs from 1000 rubles. For convenience, it is better to have a manual tamper.
Colored concrete
A concrete path does not have to be gray. You can give it one tone or another - sandy or reddish, or even make bright multi-colored tiles. To do this, at the mixing stage, color is added to the concrete solution. True, the cost of the material will increase by 10-30%. But unlike the paint that covers the surface, such a dye will not be erased or fade from direct sunlight. So colored concrete for garden paths will last a long time.
Garden paths: do it yourself and at low cost
The listed methods can be combined, for example, by casting tiles from colored concrete and laying out a pattern with them.

Stages of work
The process begins with creating a pallet: it must match the width of the track. It is made from dense boards; the finished pallet is a rectangular box without a bottom. Next, they begin to manufacture structural elements - internal parts. To make them, you should also use durable boards; the elements can be of different lengths and widths to give the path an original appearance, but the main condition is that they must be rectangular or square. This is the only way to achieve the strength of the track. The height of the pallet ribs themselves should be slightly greater than the expected height of the structure, which will greatly facilitate use. In addition, to fix the elements of the future path, it is also necessary to prepare stakes (length 40-50 cm). The number of these stakes directly depends on the thickness of the boards used: the thicker the board, the fewer of them will be needed. The stakes are placed on the outside of the formwork. Approximately every one and a half meters, vertical partitions are installed inside the structure, which will help increase the strength of the future path. Thin plastic or siding are used as such partitions. If you pre-lubricate them with oil, then after pouring the concrete they can be easily removed without disturbing the beautiful appearance of the new path.
Advantages
The ability to create an interesting, geometrically correct design using several elements that differ in length and width.
Flaws
A rather labor-intensive process: you have to work with each element separately; You can only use regular geometric shapes - squares, rectangles, which limits the creator's imagination.
Excavation
1. Marking the path. If the path is straight and short, drive a pair of stakes on both sides of the planned path, at its beginning and end. Tie cords to the stakes. To mark the line of the path on the ground, take sand and sprinkle it along the cord. If the path is curved, drive additional stakes at intervals between them of 300 mm to 1 m, depending on the radius of the curve (the smaller the radius, the closer the stakes). Tie the stakes with cord. If the path branches, drive stakes along curves and at the beginning and end of each straight section, then tighten the cords.
2. Soil preparation. After removing the marking stakes and cords, remove a strip of soil of the required depth one line at a time, retreating 300 mm beyond the sand line. If it is necessary to lay a layer of sand and gravel, the excavation must be made 100 mm deeper. Be sure to remove all vegetation, but be careful to save the layer of turf if you want to lay it later along the edge of the path. Then remove the soil from the rest of the path, extending 300mm beyond the opposite sand boundary line.
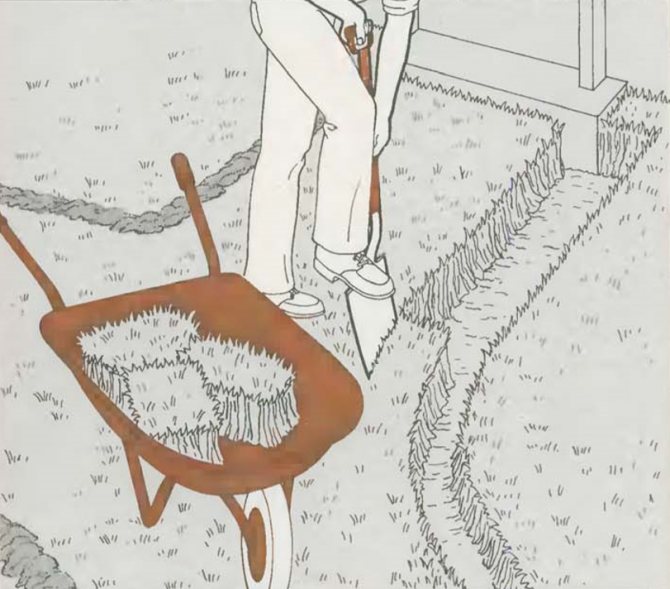
3. Leveling the ground. Level the soil with a scraper and fill with sand, l and gravel all the depressions that were created as a result of removing stones or careless shoveling. Level the ground with a board, moving it along the surface of the soil. If the planned concrete slab is narrow, use a board equal to the width of the slab.

4. Soil compaction. Compact the soil with a roller, spare tire or tamper made from a board measuring 300 by 350 mm and a strong block 1 m long, attached to it at a right angle. Nail the door handles to the block on both sides. Fill with sand and compact the recesses. Then, using a level board as a ruler, check the entire width of the bottom of the trench.

Flexible formwork
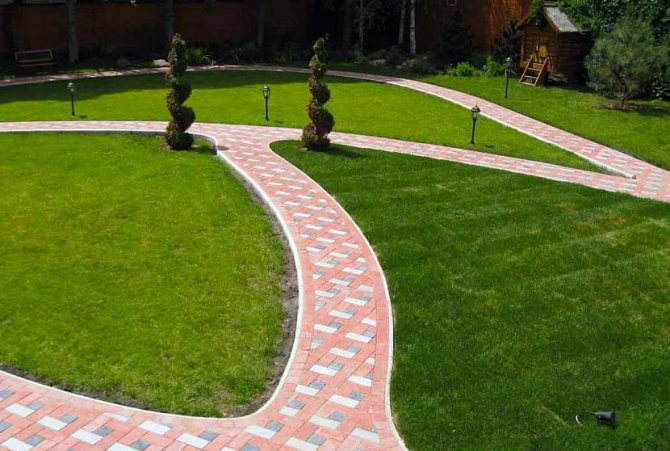
Not everyone likes clear, smooth, straight paths; many people like smooth bends, original turns and transitions. Flexible formwork, which uses bendable plastic rather than wood, will come to the rescue for creating such a structure. The main stages are similar to creating direct formwork: first a drawing is made, then the base of the future structure is created using pegs and a rope stretched between them, then plastic is placed, the finished formwork is leveled and strengthened from the outside. Then the concrete is poured. Using plastic will help create smooth turns on an ordinary straight path, which will give the path the appearance of a magical fairy tale path.
Advantages
The ability to create an original path in full accordance with the tastes of the owners; ideal for garden plots of irregular shape.
Flaws
Labor intensity in giving the desired shape; If you choose weak plastic, the structure may suffer under the pressure of concrete.
Metal formwork
Not only wood can be used to make formwork for a garden path, but also steel. This type of construction is distinguished by high strength, long service life, and the ability to make bends when designing a path. The process of making metal formwork is completely similar to working with wood. Metal sheets are cut to the required sizes, then installed along the future path and reinforced with pegs. For beginners, making a formwork frame from steel is suitable, while more experienced ones can create interesting original designs.
Advantages
Allows you to combine straight and curved shapes in one track
Flaws
Requires a special tool for cutting metal; some skill is required when working.
How to design a path?
Comfortable conditions for land owners will be provided only if the correct layout is observed. For example, when laying short concrete paths that divide the garden into small fragments, they will visually make it even smaller. To avoid false visualization, adhere to the rule of “long paths” that can convey a feeling of spaciousness.
Before designing, you should understand the question: what types of paths exist. Conventionally, they are divided into 2 groups:
- Household – intended for pragmatic purposes: access to buildings, other objects, around the house.
- Pleasures - do not have a utilitarian function, they are used as decorative elements. Duplication of main business routes is allowed. Adds a picturesque touch to the garden arrangement.
Construction of walking paths
A garden path made of any material must meet three main factors: - Be practical, participate in providing a well-kept and comfortable environment in which it is pleasant to be. This becomes the reason for arrangement in places where they are necessary for movement between objects. Especially relevant in the off-season.
- The factor of operational practicality must be associated with the entire facility. For example, the sidewalk connecting the gazebo to the house is being built extensively. Durability and neat appearance must be maintained even after several years of operation. Paths between flower beds or beds can be organized from temporary, non-permanent structures, for example, separately laid tiles that do not have a base.
Have an aesthetic appearance, be one of the key elements of garden design, and in some cases, a key part of the decor. Pay attention to the harmonious combination with the environment.
Designing concrete paths is done on paper. Consider not only the desired routes, but also the landscape features, surrounding buildings and flora. It is not necessary to do it in strict relation to the scale and terrain. The main thing is that it is clear to the performer.
Laying concrete paths in places with the most compacted earth is considered a mistake. Using this principle, you can only determine the main direction and priority of movement around the site. The designed lines should add an impressive feature, zest to the garden interior, and make a person want to walk along them again and again.
Concrete garden path
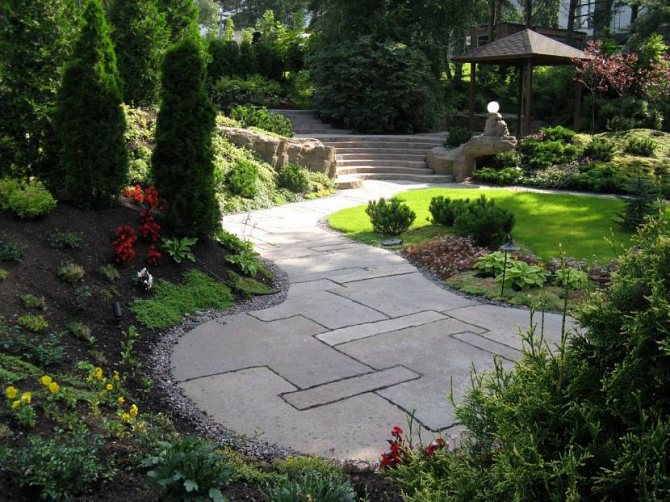
Please note that the eyes of a person walking towards the house are always directed forward. All along the way he sees the same thing - the building at the end of the road. Walking along a winding path, with each turn he will discover different landscapes: rosalia, a hedge of thuja, a blooming acacia waiting around the bend, and so on.
A properly designed concrete path should evoke intrigue: it should not wind along the border of open and closed spaces, but hide in the shadows of the bushes. The location of the final destination remains a mystery until the last moment: it is hidden at the top of the stairs, behind a spreading bush, in the corner of the building.
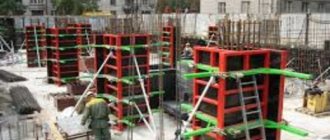
Formwork with internal forms
This is a rather difficult type of work to do with your own hands, and only experienced craftsmen can successfully handle it. But the result is also at the same level - the ability to create a completely original garden path, taking into account all the wishes of the author, freedom of shapes and volumes. To make this kind of formwork, a frame - a pallet - is first prepared. Next, various partitions for internal filling are constructed from plywood sheets. In order to speed up the process of creating a garden path, you can prepare several similar formworks.
Advantages
Originality, beautiful appearance, the ability to take into account all the details of the author's plan
Flaws
The complexity of implementation requires skill and experience. Long production time. As we have seen, there are several formworks for garden paths that you can create yourself. The choice of one type or another depends on many factors: the availability of experience, time, equipment; on what result needs to be achieved; from the garden plot itself. Regardless of the type chosen, a number of principles should be followed when working: accuracy; slowness; attention to leveling and strengthening the structure; creativity. Also, beginners need a desire and willingness to learn, diligence; and for the more experienced - creativity, the desire to create and create original works of authorship. All this will help to create a small masterpiece in the garden, an unusual path that invites you to a fairyland. Do not forget that formwork is the first step in making a walkway. And unscrupulous, hastily completed work cannot be saved even by the most expensive material.