Natural stone for finishing the base is an excellent solution that makes it possible to protect the structure from moisture and the harmful effects of the environment. The resulting coating is reliable and durable, provided that the work is carried out in compliance with all rules. Currently, there is a large selection of products, this allows you to find an option that meets the necessary requirements.
What is stone cladding?
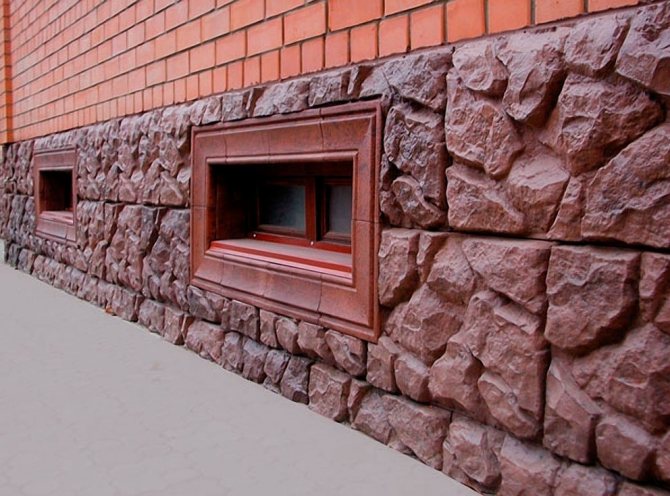
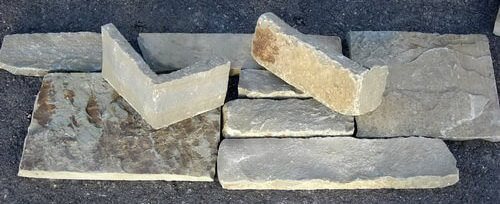
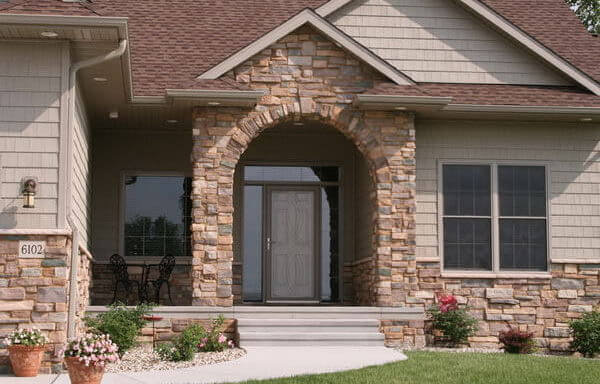
Natural stone is considered the classic and most common material for cladding the foundation after the construction of a country house or cottage. Its types and shapes are varied. It is used for cladding both in processed and unprocessed form. It could be a cobblestone or pebble, or it could be a layer of the desired size and shape. The natural texture and unevenness of natural material gives great scope for imagination and the creation of unusual patterns of different colors and shades. The process of laying stone is greatly simplified if you first cut it, obtaining a flat surface on the back side.
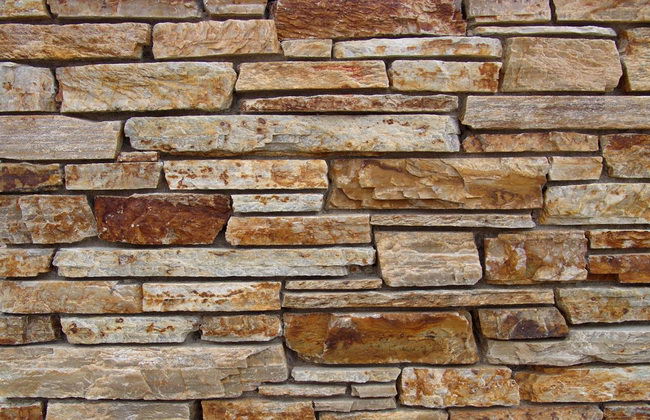
Natural stone on the foundation of a house
Advantages of finishing
Tiles for finishing the basement of a house made of natural stone are an environmentally friendly material, they do not emit harmful fumes, are durable and reliable. Natural stone has other advantages:
- Long service life. If the rules of processing and installation are followed, the stone does not lose its properties for a long time and can last up to 100 years or more.
- Fire safety. The material is not afraid of exposure to fire and is resistant to temperature fluctuations.
- Moisture resistance. This quality simplifies surface care - a rag and water are enough to clean the slabs.
- Decorative. The base, lined with natural stone, looks expensive and emphasizes the wealth of the owners of the house.
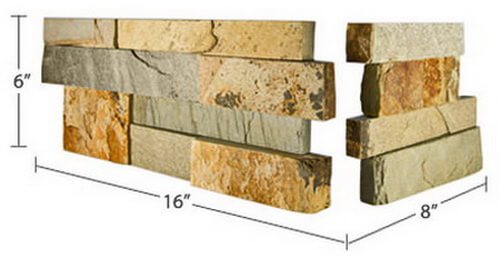
Artificial stone is an affordable alternative.
Despite the advantages of this coating, there are also disadvantages - a complex cladding process and high cost. You can simplify the laying of the material by purchasing it not in blocks and cobblestones, but in the form of slabs. And for those who want to save money, the solution would be to finish the base with artificial stone, which looks almost no different from natural stone.
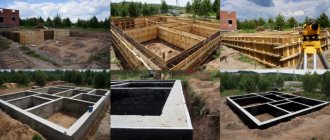
The process of laying a stone foundation consists of several stages
Preparatory stage
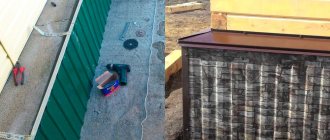
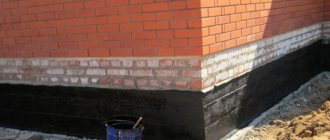
Removing old coating. When starting the cladding process, you need to decide where to start? Initially, it all depends on whether you are going to cladding a new house just under construction, or an old building. In the first case, it is necessary to allow time for shrinkage to avoid cracks in the decorative finish. In old houses, this stage can be ignored, since possible shrinkage has already occurred long ago. You can immediately replace the old cladding with new material. In this case, you must first remove the old layer of plaster, otherwise the new masonry may simply crumble. In addition, it is necessary to eliminate bumps and irregularities on surfaces if they are more than 10 mm, and to knock down protruding parts of concrete walls.
ADVICE! Preparing the walls To level the wall, plaster is first applied to it. After complete drying, a layer of insulation is nailed to it with dowels to protect the foundation from temperature fluctuations. A quartz primer is applied to the insulation, and a steel mesh is attached on top of it. If plaster and insulation are not needed, the wall should be treated using concrete contact.
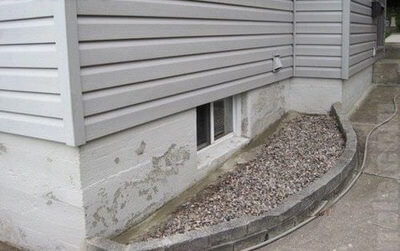
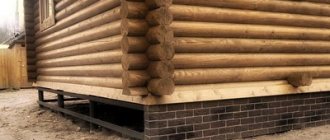
Foundation before cladding
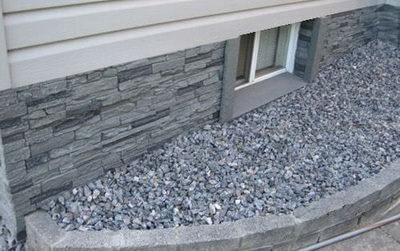
Foundation after cladding
Up
2. Laying stone
After completing all the preparatory work, when you have already achieved a fairly flat surface, you can begin to lay natural stone on the base. To lay the foundation yourself, you will need the following tools:
- Hammer
- Hammer
- Container for mixing the solution
- A special syringe used to fill construction joints
- Disc for concrete
- Bulgarian
- Grinding disc
Laying stone on the foundation usually begins from the bottom from the most visible corner. When working with flagstone and sandstone in the form of fragments of various configurations, it is advisable to first sort the stones on the ground by color and size, making an approximate mosaic plan, so that you can then line the base with them, without wasting time searching for a stone of the desired shape and size. It is necessary to strive to use stones of natural shape, cutting them as little as possible. But, in case of emergency (especially when laying the upper edge of the plinth), you can still easily cut the sandstone slab with a grinder using a concrete disc.
First, corner stones are installed on the ledge of the foundation. At the same time, they check whether the length of the stone corresponds to the dimensions of the foundation. In case of discrepancy, the corner elements are filed along the drawn line using a bow saw. To do this, quartz sand is poured on top of the bars folded on different sides. During sawing, abrasive particles trapped under the blade can adhere tightly to the stone, damaging it, which can result in the formation of cuts. In this case, the bars are removed and sand is poured directly into the cut. In the further process of sawing, water is poured into the cut, which washes out rock salt and abrasive grains from it.
ADVICE! To avoid scratches on the slabs, during the construction period they are sealed with adhesive tape or paste, which is then washed off with a soap solution. Small slabs are laid using the spreading method, in which a solution is applied to the underside of the slab, then the slab is laid on the base and secured with metal ties. When the solution hardens, the seams are cleaned with a spatula.
Provided that the stone slab is in full contact with the base, the cladding has quite high strength. However, even in this case, improper operation and unfavorable environmental conditions can cause corrosion, which, in turn, leads to the appearance of rust that destroys the lining. In order to avoid this, you must carefully check whether there is salt in the solution. After all, its presence can cause harmful and unsightly efflorescence to appear on the surface.
The harmful effect on the foundation can be easily minimized by adding a plasticizer to the solution, as well as by securing the cladding layer to the slope, due to which a layer of air is formed between the base and the layer, preventing the base from coming into contact with the cladding layer. However, this method is only suitable for fairly thick stone slabs. In this case, the gap between the layer and the base should not be more than 1 cm. Read how to clean mold here.
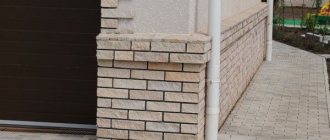
Option for laying the corner of a house with stone
Elements for laying out the corner of the façade
Up
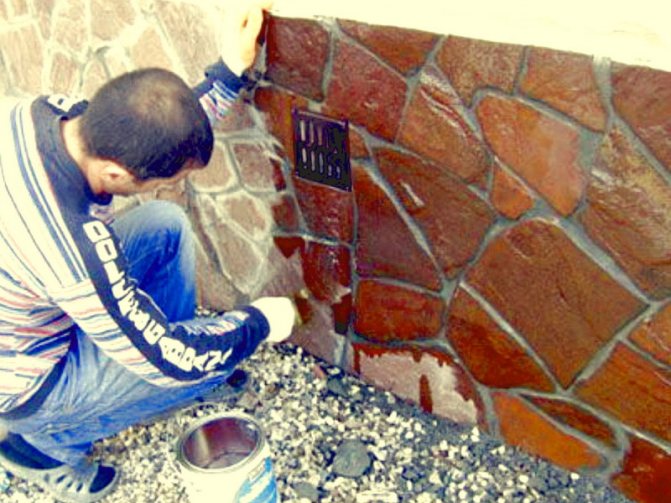
Varnish coating
Apply varnish in 2 - 3 layers.
The finishing of the base made of wild stone and flagstone is often covered with a stone specially designed for processing stone coverings of facades. It can always be purchased at any construction supermarket.
Cover the stone with varnish in 2-3 layers. Each layer is kept until completely dry. The varnish coating, in addition to strengthening the surface of the cladding, gives it the special beauty of a natural material.
It is important to understand that the material for cladding the basement of the house must be in harmony with the overall exterior of the building. If the house is built in the spirit of architectural minimalism, then finishing the top of the foundation with expensive marble slabs will look rather ridiculous. Conversely, a pompous facade, emphasized by a lower edging made of cheap materials, will be dissonant in the general perception of the appearance of the entire building.
Options for cladding the foundation with natural stone
Option.
The first is similar to laying regular tiles. A special cold-resistant solution is applied to the inside of the stone. Then he is placed in his designated place. For a strong connection to the surface, it should be intensively pressed against the wall and the adjacent stone. The next element of the required size is placed in the middle between the two stones. Thus, the lower ones are filled and, gradually, move to the upper ones. Excessive cement-filled gaps between stones should be eliminated, as this looks unsightly. If they still remain, it is better to place small fragments in them. A solution of equal thickness is applied to the stones and pressed against the base with the same force, so that as a result, the fragments located nearby are at the same level without jumps, which can be checked using a level.
Option.
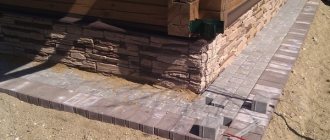
If the base is made of liquid concrete, then it is preferable to use rubble or stones from the shore of a reservoir rather than stone slabs. To obtain a uniform, beautiful base, when concreting, formwork is placed and an equally level level is achieved both horizontally and vertically. Cladding begins after the formwork is secured. During work, the stones should fit snugly against it with their front side. During installation, the bottom row is laid first. It is fixed with cement, then concrete is poured to the lower level. The consistency of the concrete should be quite thick so that it does not leak through the cracks and flood the outside of the stones. The concrete hardens within an hour, after which the next row of stones can be laid. The base can be raised half a meter in a day. Thus, I simultaneously line the foundation and pour the basement.
Option.
A few days after installation, the formwork is removed and the surface is thoroughly cleaned of concrete. The seams are rubbed with a solution to which you can add a pigment of the same shade as the stone. The surface of the lined base is treated with protective impregnations against mold and efflorescence. In polished or sanded boards, the seams are sealed with mastic using the hot method. To do this, the joints in the cladding are heated with a blowtorch, after which mastic is fused into the seams.
Professional foundation laying makes it possible to realize the most daring ideas, feeling like an exterior designer, and harmoniously fit the appearance of the house into the overall landscape of the area.
Finishing a country house with stone
Care of the tiled surface
Although stone is a stable material, the base lined with it still requires maintenance. It begins with initial processing after installation. If there are traces of concrete mortar left on the surface in some places, a cement remover will help get rid of them. It is not recommended to use a knife or other sharp objects for this purpose, so as not to scratch the coating.
To further care for the stone surface, in addition to water, use stone soap. This is a special cleaning agent that effectively removes dirt, helps preserve the natural color and forms a thin protective coating on the surface. It is recommended to treat travertine, granite, and marble with this composition.
If the base was lined with porous materials (shell rock, sandstone), it is useful to cover it with a stone sealing agent. It creates a transparent acrylic film over the finish that seals the pores. The material processed in this way becomes resistant to moisture and dirt, is easy to clean and retains its original appearance longer, and the structure of the stone appears more clearly.
Primer treatment will extend service life
Special care products are not required for all types of cladding, but their use will benefit the coating. For durable rocks, it is permissible to limit yourself to periodic wiping with a damp cloth, the main thing is not to use aggressive chemicals.
To summarize, we can say that finishing the basement of a house with natural stone with your own hands is a labor-intensive process, but worth it. Attention, accuracy and consistency of work will help you cope with this task and obtain a durable and strong coating that protects the foundation of your home.