- 22715
- low tides low tides for the foundation with your own hands foundation
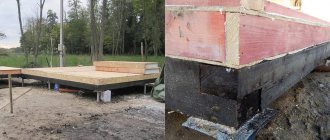
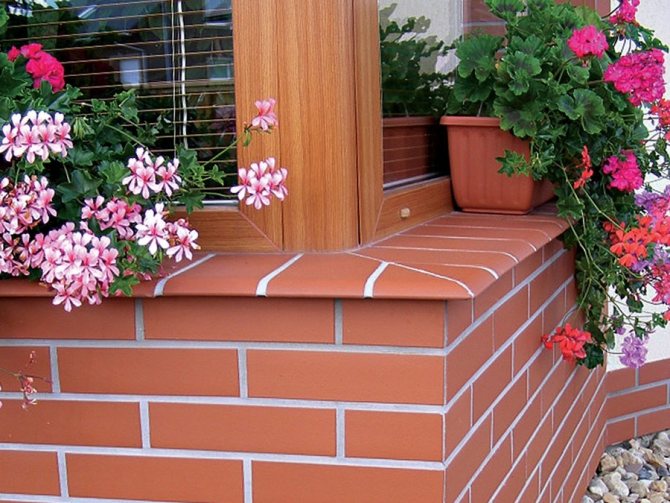
The base of the house can be flush with the facade, recessed or protruding outward. If the facade walls are not thick enough or the house is planned to have a basement floor, the third option is usually used. The protruding part is covered with ebb from above to avoid damage by precipitation. Let's look at how to make castings for the foundation.
What is low tide and what are its functions?
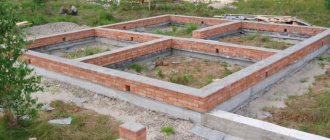
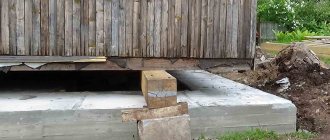
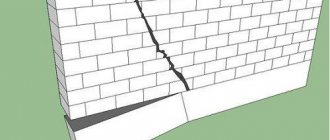
Since the foundation performs a load-bearing function, it is often wider than the walls. Therefore, the base forms a protrusion relative to the walls. Melting snow or rain moisture can accumulate on the top of the foundation and gradually penetrate deeper, eroding the structure of the base of the building. In addition, when freezing, water that gets inside the base expands, also having a destructive effect.
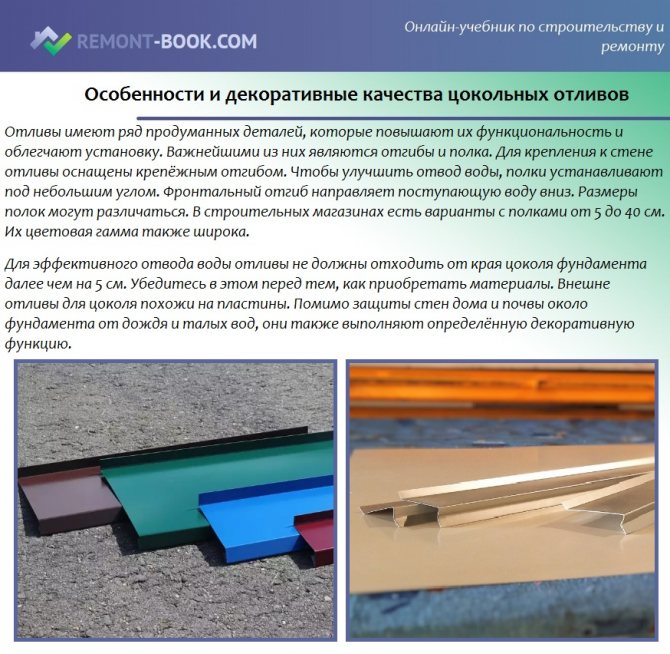
To prevent such processes, a bar is installed on the ledge, the width of which can be from 5 to 40 cm. It is mounted on the base at a slope, which allows water to drain. This is the low tide.
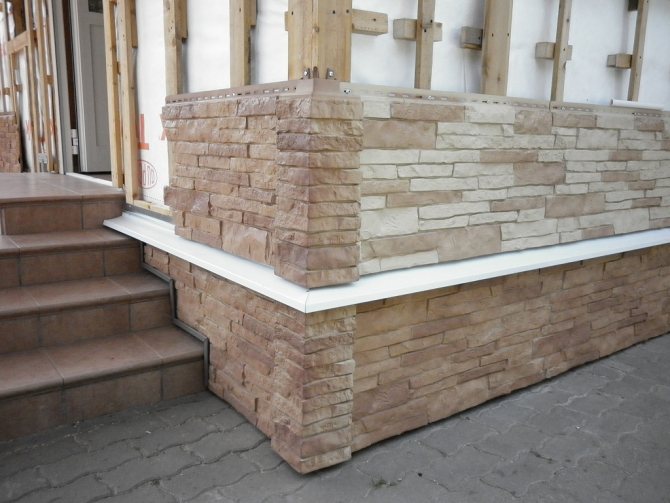
Base ebb
In addition to being protective, such a canopy performs a decorative function, participating in the design of the facade of the building. It is made from various materials in various colors.
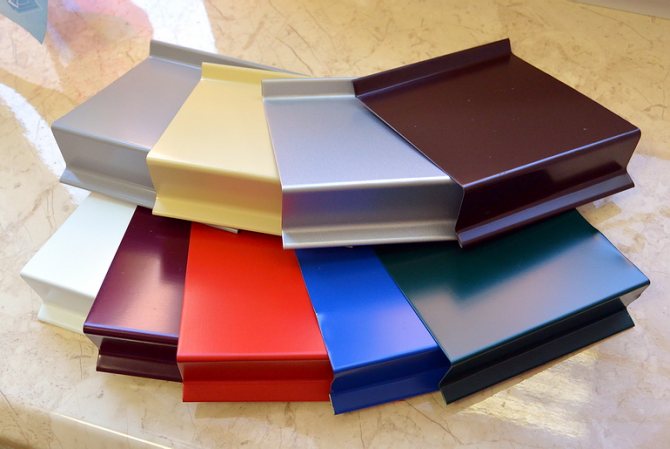
Planks can be of different shades
Note! The color of the tint can not only match the tone of the facade or base, but also be contrasting. If you choose the right palette, this option will decorate your home.
from 28.5 rub. / PC.
Dimensions, mm Price, rub galvanizingTo give their home a good look, and for their own convenience, many decide to switch to plastic windows and even do it themselves. Undoubtedly, they look beautiful, but the final phase of such installation will be the installation of ebb and flow on plastic windows.
They are installed in order to drain water that can get onto the window. With the help of ebb tides, incoming water, for example from snow or rain, flows down, thereby also protecting the adjacent wall from moisture.
Types of tides
The building materials market is diverse. This also applies to the strips for protecting the base. The most common are base visors made of plastic and sheet steel. However, there are options made of concrete, ceramics, aluminum, copper and even wood. Let's consider each option in more detail.
Metal casts
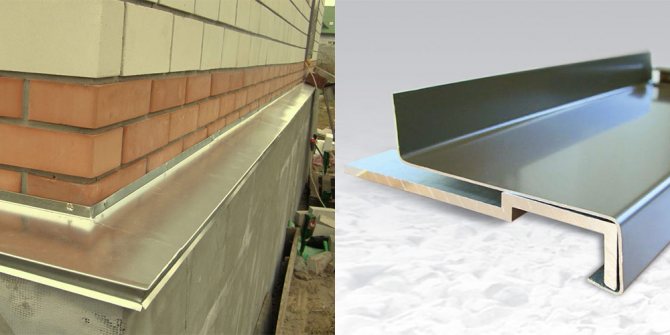
The group of metal base insulation includes steel, aluminum and copper strips. All of them have three elements as standard:
- bend fixed to the wall;
- a shelf, which is the widest part and is mounted at an angle so that moisture is not retained;
- frontal bend to drain water from the foundation.
The most common representatives of both the metal group and ebbs in general are products made from steel sheets, the thickness of which is 0.5 mm.
Metal casts
Among the steel strips, you can choose a shimmer that suits the cost and color. More affordable models are made of galvanized steel sheet. More expensive products have a polymer coating, which can not only be of different colors, but also imitate wood, stone or other materials. In addition, it increases the wear resistance of the steel strip.
Steel castings are durable, strong and temperature resistant. You can also make them yourself from galvanized steel sheet. This option will require a lot of time and is sometimes not as attractive as a factory option, but it will help save your budget.
Steel ebbs
The protective properties of aluminum basement waterproofing are similar to those of steel. However, aluminum slats better withstand negative external influences and also weigh less, which makes installation easier and reduces the load on the foundation. But such visors are somewhat more expensive.
Aluminum castings
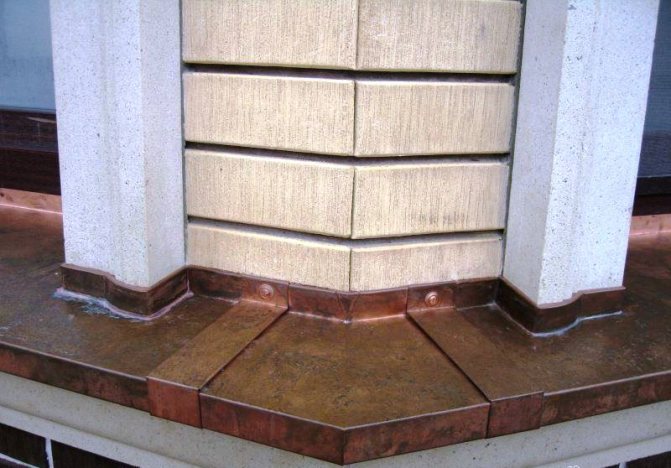
The most expensive are copper base sills. They allow you not only to protect the foundation from external influences for a long time, but also give the house a noble appearance. This is especially true for models with patina.
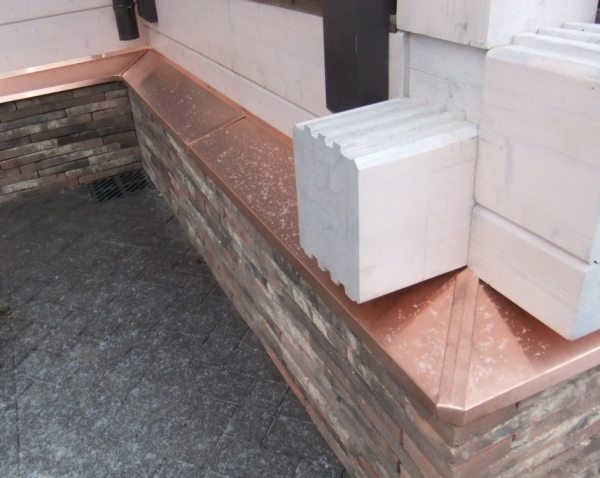
Base ebb made of copper
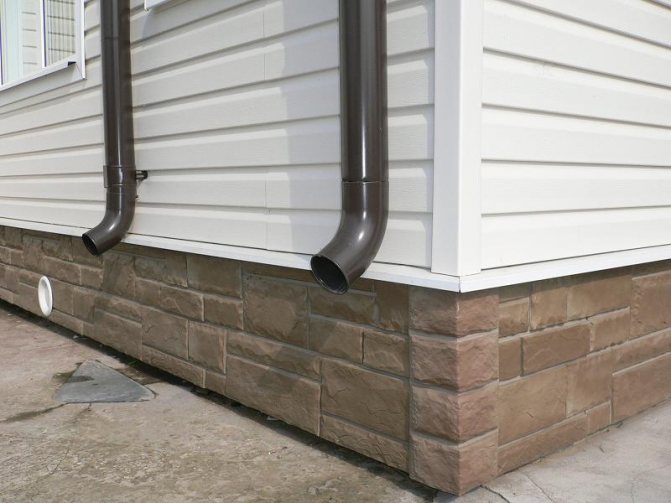
Practical PVC
Plastic strips are more attractive in price compared to metal castings. They also have other positive characteristics:
- variety of colors;
- imitation of various materials;
- waterproof;
- light weight, facilitating installation and not increasing the load on the foundation;
- durability;
- ease of installation;
- strength.
These strips are especially suitable for homes with vinyl siding.
Plastic base flashing
Note! When choosing plastic canopies to protect the base of the foundation, do not try to buy cheap models, which most often cannot withstand low temperatures and burst. This will lead to the need to replace a collapsed element or ebb along the entire perimeter of the house.
Clinker tiles for basement waterproofing
Clinker tiles are a product of pressing and firing highly plastic clay.
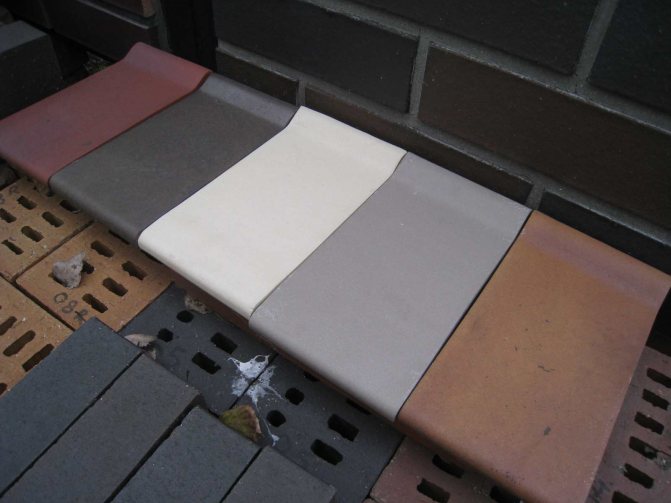
Clinker tiles
This material is increasingly used for exterior decoration of buildings because it has many advantages:
- weak hygroscopicity;
- high resistance to frost and temperature changes;
- wear resistance;
- light weight that does not increase the load on the foundation;
- long service life.
Clinker tides
The tiles can be of various colors, glazed or have a matte surface. Finishing with such material improves the appearance of the facade of the house, giving it status. Clinker waterproofing is laid on a stone, brick or concrete base using a special adhesive composition.
Note! Tile adhesive for installing clinker sills must be water- and frost-resistant and suitable for outdoor use.
However, such tile waterproofing has three disadvantages:
- high price;
- the complexity of the layout, requiring experience in similar work;
- the need to pre-level the surface of the base.
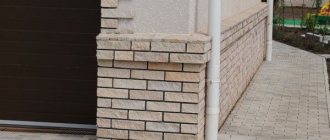
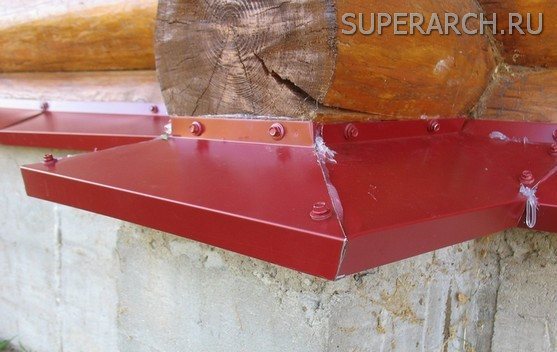
Concrete waterproofing
Monumental concrete has also found its use for protecting the base. Beautiful concrete basement flashings will not only protect the foundation of the house from various external influences for a long time and reliably, but will give the building a noble appearance. This waterproofing is used for buildings with brick or stone finishing. Concrete products may vary in shape and color.
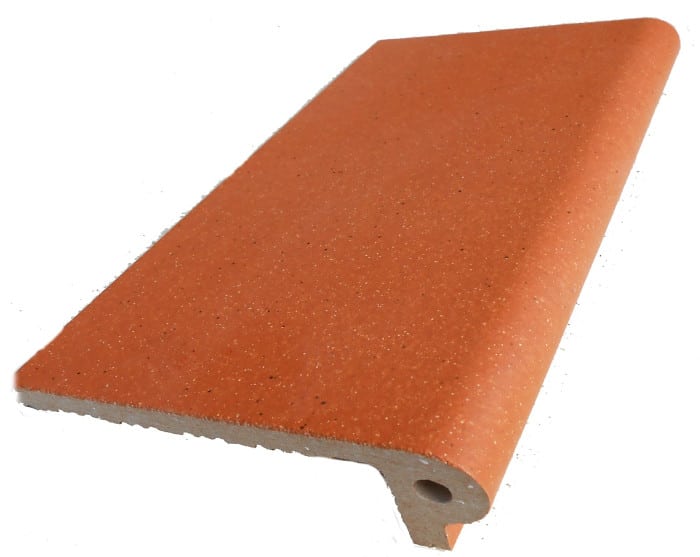
Concrete casting for the plinth
They are made from concrete grades M 400, M 450 or M 500 with the addition of granite chips and plasticizing additives. This composition determines the durability, strength of the product, its resistance to frost, water, and temperature changes.
Concrete tides
The disadvantages of a concrete canopy on the base are high price and weight. The installation of such products must be taken into account at the design stage and carried out on a reinforced foundation.
Wooden cast
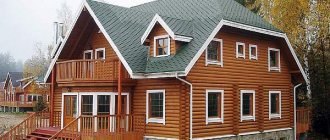
For wooden houses and/or buildings decorated with wood, wooden plinth flashings are suitable. They are often made from scrap lumber. At the same time, the type of wood must be able to withstand moisture well. Such an example is larch. But wooden ebbs are rarely installed, since there are other materials that imitate wood.
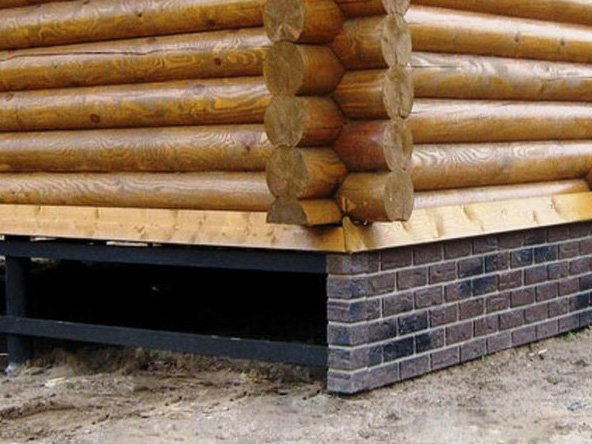
Even in log houses, wooden sheen is a rarity
Low tide prices
Low tides
Cost of work
How much does installation cost? Prices are set per linear meter. In addition to the overall length, the cost of installation is affected by the chosen method of joining the parts.
An additional factor may be applied for work at high heights requiring the use of lifting equipment.
An accurate calculation will be made by a surveyor who goes to the site, takes the necessary measurements and evaluates additional conditions.
| Name of service | Width (mm). | Unit measured | Cost (in rubles). | |||||
| Material | Works** | General | ||||||
| Up to 12 m.p. | More than 12 m.p. | Up to 12 m.p. | More than 12 m.p. | Up to 12 m.p. | More than 12 m.p. | |||
| 1. Installation of galvanized ebb | 110/130 | m.p. | 360 rub. | 310 rub. | 600 rub. | 350 rub. | 960 rub. | 660 rub. |
| 150/200 | m.p. | 470 rub. | 400 rub. | 600 rub. | 350 rub. | 1070 rub. | 750 rub. | |
| 210/250 | m.p. | 480 rub. | 410 rub. | 600 rub. | 350 rub. | 1080 rub. | 760 rub. | |
| 300 | m.p. | 530 rub. | 460 rub. | 600 rub. | 350 rub. | 1130 rub. | 810 rub. | |
| 2. Installation of polyester drip with plugs | 110/130 | m.p. | 380 rub. | 320 rub. | 600 rub. | 350 rub. | 980 rub. | 670 rub. |
| 150/210 | m.p. | 430 rub. | 370 rub. | 600 rub. | 350 rub. | 1030 rub. | 720 rub. | |
| 230/250 | m.p. | 530 rub. | 460 rub. | 600 rub. | 350 rub. | 1130 rub. | 810 rub. | |
| 320 | m.p. | 610 rub. | 530 rub. | 600 rub. | 350 rub. | 1210 rub. | 880 rub. | |
| 340/380 | m.p. | 820 rub. | 700 rub. | 600 rub. | 350 rub. | 1420 rub. | 1050 rub. | |
| p.3. 1. Installation of aluminum ebb (Russia), bent, thickness 1 mm with plugs | 70/90 | m.p. | 1010 rub. | 860 rub. | 600 rub. | 350 rub. | 1610 rub. | 1210 rub. |
| 110/130 | m.p. | 1140 rub. | 970 rub. | 600 rub. | 350 rub. | 1740 rub. | 1320 rub. | |
| 150/165 | m.p. | 1240 rub. | 1070 rub. | 600 rub. | 350 rub. | 1840 rub. | 1420 rub. | |
| 180 | m.p. | 1340 rub. | 1140 rub. | 600 rub. | 350 rub. | 1940 r. | 1490 rub. | |
| 210/240 | m.p. | 1450 rub. | 1240 rub. | 600 rub. | 350 rub. | 2050 rub. | 1590 rub. | |
| 250 | m.p. | 1450 rub. | 1240 rub. | 600 rub. | 350 rub. | 2050 rub. | 1590 rub. | |
| 300/350 | m.p. | 2270 rub. | 1940 r. | 600 rub. | 350 rub. | 2870 rub. | 2290 rub. | |
| 400/550 | m.p. | 3380 rub. | 2890 rub. | 700 rub. | 450 rub. | 4080 rub. | 3340 rub. | |
| 600/700 | m.p. | 6760 rub. | 5780 rub. | 700 rub. | 450 rub. | 7460 rub. | 6230 rub. | |
| 3.2. Installation of extruded aluminum flashing (Gutmann) with plugs (white and dark bronze)* | 70 | m.p. | 1500 rub. | 600 rub. | 350 rub. | 2100 rub. | 1850 rub. | |
| 90 | m.p. | 1725 rub. | 600 rub. | 350 rub. | 2325 rub. | 2075 rub. | ||
| 110 | m.p. | 2250 rub. | 600 rub. | 350 rub. | 2850 rub. | 2600 rub. | ||
| 180 | m.p. | 2850 rub. | 600 rub. | 350 rub. | 3450 rub. | 3200 rub. | ||
| 210 | m.p. | 3675 rub. | 600 rub. | 350 rub. | 4275 rub. | 4025 rub. | ||
| 280 | m.p. | 5250 rub. | 600 rub. | 350 rub. | 5850 rub. | 5600 rub. | ||
| 320 | m.p. | 7125 rub. | 600 rub. | 350 rub. | 7725 rub. | 7475 rub. | ||
| 360 | m.p. | 7875 rub. | 600 | 350 rub. R. | 8475 rub. | 8225 rub. | ||
| 3.3. Powder coated AL shimmer on one side | m.p. | 350 rub. | 300 rub. | 350 rub. | 300 rub. | |||
| 4. Dismantling while preserving the old tide | m.p. | 770 rub. | 610 rub. | |||||
| 5. Dismantling without preserving the old tide | m.p. | 200 rub. | 200 rub. | |||||
| 6. Installation of flashings, customer’s material | m.p. | 880 rub. | 650 rub. | 880 rub. | 650 rub. | |||
Installation of ebb tides
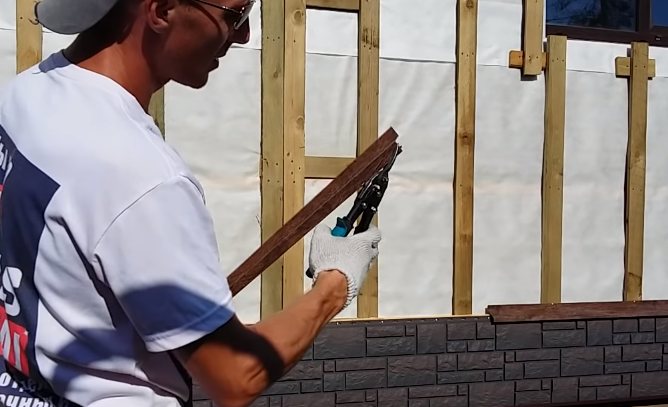
Metal and plastic ebbs are the most common because they are quite easy to install. They are attached directly to the facade of the building or to the installed sheathing before facing.
Let's look at the installation using steel products as an example. If you use ready-made sills, then first you need to calculate how many slats you will need. This is easy to do if you know the perimeter of the house. The resulting sum of side lengths must be increased by 5%, since the planks overlap each other. Now you can easily calculate the number of flashings, given that the length of a standard steel strip for waterproofing a basement is 2 m.
Features and decorative qualities of basement flashings
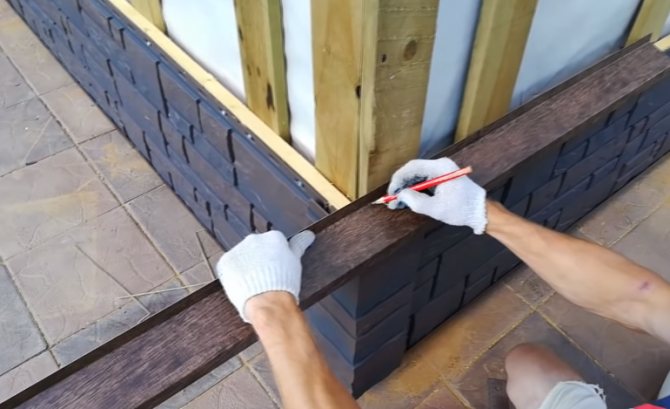
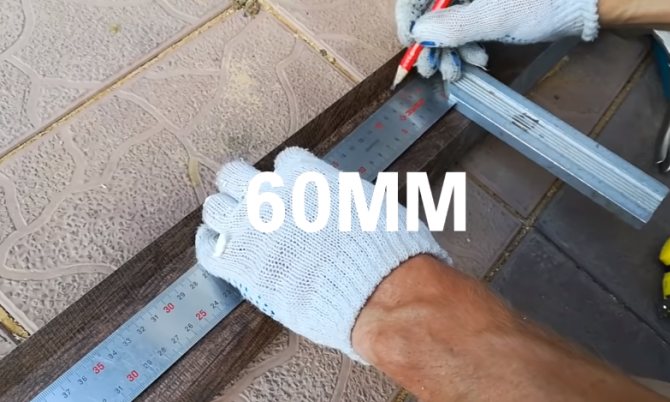
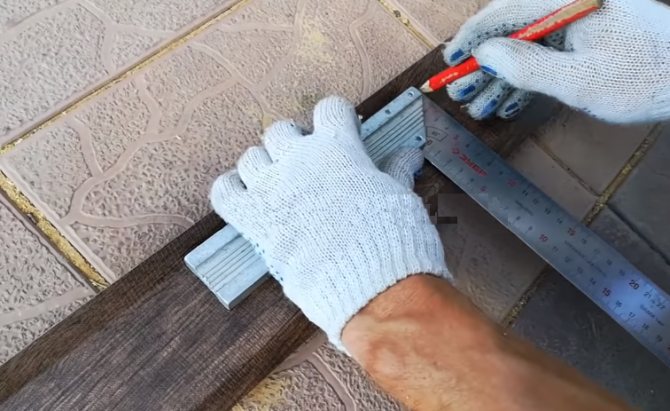
If you decide to make your own ebb molding from a galvanized sheet, you can do this using the method described below.
- Measure the distance from the wall to the outer edge of the protruding part of the foundation and add 50 mm to the resulting value for the upper and lower bends.
- Cut the sheets into strips of the resulting width.
- On the resulting workpieces, mark the line for bends at a distance of 25 mm from the edges.
- Make an upper and lower bend. To calibrate the angles, use a metal corner or block. The bend is made using a mallet.
Note! At the edges, it is also recommended to bend the metal inward. This will add rigidity to the structure.
Video - How to make an edge on a tin cast without a sheet bender
To install basement waterproofing, in addition to the ebb tides themselves, you will need:
- metal scissors;
- construction square;
- level;
- clamps or pliers for bending or unbending drip elements;
- screwdriver;
- self-tapping screws;
- pencil.
Prices for popular models of screwdrivers
Screwdrivers
Note! Sometimes an angle grinder is used to make cuts, which is not entirely true and can lead to an inaccurate result. To reduce this negative effect of working with such a tool, it is better to saw the panels without removing the protective film.
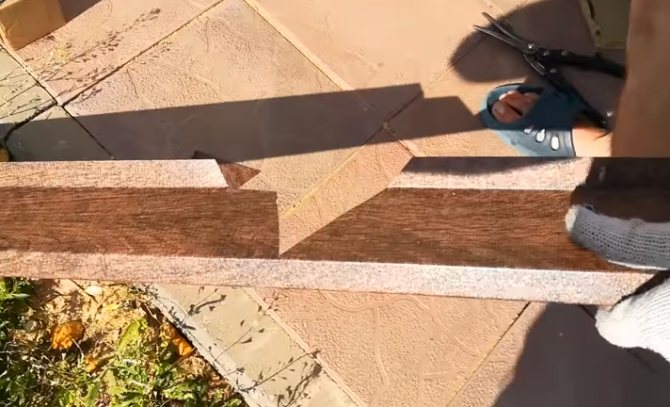
An important element that should not be forgotten when installing basement waterproofing is the corners. You can purchase ready-made corner elements, or make them yourself during the installation process, following the diagram.
| Step, No. | Description |
| A central mark is placed on the edge of the shelf that is adjacent to the house. This is the inner vertex of the corner. |
| A segment is laid in each direction from this mark, the length of which is equal to the length of the ebb shelf minus 10 mm. |
| A perpendicular is drawn from the central point to the outer edge of the shelf. An equilateral triangle is formed between the resulting point and the two lower side ones. |
| On the mounting molding, cuts are made along the side marks. Moreover, they cut not only in a straight line, but also cut off the corners to make it easier to carry out further work. An incision is made along one of the equal sides of the triangle. On the other hand, the incision is not made in a straight line, but leaving a small tongue, which is slightly bent using clamps to the inside. This is necessary to create a low tide slope. |
| In the area of the apex of the triangle, the outer limb is clamped, but not cut. |
| Fold the corner. |
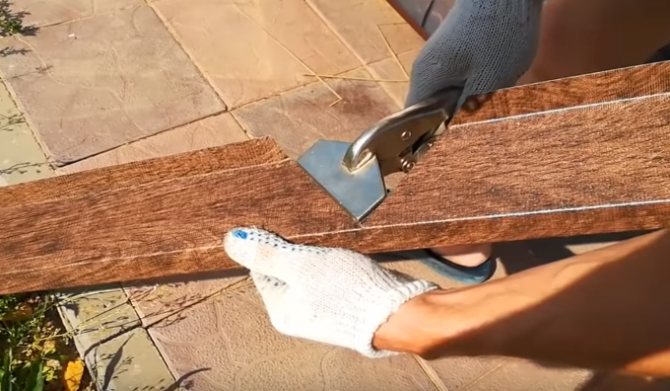
Note! Internal corners are made according to a similar principle, but the first three points are marked on the edge between the outer bend and the shelf.
Starting from the corner, they begin to install the ebbs. They are attached to a pre-prepared sheathing for installation of façade finishing elements. To make it, you can use boards, wooden beams or a metal profile and secure them strictly vertically.
| Step, No. | Description |
| Apply a homemade or factory-made corner element to the corner of the building at the required height, covering the upper edge of the base. It is important not only that the shelf be sloped, but also that the ribs of the plank are laid perpendicular to the vertical guides of the sheathing, which is checked with a building square or a water level. You can put marks on the crate in advance. |
| Fix the corner with self-tapping screws to the sheathing. |
| At the next ebb, cut off a small corner at the outer bend in order to bring the edge under the previous ebb by about 2-3 cm. |
| Using the construction corner or hydraulic level as a guide, fix the next ebb with self-tapping screws. |

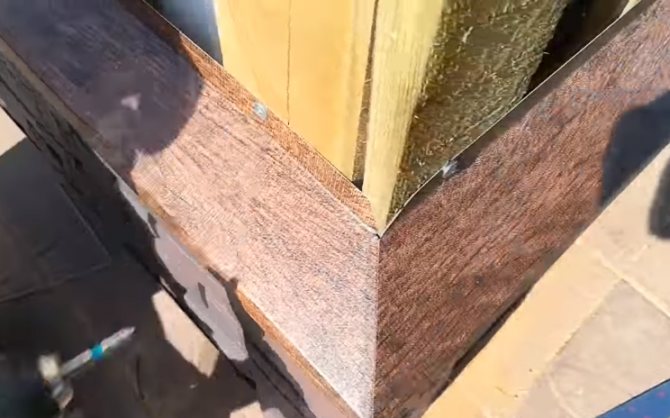
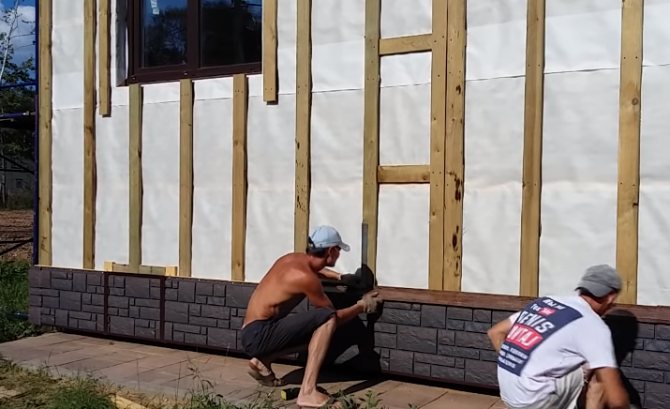
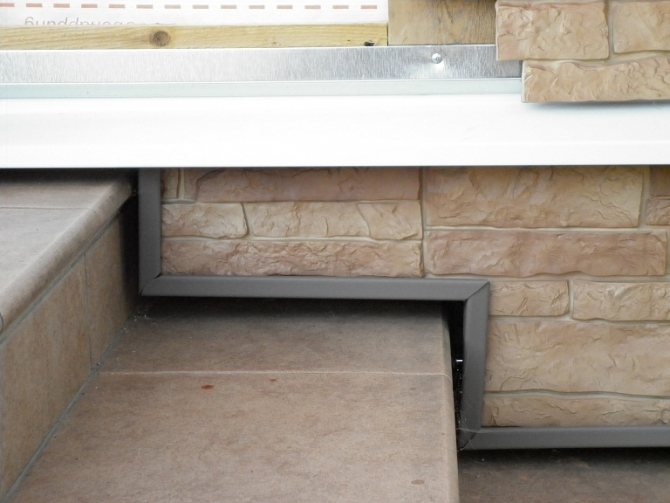
Thus, the base is covered along the entire perimeter of the house. The space between the foundation and the waterproofing shelf is often filled with polyurethane foam. In this simple way you can improve the foundation of your house and protect it from external negative influences.
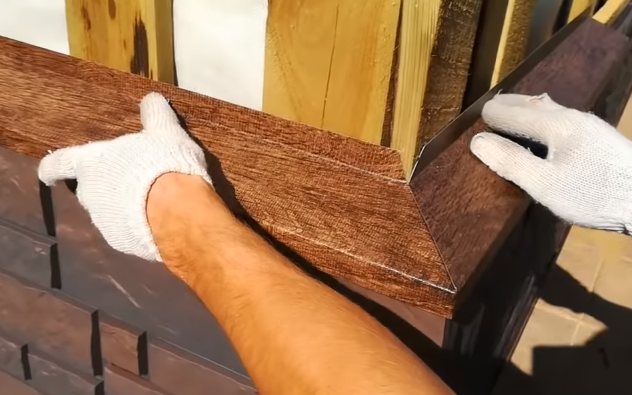
Making an external view corner
When making the ebb from plastic, the cutting of the corner elements is simplified. To do this, the lower and upper parts must be cut out, an additional type of element must be built on the area being placed, and then all connections must be treated with silicone material or sealant.
When using metal elements, the work is done differently.
- First, the shelf of the upper and middle view is cut, in one section up to 90 degrees in angle, and in the other an overlap of about 2 centimeters is made.
- Then the corner parts are connected; to do this, the bar is bent at the cut area, and the overlap must be brought inward. The corner element is fastened using self-tapping screws or rivets.
The most reliable connection is considered to be a seam fastening; for this, 2 centimeters are left on both sides of the corner. To fasten the seam connection, you must use a special tool and also have experience with such work.
You can also connect the corner, leaving a small gap; it is subsequently closed on top with a strip, which is secured along the seam using self-tapping screws.
It is necessary to protect the foundation from water ingress on all sides of the house, taking into account the porch and other decorative elements.