What types of stone-like plasters are there?
Stone plinth plaster imitates masonry of various textures, character and colors. The most common and accessible for repetition are the following:
- Smooth blocks of the same shape. Imitation of block masonry.
- Hewn stone of various shapes. Even “bricks” of different sizes.
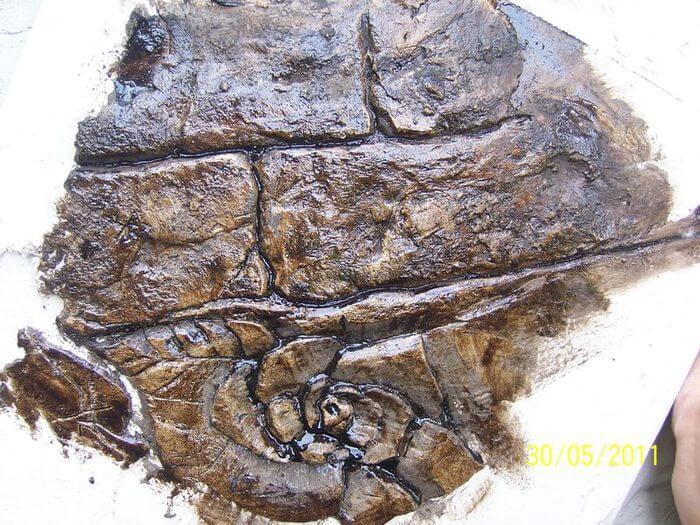
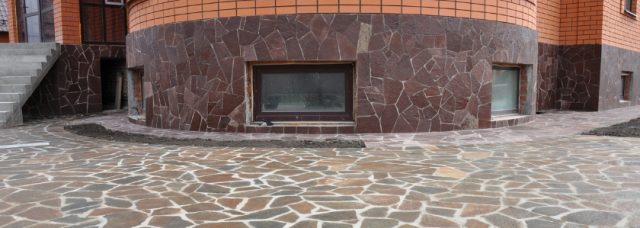
- Uneven large stone (torn rubble). The most popular and simplest base “stone” plaster. Stones with polygonal shapes are “laid” in 1-2 rows. The most convenient drawing in situations where it is not possible to do the work painstakingly.
- Medium sized stone. Small equal rubble, limestone. The most harmonious: it has a believable drawing full of details, but is relatively simple and quick to implement.
- Small elements. Not cladding, but masonry with sandstone (“plaster”). Many rows of untreated small stones.
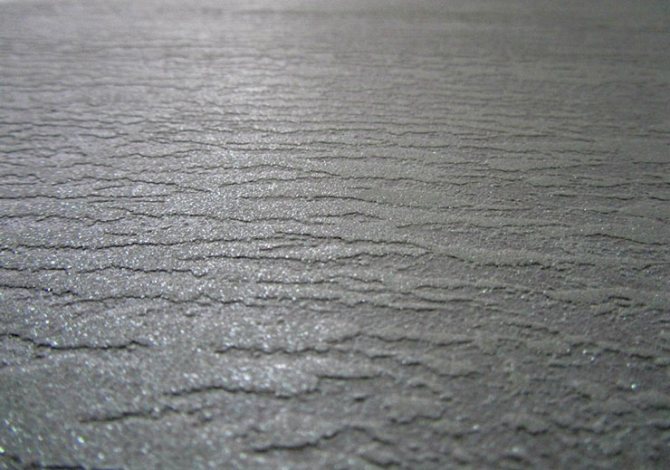
- Pebble. “Facing” with sea, river stone, “ground” by waves, rounded.
All these forms are available for amateurs to repeat on their own. The nature of the drawing requires only a certain sense of harmony, which is inherent in most people, even those who are not capable of drawing. Plastering a plinth to resemble a stone with your own hands is no more difficult than conventional finishing.
The main thing is to achieve believability, to avoid clearly noticeable repetitions of the design, its distortions, unusual chips, and their too precise fitting to each other.
Required Tools
Broom Burlap Cement Staples for stapler Sand Primer Spatula Floor trowels Screwdriver Trowel Trowel Chisel Dowels Show all
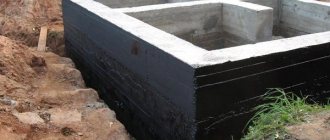
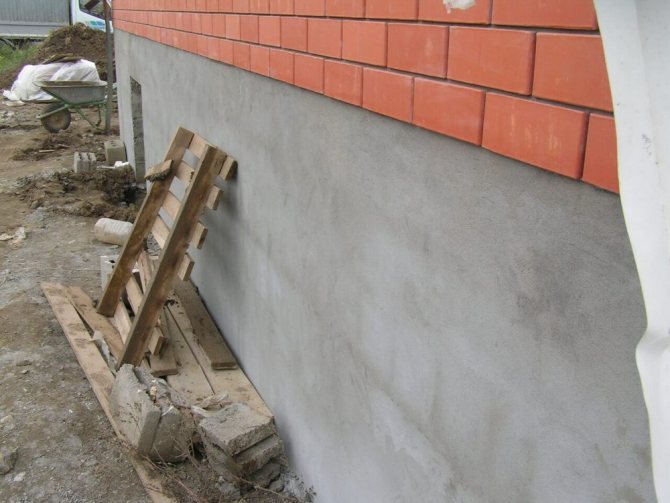
Plastering the foundation of a house is carried out for its high-quality protection from various negative environmental factors. With your own hands, this procedure takes quite a long time, but without any particular difficulties.
- 2 Mortar for plaster - do it yourself
- 3 Preparing the base for processing is an important step
- 4 Independent plastering of the foundation - stages of work
- 5 Application of a decorative layer - features of the operation
How to create a relief on the plaster of a plinth under a stone without tools with your own hands.
Decorating concrete “to look like stone” can be done using special devices (impressions, manually, homemade tools.
First, ordinary cement-sand plaster (spray, primer) is applied. Then, without waiting for it to dry and set, they begin to imitate masonry. The thicker the plaster, the more voluminous the relief will be.
The prepared plaster is leveled so that it does not have small dents or roughness. But the general plane can be left uneven so that the wall has “bumps” and “hollows”.
For a symbolic relief design, a plaster thickness of 1 cm is sufficient. For volumetric, believable “masonry”, it is necessary to apply at least 2.5-3 cm of solution.
Work by hand.
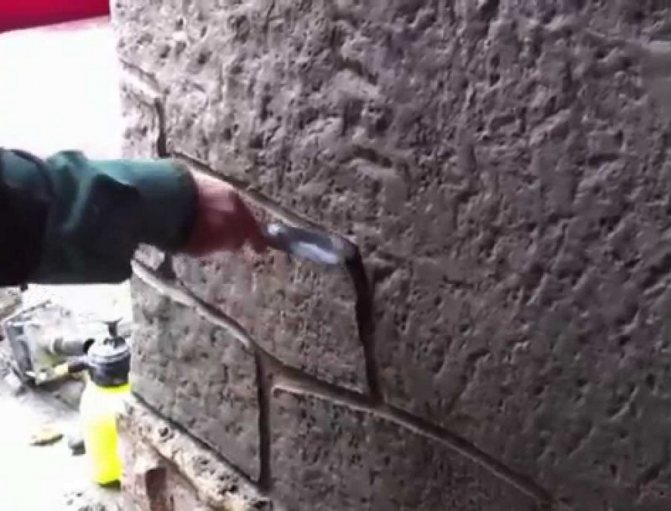
A drawing of the future masonry is applied to the finished fresh plaster with a thin sharp object (a piece of wire, an awl, a nail).
Then the given line deepens to the entire (or almost the entire) depth of the plaster layer. A spatula, a corner of a trowel, or a piece of tin are used. An object is selected experimentally that leaves the furrow that is most characteristic of the chosen technique. When the new basement plaster dries (almost completely dry), it is cleaned of small pellets of mortar, tiny fragments that have come off but have not fallen off. The edges of the convexities are smoothed with a wet painting glove.
Application of molds (patterns).
The process can be accelerated and simplified by using patterns.
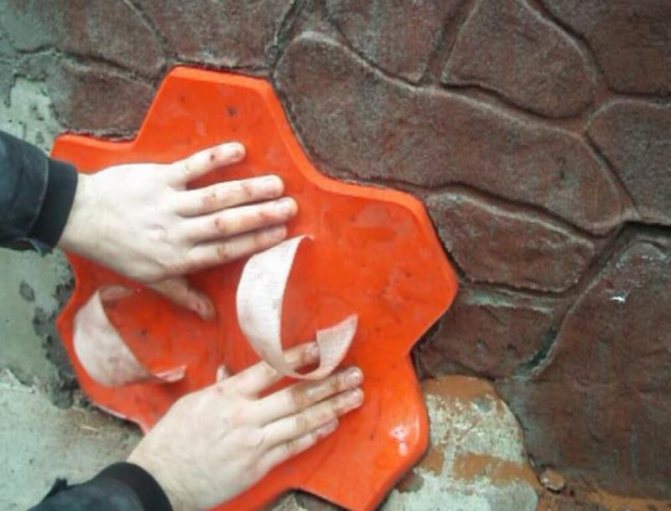
To do this, a form heavily moistened with water is applied to the working surface of the base, pressing it into the solution. To make the impression as clear as possible, the form is recessed as much as possible by tapping it with the edge of the palm.
One pattern can have 2 patterns depending on the angle of its rotation.
“Masonry” made using several forms of the same type, having different patterns, looks more natural.
How to paint the plaster of a plinth finished to look like stone.
Based on color, the finish of the plinth can be divided into:
- Plain bases. Unpainted (having the original color of the plaster) or painted in one tone.
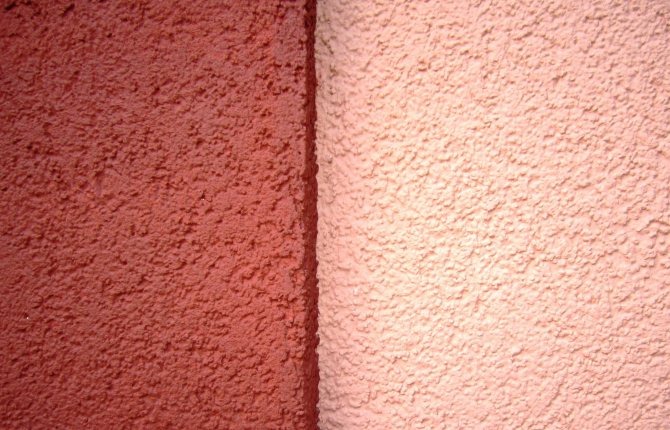
- Two-color plinths are painted, and then a different color is given to the seams of their masonry.
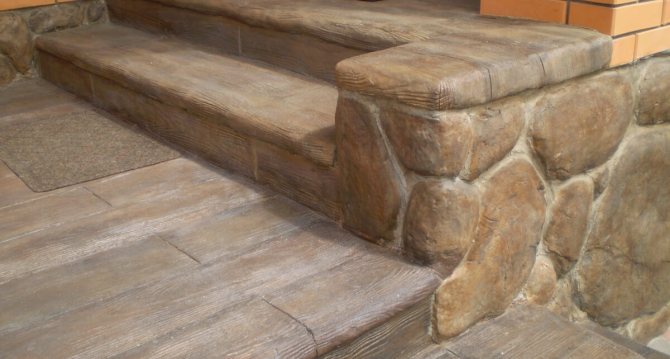
- Plausible stonework. They have many shades and tones. This imitation is the most complex and time-consuming, but more effective than others.
Painting methods are simple and applicable to builders of any level. It is only important to remember that it is better not to “combine” some colors and their shades on one building, within the overall design concept. The shade of the foundation should be a tone or two different from the walls. In terms of color, the base can “echo” the roof and small elements (shutters, windows, doors, corners of the building).
Combination of shades of the “stone” plinth with the color of the walls.
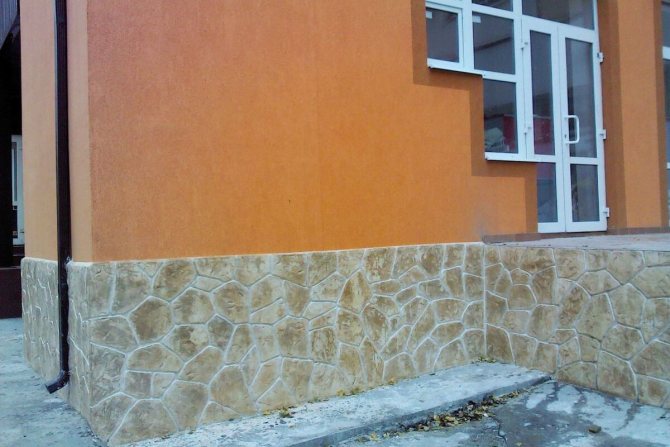
The plaster of the base of the house is painted in a tone that matches the color of the walls:
- Light blue walls. The most “pleasant” combination is with a stone of a grayish-blue, chocolate-brown tone.
Orange, red and greenish stones are not suitable for such walls.
- Turquoise. Against such a background, you can harmoniously place dark, warm bluish stones. Red and orange will look contradictory and tasteless.
- Light green – grayish-green and cold green (close to “green”). An unsuccessful combination is warm, bright colors (orange, red) and related ones (blue).
- Yellow. For warm shades - brown pebbles, for cool shades (lemon) - dark green warm (chrome).
- Beige. Brown chocolate. But not green, blue.
- White. Achromatic tones (white, gray) can be combined with any color. For example, a dark gray stone “fits” harmoniously into any color scheme.
You can't combine blue with red. These are opposite colors that are not in harmony with each other (the exception is pastel shades). Red and green don't go well together either.
The main rule is to combine related shades of different color saturation and warmth: lemon - dark green, pink - cherry, yellow - cold brown, blue - so-called blue.
Stages of applying the plaster mixture to the surface of the plinth
We will outline the entire process of plastering the base step by step. The first stage of preparation should be a draft of future work. They preliminarily estimate the scale of the work, how much time it will take, the required labor resources, tools, and, of course, the established budget with a reserve of 20% for unforeseen expenses.
There are several stages of work
As practice shows, it is never possible to avoid surprises and surprises, and the strategic reserve is very helpful in these cases.
Surface preparation
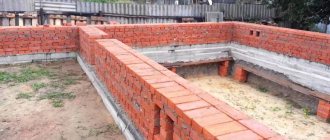
The surface of the base must be carefully sanded manually or using a grinding machine. Carefully work out all fragile and weak areas, getting to a solid base. If plaster is applied to an old brick base of a house with remnants of the coating, careful preparation is indispensable. It is very important to go through all the seams, repair the cracks, and, if necessary, carry out restoration work, replacing old plastered bricks with new ones. In the concrete base, all cracks and cracks must be carefully sealed with repair compound and wait until the putty gains strength.
It is recommended to apply notches on the surface of the base using a hatchet, but only after the primer and putty layers have hardened. Grooves on the surface will increase the area of adhesion of such a material to the base, and adhesion will be excellent.
Some craftsmen neglect the priming stage, but this is completely unacceptable. It is best to use a deep penetration primer. This will further strengthen the base and walls, and also ensure reliable adhesion of the plaster. There are a number of primers on the market with hydrophobic properties, and the use of such a material will add moisture resistance to the entire foundation. You can also prime the base by applying polymer base mixtures. Alkyd polyurethane and epoxy primers, as well as materials based on acrylic resin, show improved performance compared to traditional compounds.
It is important to pay special attention to strengthening the foundation.
Plastering the surface
To apply plaster, you will need to install beacons over the entire surface of the base in increments that match the size of the rule. For ease of work, it is recommended to use a painting mesh as reinforcement for the plaster layer, and attach a special corner profile to the corners.
Next, the plaster mixture is prepared step by step, the layer is applied to the wall initially in large pieces and gradually distributed. Then the second and third are applied until a smooth finished surface is formed, oriented at the level of the beacons. Plastering the plinth on a mesh is the simplest and most reliable coating option for decorative finishing of the plinth and other external elements of the building.
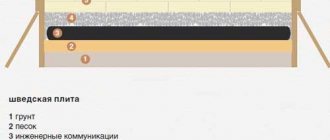
In cases where it is necessary to insulate the surface of the base, tile or mineral wool insulating materials are used. And first of all, they install insulation on the primed wall, apply special glue for thermal insulation panels, and attach a metal profile to the lower level of the plaster to support the structure.
Thermal insulation is glued to the surface of the base, but sometimes, as fasteners, it is convenient to use dowel nails with wide heads. An adhesive is applied to the insulating layer to prime the surface and ensure the necessary adhesion to the plaster, and then the plaster mixture itself, 25-30 cm thick, is applied. A detailed description of the process of working with thermal insulation and installation features can be found in our articles on the technology of ventilated or wet facades .
When the layer of plastered surface is leveled, the beacons can be removed. The lighthouse itself is removed from the layer of plaster that has not yet hardened, and the hole in the base of the house is filled with mortar and then leveled.
Don't forget to remove the beacons
Final stage
To avoid cracks and deformations, it is necessary to ensure uniform drying of the plaster. For the entire period of strengthening, you need to cover the base with film and periodically moisten the top layer. Moisture leaves the top layer faster than the inner layer, this provokes unevenness of the solidification process, and internal stresses inside the material are inevitable. Periodic light moisturizing will help avoid this danger.
Another issue to be resolved is how to make the connection. The main part of the house can be decorated using facade panels, facade glazing or a wooden curtain wall. The simplest way to ensure decorative unity of the solution is a strip of bent galvanized or stainless metal.
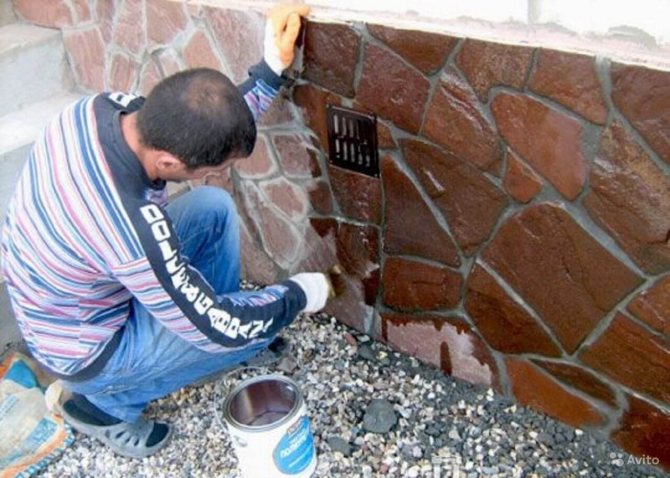
Methods of painting “stone”.
Basement plaster needs protection and decoration.
There are several standard approaches to tinting plasters: the use of colored solutions, their additional tinting on the wall, “sprinkling” fresh plasters with pigment, painting.
Tinting plaster mortar.
Ready-made finishing mixtures can be tinted.
When made independently, pigment can be added to them. For this, both acrylic coloring liquids and dry powders are used. A variety of shades and believability can be achieved by mixing several colors:
- The concrete solution in the trough is divided into 3-4 sections.
- Each is carefully mixed with a pigment of a specific color (such as light grey, yellowish, pale green and brown).
- The finished parts are slightly mixed so that they do not merge into one tone, but only lose their boundaries.
When using such concrete to decorate plaster “like stone”, an element of randomness of tone arises. This gives the finish exclusivity.
The easiest way of painting is concrete tinting. But it can also be supplemented by subsequent painting of individual elements.
Tinting the decorative plaster of the base and walls of the house with paints.
Produced on both fresh and dried plaster. Even if the solution initially has a suitable shade, its color can be enriched with additional tones.
They do this in the following ways:
- “ Pigmentation” of wet plaster. The freshly applied solution is “painted” with a brush, which is “dipped” into the powder pigment. Then the moistened mold is “embedded” in the plaster.
This is the most economical coloring - pigment consumption is minimal.
After drying, the plaster is coated with acrylic varnish.
- Painting dried concrete. Appropriate paints for exterior concrete work are used to coat the plaster.
- First, the general tone is applied.
- Then darker (for example, for golden - brown), but not over the entire area, but only in the deepest depressions and seams.
- When the paint dries, the most convex parts of the “stones” are covered with light paint (for golden ones - whitish-yellow).
The edges of the color inserts should be blurred with a piece of sponge or foam rubber.
To apply the last (light) tone, use a short-haired roller.
Any paint (including pigments) requires protection with varnish. And the semi-matte shine will only add naturalness to the relief.
Selection of plaster
The functional significance of finishing the base is enormous; it creates additional protection from moisture, improves thermal insulation, and gives the house a more aesthetic appearance. The selected material must meet high requirements: be moisture resistant, withstand temperature changes, and soil freezing.
Popular options for basement finishing: concrete, plaster, facing with artificial or natural stone, tiles, siding. Among them, plastering is the most common.
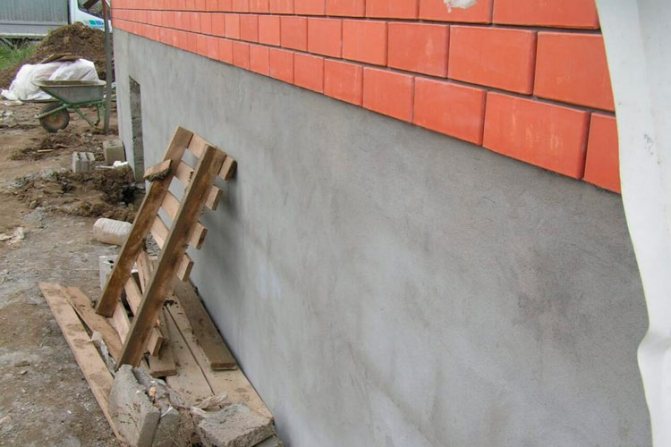
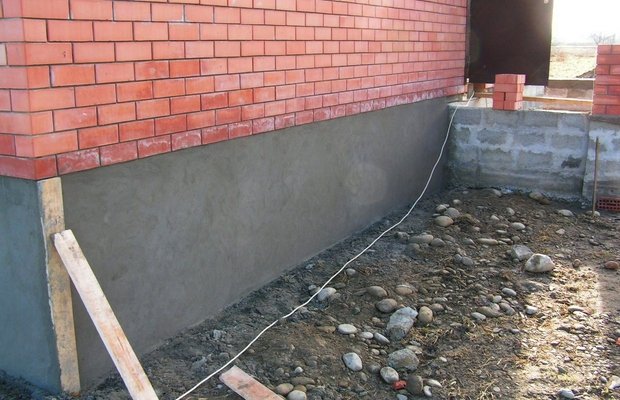
The base is leveled with cement mortar and is ready for decoration, for example, with clinker tiles.
Cement-sand and cement-lime plasters are best suited for exterior work. They are durable and moisture does not harm them. In addition, they are rarely affected by mold.
Expert opinion
Sergei Shablovsky
Plasterer
Cement for plaster is taken of high grade M400 or M500, this should be taken into account when mixing the components yourself; sand is sifted with medium grain size. Approximate proportion 1:(3–4). The main thing is that the material is homogeneous and fits well on the wall. For ease of work, mixtures with the addition of lime are often used in the solution.
If plaster is applied over insulation boards, then a cement-based adhesive composition must initially be applied to their surface. Thickness is approximately 3-4 mm. A fiberglass or metal mesh is attached to it, and then a leveling and decorative layer of plaster is applied. Read more about this.
Preparing the base for plastering.
Finishing the base with decorative plaster is carried out in the same way as regular plastering of walls and requires surface preparation.
New plinth
A fresh basement wall does not require special preparation. Before applying the coating, just moisten it with water and wait until it drains and is partially absorbed.
Preparing the old base for repairs.
The old basement wall requires more attention:
- Removing old coatings. Anything that does not hold well, wobbles or moves when pressed (old concrete coverings) must be removed and cleaned.
Concrete cannot be thrown onto unstable surfaces (anything that “shakes”) and onto weaker layers (chalk whitewash, clay and lime plasters). Its connection with such a surface will not be reliable.
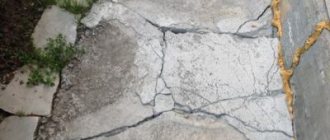
- Sealing cracks, lunges. Deep depressions in the wall must be repaired:
If possible, cracks and crevices are widened, a reinforcing mesh is strengthened here and “clogged” with mortar, working with energetic “slaps”.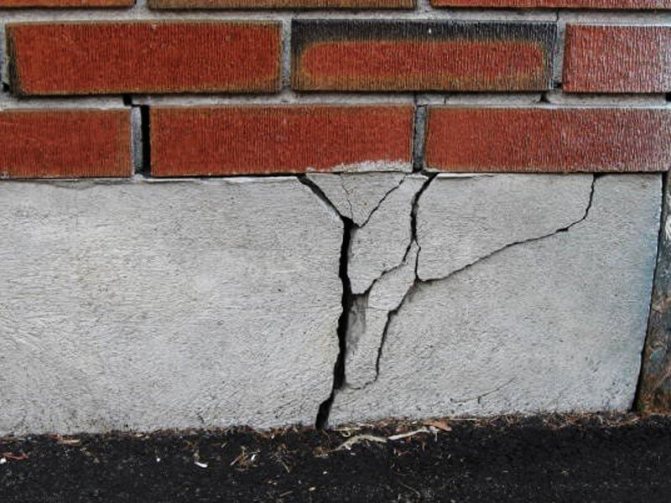
Crevices.- Notches. Deep (more than 1-2cm) depressions in the wall are usually sealed and leveled. Plastering a plinth under a stone in a certain sense “needs” some curvature of the walls, so it looks more believable.
- Loss of masonry. Drops of stone or brick must be replenished. To do this, throw a solution into the opening and place a pebble of suitable size.
- Primer. Before applying plaster, the wall should be covered with primer. This will increase adhesion and fill the pores so that they do not “pull” water out of the solution, weakening it, and the base “stone” plaster will not fall off over time.
The prepared surface must be hard, stable and clean.
Independent plastering of the foundation - stages of work
Most often, the event we are interested in is carried out in two layers. First, a primer is applied, and then a decorative one. Do the work yourself like this:
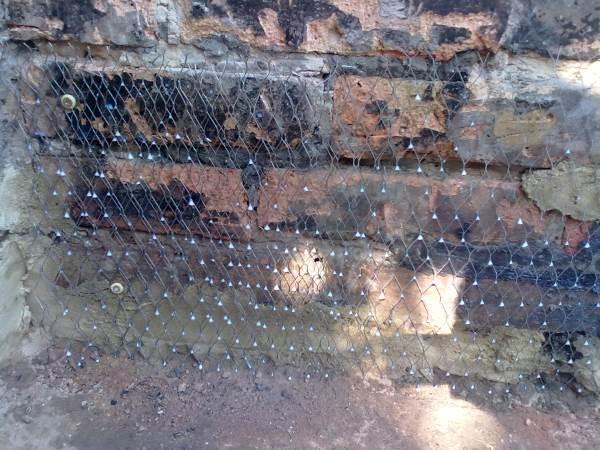
- Attach the Chainlink mesh with staples or dowels to the base of the house being processed.
- At the corners of the masonry and every 150–200 cm along the perimeter of the structure, place metal profiles - guide beacons that simplify the plastering process. They should be set at the water level. Stretch a nylon thread between the mounted beacons. It will show the level to which you will need to add the solution.
- Wait for the reference profiles to dry and spray the masonry with water.
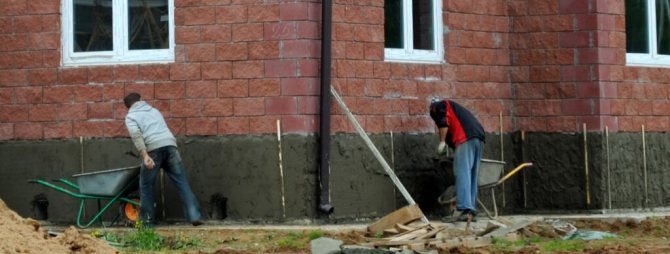
- Using a trowel or ladle, spread a 5–9 mm layer of plaster onto the foundation. This procedure is called grouting. Then treat the applied layer with primer and wait for it to dry slightly. Then apply the cement mortar again.
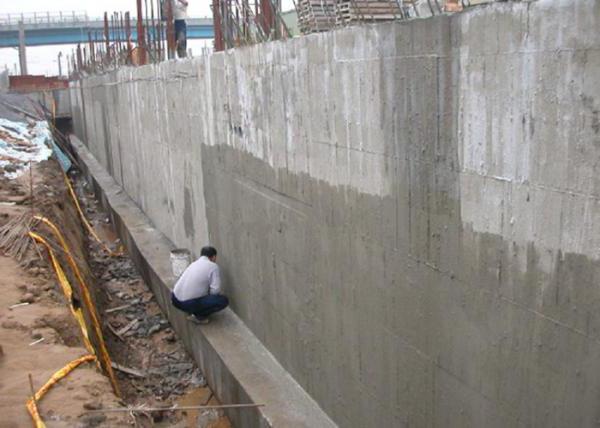
Applying a layer of plaster to the foundation
The first plaster layer is ready. It is advisable to draw wavy lines on it using a scraper. They will provide better adhesion of the preliminary layer to the decorative one. The distance between individual lines in the form of waves is taken to be about 0.35 m.
You need to wait 5-7 days. During this time, the primer layer will harden. Note! Every day you need to spray the plaster with plain water (a couple of times a day). During the daytime, when there is high solar activity, the foundation should be covered with parchment sheets, hard matting or burlap. Plaster can crack if not protected from the sun's rays.
Composition of the solution for decorative plaster of the base.
Self-cooking.
The standard plaster solution is cement and sand in a ratio equal to 1/100th grade of cement (for m500 - 1:5). Plastering the plinth to look like stone is carried out using standard technology adopted for ordinary plaster coatings.
Ready-made plasters.
The use of ready-made mixtures increases the cost of finishing, but significantly simplifies it.
Many ready-made compounds are produced. The most popular plaster for plinths is Knauf, although many domestic mixtures are of decent quality.
Requirements for basement plaster
In order for the protective coating to perform its functions, it is necessary to properly prepare and apply the plaster mixture. In addition, basement plaster must have certain qualities:
- High resistance to moisture. Any water, atmospheric or melted, tends to accumulate near the bottom of the house. In addition, it contains many aggressive chemical compounds. Consequently, water constantly has a negative impact on the foundation of the structure. The plastered surface must resist this factor and prevent moisture from penetrating into the base.
- Increased strength. In addition to water, the base can be subject to mechanical stress. Basement plaster should reliably protect the surface from this negative factor.
- Frost resistance. The plaster mixture must retain its qualities even under conditions of regular thawing and freezing.
- Resistant to ultraviolet rays. In summer, all surfaces are exposed to harmful sunlight. Plaster for the plinth must resist ultraviolet radiation without reducing its strength characteristics.
- Resistance to microorganisms. Fungi, bacteria, insects and plants can cause biological corrosion. Basement plaster should be a reliable obstacle to this defeat.
How to save money when finishing a basement with plaster.
Involvement of construction crews.
Ordering work from specialists is the most convenient option. But professionals will charge a higher price for the work, which will significantly increase the overall cost of finishing the basement. At the same time, plasterers take into account not only the fee per square meter. m. walls, but also the number of slopes, features of the workplace and plastering of right angles.
How to paint
In fact, difficulties begin precisely at this stage - not everyone knows what and how to paint, as well as what colors to use. The best color choice is one that does not contrast with the walls of the house, however, many people choose darker colors because the walls of the house are too light. In such a situation this is acceptable. The painting itself may be different:
- One color – simple and not particularly beautiful. There will be no realism here, unless you want to create the appearance of whitewashed brickwork.
- In two colors - here the seam differs from the tone of the stone. The situation with realism is no better.
- Multicolor is the best option. However, you will need to experiment a little with coloring. The fact is that nature is inventive - you won’t find two identical blocks, including in color. They are not uniformly colored and it is necessary to select color combinations so that everything looks beautiful and realistic.
It is worth taking care of one more detail: when finishing the base with stone-like plaster is almost finished and the paint on the blocks has already dried, it is advisable to somehow protect the coating. Everything can be varnished or impregnated with penetrating primers.
Advantages and disadvantages of plaster
When choosing which type of material to use, you can choose plaster, but you need to study its advantages and, importantly, disadvantages.
The advantages will be the following parameters:
- Effective protection and reliability of the cladding will preserve the surface for many years, without requiring repair and restoration work;
- Easy to apply and does not require the use of special tools or special skills;
- Affordable pricing compared to other finishes;
- Ease of repair in case of damage to part of the facade of the house.
You should know the disadvantages of plaster in order to have an idea of the lifespan of both the base and the entire house.
The main disadvantages are:
- Significantly lower durability of the finish than stone or tile cladding;
- Relatively low level of protection;
- Short service life of the finishing layer;
- Low thermal insulation.
When finishing work, you cannot use the wet method if it is raining or the hot sun is shining with direct rays on the finishing area. It is better to refrain from this kind of work even in winter during frosts.
Preparing the base
Before applying the plaster layer, it is necessary to prepare the surface of the foundation wall. To do this, use a thin spatula or trowel to carefully clean the masonry joints, after which, using a stiff brush, remove dust and remaining crumbs. On the concrete surface, the cracks are slightly expanded, removing the flaking areas. After this, the base is treated with a deep penetration primer. If the area is too large, only the defective parts and seams are coated with liquid.
Extra protrusions should be taken care of in advance. They are cleaned off first.
Notches are made on concrete surfaces for better adhesion to the plaster layer. For this work, you can use a chisel or other suitable metal tool. Next, proceed directly to plastering.
Quality solution
For those who prepare the solution themselves, you should adhere to the technology for creating the mixture. To do this, the starting materials are initially sifted through a sieve. This will help achieve a uniform consistency.
Next, you should give the solution the necessary fat content. The mixture can be high fat, normal fat or lean. The fatty solution contains a large amount of astringent component. It will quickly spread and settle. A normal level of fat content should be ensured by the preparation of the cement mortar. The proportions of the components in this case are observed in the most harmonious manner. Lean mortars have a high aggregate content. They are tough and will crack when dry.
The consistency of the solution should be convenient for work, and all its components must be thoroughly mixed until smooth.
Having familiarized yourself with the main types of cement-based mixtures, you can choose the right type for a certain type of work. For each type of base, the appropriate plastering mixture should be used. Accurate implementation of the technology will help prepare the correct cement mortar. The proportions of its components, maintained in accordance with the norms and requirements of construction work, will guarantee the durability and functionality of the material.
Polymer additives
In modern construction and repair work, cement mixtures prepared on the basis of polymer-enriched materials are used. They significantly increase the plasticity that cement mortar for plastering walls must have. The proportions of such additives are characterized by high accuracy, since they are calculated in laboratory conditions. These are ready-to-use mixtures.
Cement mortar enriched in this way has a number of advantages. Its consumption is much less, and the use of plaster mesh is not required at all. Increased elasticity will make the coating resistant to changes in temperature and humidity. Plastered surfaces will allow air to pass through, which will prevent the formation of fungi and microorganisms on the surface.
For the average consumer, the use of such mixtures is very convenient. After all, you just need to add water to the cement mortar. The proportions of the components have already been calculated by the technologists of the enterprise that produced such a product.
General information
Types of plaster
Plastering is a very popular type of finishing of the base, as it does not require large expenses and at the same time looks quite stylish and presentable. In addition, a huge selection of plaster allows you to decorate the base with original textures and patterns.
The following types of plaster can be used for finishing:
- Silicone is the most expensive option, but the cost is justified by the high quality of the finish and its versatility. This plaster protects the surface from any negative environmental influences without losing its attractive appearance over time. In addition, you can create any colors by combining compositions of different colors.
- Cement-sand is the most budget option. Its advantages include high strength. To make the composition moisture resistant, special additives are added to it. This plaster is sold in the form of dry mixtures.
- Acrylic - great for decorating a base. It contains various resins that act as a binder. In addition, the mixture contains special additives that allow the surface to “breathe” and also make the finish moisture-resistant.
Acrylic plaster
Advantages
Modern compositions have many positive properties, among which are the following:
- Resistant to large temperature changes.
- Vapor permeability. Due to the fact that the compositions are capable of letting steam out, the house, as mentioned above, can “breathe.”
- Moisture resistance. Finishing the base with plaster can protect the base from precipitation, which gradually destroys the structure.
- Good sound and heat insulation. Finishing is an additional obstacle to the penetration of cold and extraneous sounds into the house. As a result, a comfortable and healthy microclimate is created in the room.
- The solution is easy to apply, so you can do the plastering yourself.
- Large selection of colors and textures. This will allow you to create unusual coatings with a beautiful texture and suitable colors.
- Affordable price of compositions.
Silicone plaster