Quite often, developers choose a strip foundation as a reliable underground support for a house. Its easy-to-understand technology allows you to handle the work yourself, without involving professionals, but this requires a certain amount of knowledge and experience. It is required to competently understand not only the basic issues, but also to understand, for example, how to level the foundation after it has been poured. A flat surface is too important for the further construction of load-bearing walls, so this stage of construction should not be neglected.

Site cleaning
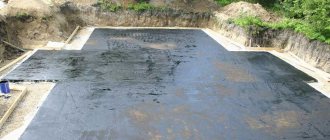
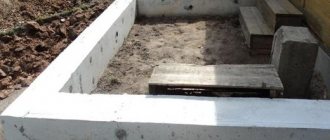
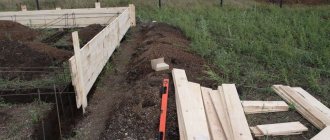
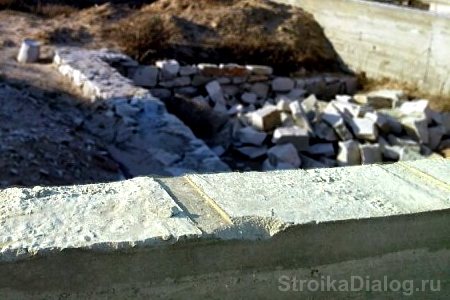
Casting off the foundation.
The first step is to carry out general cleaning of the area, that is, thoroughly clean the soil surface of various debris. Next, existing trees, shrubs and their root systems are removed. If there are long-lived trees on the site - old trees of large diameter - then it is better to place the foundation in another suitable place, since cutting down trees of this scale takes a lot of time and effort. The next action will be to remove the top fertile layer of soil. The thickness of the cut layer varies from 10 to 30 cm, this value depends on the soil on the site, or more precisely its type (clayey, peat, etc.). You will still need this layer of earth, so you shouldn’t get rid of it. During construction, it will be possible to fill the foundation, or rather the space inside it, with earth, or use it to renew the flattened soil surface around the house. To prevent the turf from interfering with construction work, it is laid in the corner of the site or immediately in the place where it is planned to establish a vegetable garden.
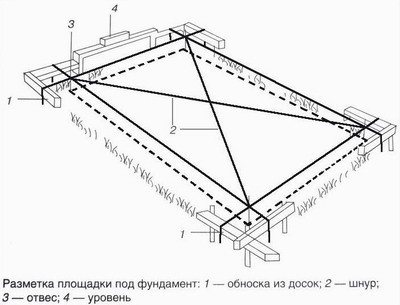
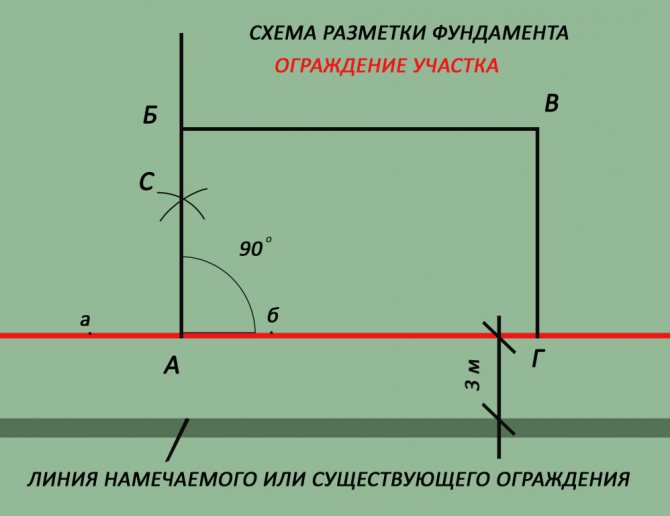
Site marking scheme.
And now more about several types of soil:
- for example, clay soil. The presence of such soil on the construction site implies the installation of a separate sand and gravel cushion;
- Loamy soil and sandy loam also require the arrangement of an additional layer (cushion). And if, after cutting the turf, you find sandy soil with medium or large grains (or small stones), then an additional sand layer will not be required. This type of soil is suitable for constructing a foundation without additional processing;
- The most difficult and financially expensive soil is peat or silty soil. Such a base is not suitable for constructing a foundation. It needs to be completely updated.
In this case, it is best to seek help from specialists. They have the capabilities to conduct a geological examination of the soil, and then decide what composition is needed to ensure that the foundation of your house is reliable and safe. Another important factor is the depth of soil freezing in the area. The depth of the foundation being built will depend on its value. The average value characteristic of a given area is taken as a basis.
Compatibility of foundations and soils
Which foundation to choose depends on the severity and design features of the structure, as well as on the geological data of the site:
- Weak and loose soils that are unable to bear the load can only be equipped with a pile foundation. In this case, piles are selected with a length that reaches the solid layer; “hanging” ones can be used, but in soil with the necessary friction force.
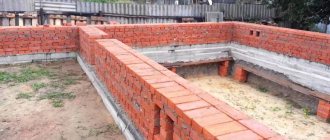
- On strong sandy and rocky soils with low groundwater levels, it is optimal to install a strip foundation of a prefabricated or monolithic type above the freezing depth; for low groundwater levels, below the freezing mark.
- On a solid foundation, posts can be installed for a light structure.
- On floating clay soils, in swampy areas with soils subject to severe frost heaving, the only solution is a slab.
Foundation soils are taken into account when drawing up a project; they determine the possibility of constructing a particular type of foundation. In some cases, several different structures can be installed under one house, if geology so requires. For example, tape and piles are often combined.
In the case of calculations, several options for fundamental decisions are usually made, and the most rational one is selected. So, for example, both piles and a strip structure can be installed under one cottage, then the more suitable one is adopted. In this question, they rely on other factors: is a basement needed, is there a budget for capital leveling of the horizon of the construction site, and how much is generally expected to be spent.
Tools and materials
Foundation layout diagram.
When carrying out work related to the arrangement of the foundation, a wide variety of tools and materials are used:
- shovel;
- rake;
- tractor (if any);
- chainsaw;
- level;
- level;
- construction wheelbarrow;
- sledgehammer;
- lacing;
- cultivator;
- and others that may be required during work (for example, the same tape measure, gas drill or hammer).
Alignment methods
So, let's return to the preparatory work preceding the construction of the foundation. After the future construction site is cleared, it is necessary to level it. To do this, you need to tear down the existing hills, and fill the holes with earth and compact them well. This stage of work allows you to do without the use of a level; it is enough to use a building level with a flat bar screwed to it, the length of which can be from 2 to 3 m.
Level the terrain taking into account the general slope.
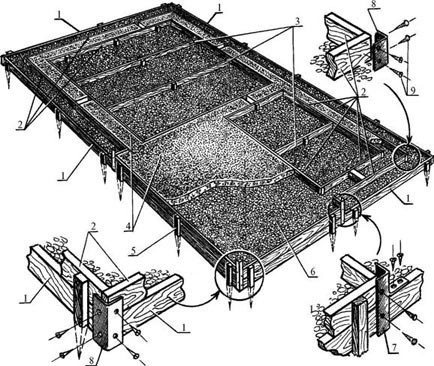
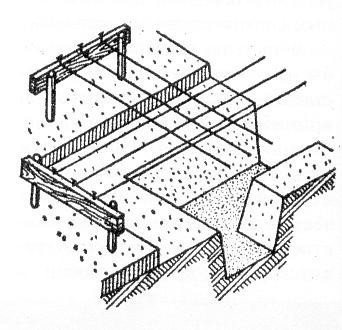
Foundation: 1 – formwork for the blind area; 2 – foundation formwork; 3 – spacer boards; 4 – concrete; 5 – formwork racks; 6 – gravel-sand backfill; 7 – special connecting element; 8 – connecting corner; 9 – screws.
Leveling is carried out by moving the soil available on the site, or by filling holes and uneven areas using imported soil. In order to level the construction site, leveling soils such as sand, crushed stone, expanded clay and other options are used. As has already become clear, leveling the site is a necessary procedure; it will greatly facilitate the subsequent marking of the foundation. For leveling, the most appropriate option is to use a tractor with a milling cutter, rake and plow. The use of equipment such as a tractor is only possible on a completely empty area in the absence of trees and structures. If it is not possible to use a tractor, then you can use a motor cultivator. And if you have a great love for physical activity, leveling can be done with your hands and a shovel. Of course, there is no perfectly flat surface of the land. This means that any relief requires a procedure such as leveling.
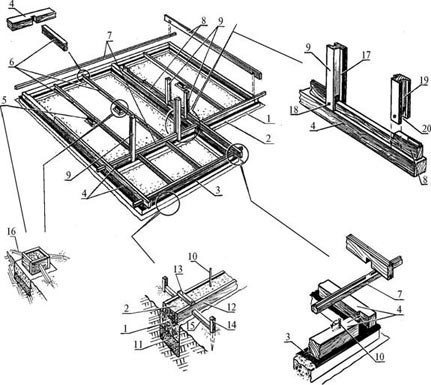
Construction of the foundation and lower trim: 1 – strip foundation; 2 – base; 3 – roofing felt; 4 – lower trim; 5 – support columns; 6 – logs; 7 – longitudinal elements of the first crown; 8 – transverse elements of the first crown; 9 – door frame pillars; 10 – anchor; 11 – sand cushion; 12 – formwork boards; 13 – overlay; 14 – support stake; 15 – spacer; 16 – strut; 17 – vestibule; 18 – dowel; 19 – groove for fastening the partition; 20 – through groove.
One of the alignment methods involves using a level. A level is a special geodetic instrument that is used to geometrically level the soil surface. Simply put, its use helps calculate the difference in height between points on a surface. Before you start leveling a site with a rather complex relief surface, you need to decide whether it is worth it or not, since in order to save time and money needed for excavation work, you can simply change the layout of the site. On the existing hill it is possible to build an alpine slide, and in a natural depression to make a swimming pool, naturally, placing the house in another place on the site (more level). You can find other options that eliminate labor-intensive excavation work for leveling, but in the absence of a level area for the location of the house, leveling is the only way out. There are several main types of leveling. These include:
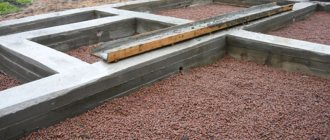
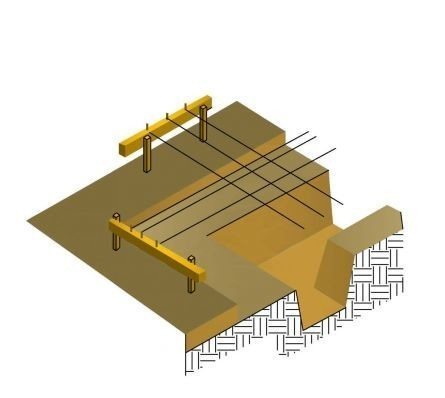
Foundation diagram.
- geometric leveling. This method is one of the simplest and most accurate, but it is not suitable when there are sharp changes in terrain on the site;
- trigonometric leveling. The convenience of this method lies in the ability to determine any elevation between points from one station if the points have mutual visibility. The disadvantage of this method is the inaccurate value of the influence of vertical angles and the deviation of the plumb line;
- hydrostatic leveling. This method is quite accurate and simple; it can be used to determine the existing excess between points even in the absence of mutual visibility.
Leveling the foundation depending on the building
Easy construction
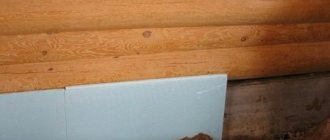
For example, for a light structure of small size, the foundation can be leveled by installing a future terrace frame with a lining of various blocks, this is done in order to bring the frame to the required horizontal position. However, this is not entirely correct, since in this case there will be no support along the plane.
You can also plaster more cement and sand mixture into the lining for the required height and then place the plinth on it. Another option is to compensate for the height using several expanded clay concrete blocks - it is recommended to use a piece of mesh to seal the seams.
Heavy construction
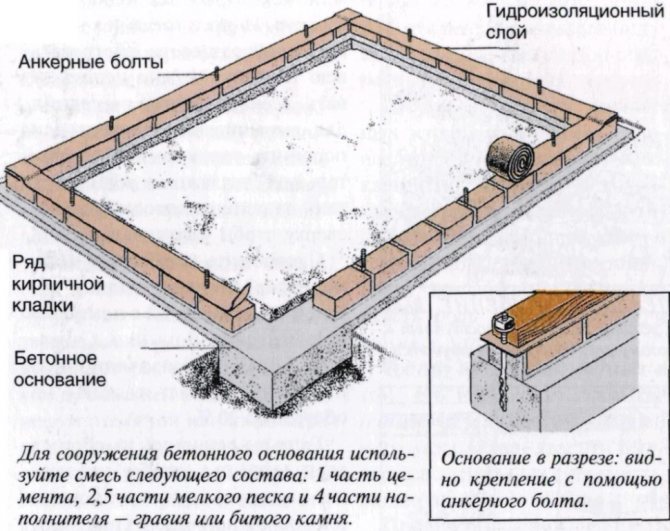
If the building is made of stone, the surface can be leveled using a masonry mixture applied to the waterproofing layer. If you get quite large unevenness (about 10 cm), most likely, you will need to reinstall the formwork, as well as add new cement mortar in order to try to bring the foundation “to zero” again.
These procedures are carried out to ensure that the foundation of the building provides a perfectly flat base for the construction of the planned structure, because a flat surface is the key to high-quality construction.
Territory marking
Marking the axes of the house using stakes and wire.
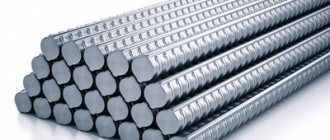
Before equipping the foundation, it is necessary to mark it in accordance with the dimensions indicated in the plan (drawing). To mark, you can use small reinforcement parts, the cross-section of which corresponds to 10 mm, and fishing line. Using fishing line for marking is the most acceptable option, since it does not stretch or sag, and its characteristics are not affected by temperature conditions. Most often, one of two existing markup options is used. This is a marking carried out according to the dimensions of the foundation walls and markings with an indentation (5 cm) on both sides of the foundation. The latter option is more convenient in terms of performing earthworks: it allows you not to affect the markings. First, you need to mark the perimeter, after which the prepared reinforcement is driven into the ground and the corners of the planned foundation are checked. In order to align the corners, it is necessary to measure the diagonals of the future foundation. If their sizes match, the angles correspond to the desired value of 90°. If the dimensions of the diagonals do not match, it is necessary to make adjustments to the markings. After which the fishing line is stretched along the outside of the marking. Now you can outline the inner boundary of the foundation. To do this, we retreat the required distance from the external border and mark the internal borders. In the same way we mark the internal partitions. After the foundation is marked and its depth is determined, you can begin to sample the soil and its further placement. Depending on what foundation you have chosen, or rather what type of foundation, you may need a tool such as a gas drill or garden auger (if you are installing a columnar foundation), a shovel or an excavator (if your choice is a strip or slab foundation). Helpful tip: Do not place excess soil in the interior of the structure. This is due to the difficulty of removing it at a later stage of construction work. Inside the future foundation, it is necessary to remove the entire top soil layer along with the grass and other vegetation on it.
Accuracy "from" and "to"
There are 4 types of foundations:
- tape;
- slab;
- pile;
- columnar.
In case of checking the accuracy of surfaces, structures can be combined in pairs: tape + slab, piles + pillars.
For a strip foundation and a monolithic slab, attention is paid to all four surfaces of the structure:
- The pillow is the lower horizon. This is a very important layer on which the uniformity of subsidence of the concrete structure and, accordingly, its geometry depend. It is the lining layer of sand and crushed stone that accepts and redistributes the load from both the weight of the concrete monolith and the soil. The backfill of a pit or trench must be made as level as possible so that the bottom of the foundation pad lies horizontally;
- The side walls for the tape and slab must also be smooth: they must be waterproofed with rolled materials that cannot fit tightly to the defective surface. In addition, the foundation wall protruding above ground level should look neat.
- The top of the foundation is subject to mandatory horizon control, since walls made of bricks, blocks or panels are installed on it. In order for them to be even, they require a perfectly horizontal base.
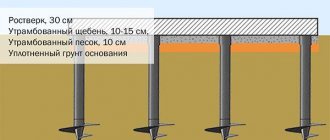
For pile and columnar foundations, it is important to observe the upper part of the structure, that is, the heads of the pillars or piles on which the grillage is mounted.
Trench for the foundation
There are two options to dig a trench under the foundation: use a manual method and a shovel, or hire special equipment - a hydraulic excavator. The choice depends on your financial capabilities and the characteristics of the foundation.
- Before you dig a trench, mark the trench boundary lines on the soil surface. It is also necessary to provide a place for placing soil;
- When digging a trench in the immediate vicinity of a house, pay attention to how these actions may affect the structural rigidity of the house. Make sure that when constructing a trench you will not damage the foundation of an existing building on the site;
- To transport soil from the trench, you can use a construction wheelbarrow - this is the most convenient option and does not require much effort.
The bottom of the trench, which is intended for constructing a foundation, must be carefully leveled. To do this, you can use a building level (laser). Now regarding the installation of a pillow under the foundation. It performs the function of reducing the degree of load on the foundation. Its upper part is leveled in the same way as the bottom of the trench - using a level.
In order to speed up the process of arranging the pillow, it is necessary to stretch the fishing line, indicating its depth, and then begin laying it. When pouring sand into a trench, ensure that the filling is uniform, after which it is necessary to carry out the compaction process. When performing actions aimed at compacting the sand layer, use water, since wet sand practically does not require outside intervention, but compacts itself.
How to level an already finished foundation
- Using a hose or hydraulic level, it is necessary to check the height of all corners of the foundation, then one of them should be taken as the starting one. All corners have digital markings that reflect the position of the selected corner relative to the original (for example, “+30” or “-50” would mean that the angle is 30 mm higher or 50 mm lower than the original corner).
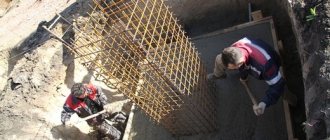
- Formwork is installed on top of the finished foundation, which consists of two boards, the lower edges of which should cover the foundation on both sides, while the upper edges will be connected through spacers, their length equal to the thickness of the structure itself.
- In all corners, it is necessary to shoot zero points on the inside of the formwork, to which the foundation should be poured, focusing on the actual position of the corners, which was correctly determined in the previous step. When performing this type of work, it is important that the minimum thickness of the foundation section should be at least 30-40 mm. A concrete layer that is too thin will not be durable. Cuts are made in the formwork so that the lower edge is horizontally at the level of the zero marks (similar to step 3 in the previous version).
- Now you need to install reinforcement in the formwork. To do this, you should properly prepare a cement-sand mortar in a ratio of 4:1 or 3:1. The surface of the foundation is wetted with water, then this mixture is placed in the formwork. Using a cord stretched through the cuts, the compliance of the surface with the zero mark is checked.